- Home
- About Us
- Join/Renew
- Member Benefits
- Member Pages
- Log In
- Help
- Museum Store
I have a broken door spring on my 1236 driver front door. It is my assumption (since I have never replaced a spring on this model before) that I must remove the door panel to gain access to the lock assembly. The problem I am having is that it appears that I must remove the garnish moulding before I can remove the door panel, there lies the problem. I would think that could be done by removing the screws in the top of the garnish moulding then pull that part of the frame forward, thereby releasing the lower part by pulling it upward. It will not budge!!! Is it just glued to the weather-stripping by age or am I missing something. Any help will be greatly appreciated, thanks, Allen Strong 217 778 1425
Hi Allen, with the screw removed from the garnish moulding, you have to slide it down to clear the upper corners of the window track, or maybe my memory is off, and you need to pull the bottom part of the moulding away from the door, then slide it down to clear the upper corners of the window track.
I’m not back home from this week’s events yet, so I’ll look at a door and moulding when I get home tomorrow. I’ll take a photo or two that might help.
Be very careful with removing the spring clips that hold the door panel to the steel-framed door. The cardboard, or masonite board that the fabric is attached to, is very fragile from age.
Greg Long
There are two additional tabs under the window channel held in place by 1/2″beveled head wood screws. Probe thru the felt to locate them. There are two tabs secured with screws on each side.”
Allen , I found the same on my ’34. I found two screws on each side through the window channels about 5 inches apart, through two tabs of the garnish molding, into the wood frame. You will have to dig around in the felt to find the location of the screws. once the screws are removed, the garnish molding can be pulled out at the top and removed.
Hi Allen, sorry it has taken me so long to post a photo or two.
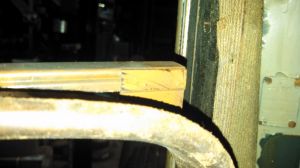
The bottom of the garnish moulding must be pulled away from the upholstery, and then slid down to clear the two square corners
with the upper window track and wind-seal in it.
The two screws in each vertical window track have to be removed, then grab the track with a pair of pliers, don’t crush it, but gently pull it away from the door a tiny bit.. just to ‘break’ the adhesion of paint and whatever that might stick to the screw/mounting tab under the track.
There are four tabs on the garnish moulding, once the four tabs have had the screws removed, and the track wiggled to make sure it is not stuck to the tabs, then use a putty knife to slide between the window track and the garnish moulding to gently pry the moulding away from the window track.
The garnish moulding has to be pulled out at the bottom far enough to let it be pulled down about 2 inches so the hidden upper corners will be clear of the slot in the upper door frame..
Hope this helps,
Greg Long

Many thanks to all for your great help, the operation was a success and the door is now closing and staying closed!! A little experience goes a long way. This is a great club, such helping membership with a focus on keeping these wonderful cars on the road, by the way, a terrific time in St. Louis!
