- Home
- About Us
- Join/Renew
- Member Benefits
- Member Pages
- Log In
- Help
- Museum Store
I am embarking on the next big component rebuild, the transmission.
I have a couple of questions. I am starting with the shift tower.
1.There appears to be a plate that locks out first and reverse when you are in 2nd(intermediate) and 3rd (high). Is it true that there is a lockout and how noticeable is it when you are driving?
2. Does anyone have a shift tower off their car. I would like to see a photo of the underside pre disassembly. I have lost my notes in the 5 years since I took it apart and moved twice.
I will post my progress, similar to the worm drive project.
It’s been ten years since I took one apart. The entire transmission is very basic, and not difficult to assemble but after 5 years, without photos, it may take a few attempts to get it back together. The shafts have to be installed in a certain order, and requires a little bit of fussing around. All the bearings were available as of five years ago. Most importantly is to be sure nothing was lost in the way of shims, if there were any in it……..best of luck. Ed
Looking forward to your photos……
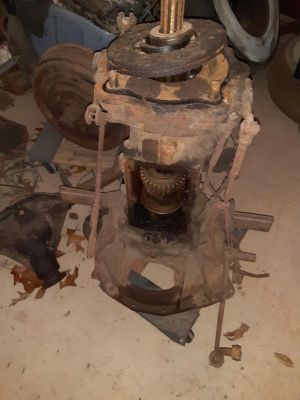
Ok, here is the start. I had taken the rear cover off to check the brake clutch and the shift tower to inspect the internals.
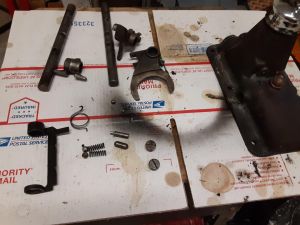
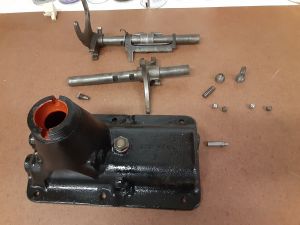
Here are the components of the cover laid out. The detent balls are 3/8″ ball bearings which just happen to be the size of my slingshot ammo.”
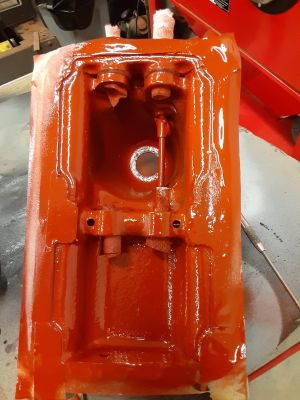
Here is the inside of the tower, the highest part is towards the engine. If you look at the upper right corner you can see a rod. This is a guide for the low and reverse fork.
It appears to have had some red paint internally so I sprayed it with Glyptol which is there to seal any sand from the casting
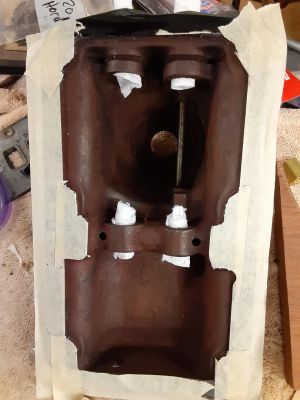
Here it is painted
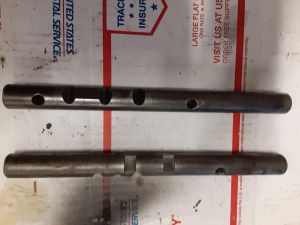
Next thing to sort out are the 2 shift rails. They are relatively easy to figure out.
As you look at the previous photo, the 2/3rd rail goes on the left, first and reverse on the right. You can tell them apart because the 2/3 has 2 champhered holes and the first/reverse has only one and has two flats machined in them.
To orient the shafts, there are 3 notches on each and they are offset towards one end. These are the detents and they go towards the back. On the left one the notches face left and on the right one they face right .
The top shaft is the 2/3 and the bottom is the first/reverse. The rear of the gearbox is on the left.
Just got a photo of a top from Dave Tyminski and that will get me over the impasse I was running up against.
There are 3 forks that attach to the shafts. The left 2/3 one has the “C”” fork and the first/reverse shaft has the quarter arch fork.”
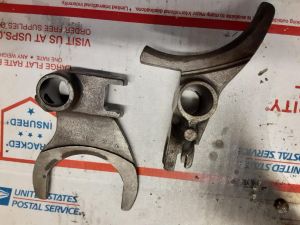
This is the fork that the end of the shifter fits into to engage 2/3. It goes on the 2/3 shaft at the front.
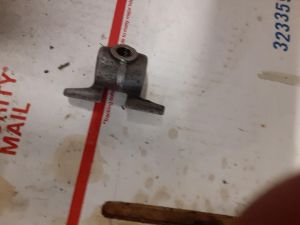
Here is the shifter fork on the 2/3 shaft. It has a notch in it to clear the 1/rev shaft. next is the lock plate that is spring loaded, then the shifter plate that fits between the ends of the lock plate.
The fork on the right is the 1/rev fork and that is the only thing on that shaft.
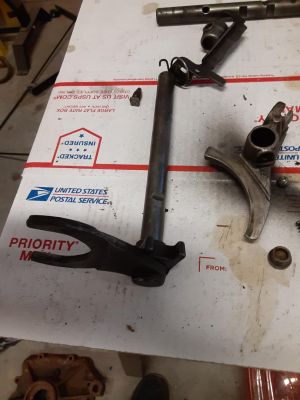
A little further in the sequence.
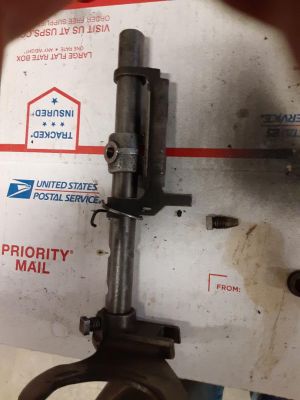
That’s it for now. Have to let some paint dry and get some pieces.
I assembled the 2/3 shaft out of the cover so you could see what it is like. The puzzle is figuring out the sequence to install all of it in the cover.
One last thing, if you look at the fork on the right you can see a channel in the bottom. It straddles the rod in the earlier case inside photo.
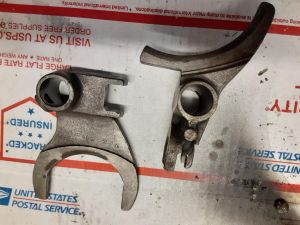
The spring clip that goes on the tower looks in good condition, often they are broken or repaired. I usually replace the springs under the balls………the get slack after 80 years.
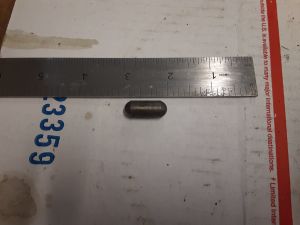
Anybody know what this is and where it goes?
Bill,
If I remember correctly that is the lockout to reverse so two gears can’t be engaged at the same time. Jim L
Bill, your dowel with rounded ends is the usual method to prevent a transmission from being able to shift into two gears at the same time..
The dowel goes between the two shift rods.rails. and when one shift rail is in a gear, the dowel is pushed over to engage a notch in the other rail, preventing it from moving.
The c-slot and tab on the shiver forks is less common.
Greg Long
All the parts cleaned and painted.
Start with the 2/3 shaft and install the lock out plate and spring then start inserting the shaft from the front thru the first ring of the lock plate.
Notice the spring and how if attaches to the lock plate and the center boss in the case
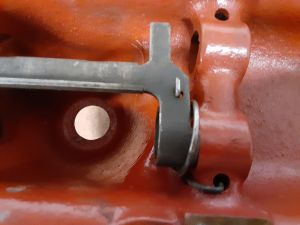
Next slide the 1st/rev fork on the rail in the case. Then insert the shaft for 1/r thru the for and the boss. Be sure it slides into the “C”” on the 2/3 fork”
