- Home
- About Us
- Join/Renew
- Member Benefits
- Member Pages
- Log In
- Help
- Museum Store
Home Page › Forums › What did you do with your P-A today? › Refinished rear compartment garnish
Tagged: wood molding refinish
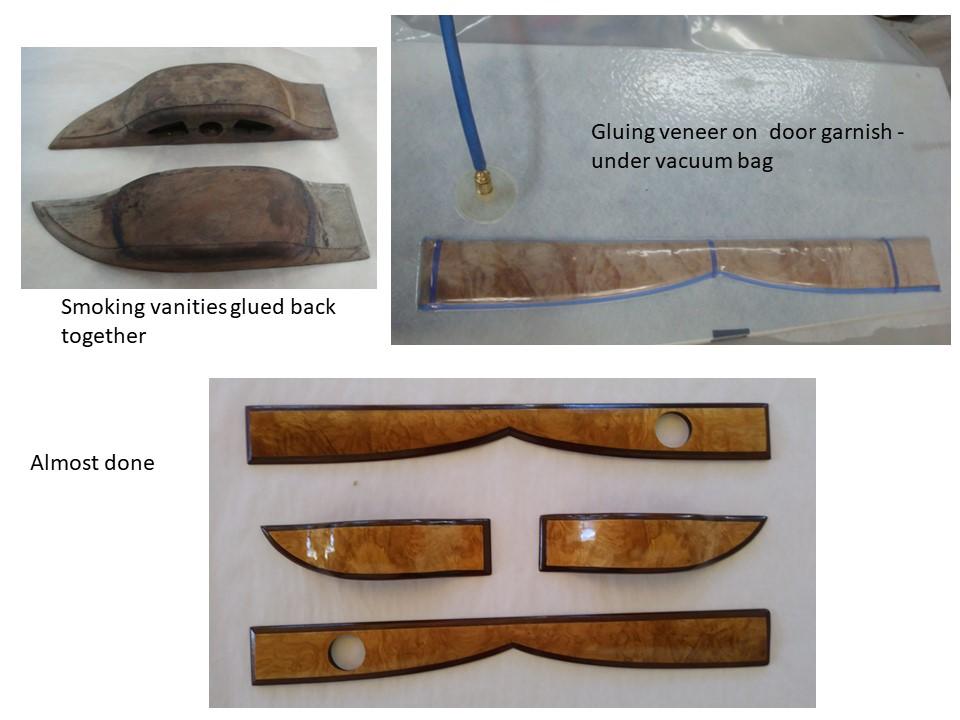
I’ve been re-veneering and refinishing the rear door garnish and smoking vanities for my ’35 Pierce. They looked pretty bad and there was only one tiny chip of finish in one corner of a vanity to indicate there ever was any veneer on them. Pictures of other cars showed there was. In the end they were actually in pretty good shape, just needed to sand, re-glue and fill a few divots. Then the real experiment, putting new veneer on. It had a few challenges, nothing comes out perfect, but they came out better than I had any reason to hope –  a satisfying experiment. I need one more round of sand and varnish on them.
Beautiful Jim!
Thanks for showing the use of a vacuum bag and the excellent results. My past veneer attempts were lousy on the curved surfaces, so I’ll use the vac bag idea next time.
Dave Stevens
The biggest problem was compound curvature of the smoking vanities. Even with veneer softener and the vacuum bag the veneer won’t drape completely, so it had to be snipped at 4 corners and let it overlap under the bag. The first try was pretty bad and had to pry and sand off the veneer for a second try. The overlaps at the slits sanded out very nicely but there are a couple small patches visible on really close inspection.
It would be interesting to know how it was done originally (steamed?), as well as how these pieces were carved in production (traced mill?).
Nice Jim!
Always thought a vacuum bag was for the filter/collector in a vacuum cleaner. Shows what I know (knew).
I think it’s possible that small items like the vanities were pressed into a metal mold until the glue set; just speculation.
