- Home
- About Us
- Join/Renew
- Member Benefits
- Member Pages
- Log In
- Help
- Museum Store
Tagged: Hood, hood assembly
1934 840A Center Hood Molding. Any one have information on replacing the center molding on the hood? Need to take off current one and replace it with another one! Thanks for any info! Kevin Miller
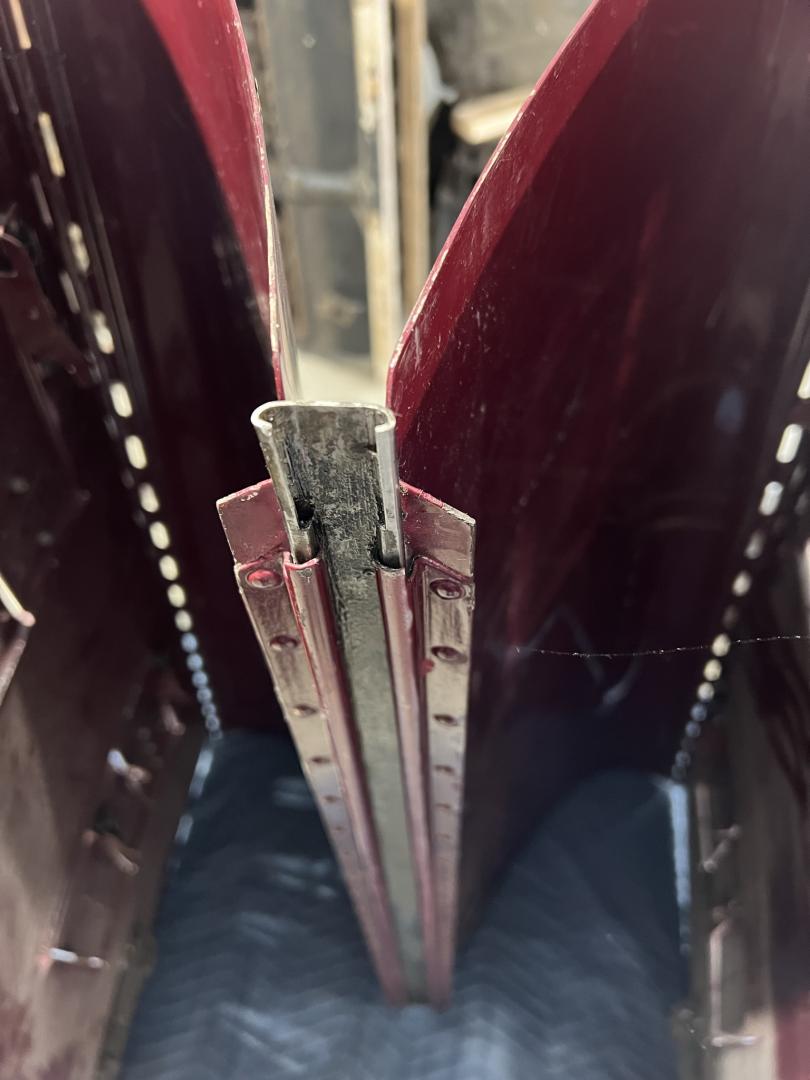
Kevin, I’m not sure I will answer exactly what you are looking for, but the 2 hood halves slide off the center hood molding. I have found it easier if I have 3 people to do it. Here is a picture of just the hood attached to the center hood molding. 
I purchased a repro SS hood center hinge from Irv Blonder many years ago. I imagine that stock was depleted many years ago but you could check with Dave Murray just in case. It didn’t work directly, I had to do a lot of grinding to make it work, the flange legs were too long and I burned out my Dremel cutting them back. I have the original which is surface rusted and would need to be rechromed. Alhough a better design it didn’t work too great either despite having no apparent internal damage. John Cislak has parted out several cars and he may has something better, but I could send mine if it is better than what you have.
My hood was already unscrewed from the center hinge rods when I bought the car, but I assembled it back on by myself on the car, rather than try to coordinate and manhandle it with multiple people installing the whole assembly onto the freshly repainted car. Think of four ushers trying to drop a casket into a hole with 1/8″ clearance without hitting the sides. I attached the center hinge with the attach rods, archer and tail of the arrow first after carefully measuring and adjusting the distances from the body to the radiator shell. I then placed each hood top panel with sheets between the body radiator shell and hood panels and then screwed the top panels to the attach rods. After checking the fit and movement of the top panels I propped the top panels up a bit with so e foam and placed the side panels into the valley of the fenders with thick blankets to protect the paint and raise them enough that the piano hinge rods would clear the radiator shell. It had taken serious bashing and penetrating oil to get those rods out in the first place and I didn’t want to do that with the freshly painted car, so instead of the original piano hinge rods I bought SS all-thread rods to replace them. I cut a taper in one end and cut a screwdriver slot into the other (front end). I then jammed two nuts on the front end and used a drill driver with a socket to turn the rods. Tricky to get started but once the first pair of loops were engaged the threaded rods turned themselves in slowly and methodically. When it was almost all the way in there wasn’t enough clearance for the socket so the last 6 inches or so I used a slotted screwdriver bit to finish driving it in flush. Theoretically it shouldn’t be a heroic effort to remove the side panels if required in the future. It is a lot of screws on the center hinge!
Thank you both for your information on the center hood molding! So if I get it right from what I read the center molding removed leaves the top center hood in two half’s ? The center molding is what holds the top two half’s in place? I was able to purchase a Molding that is in much better shape than the one that is on the car now.
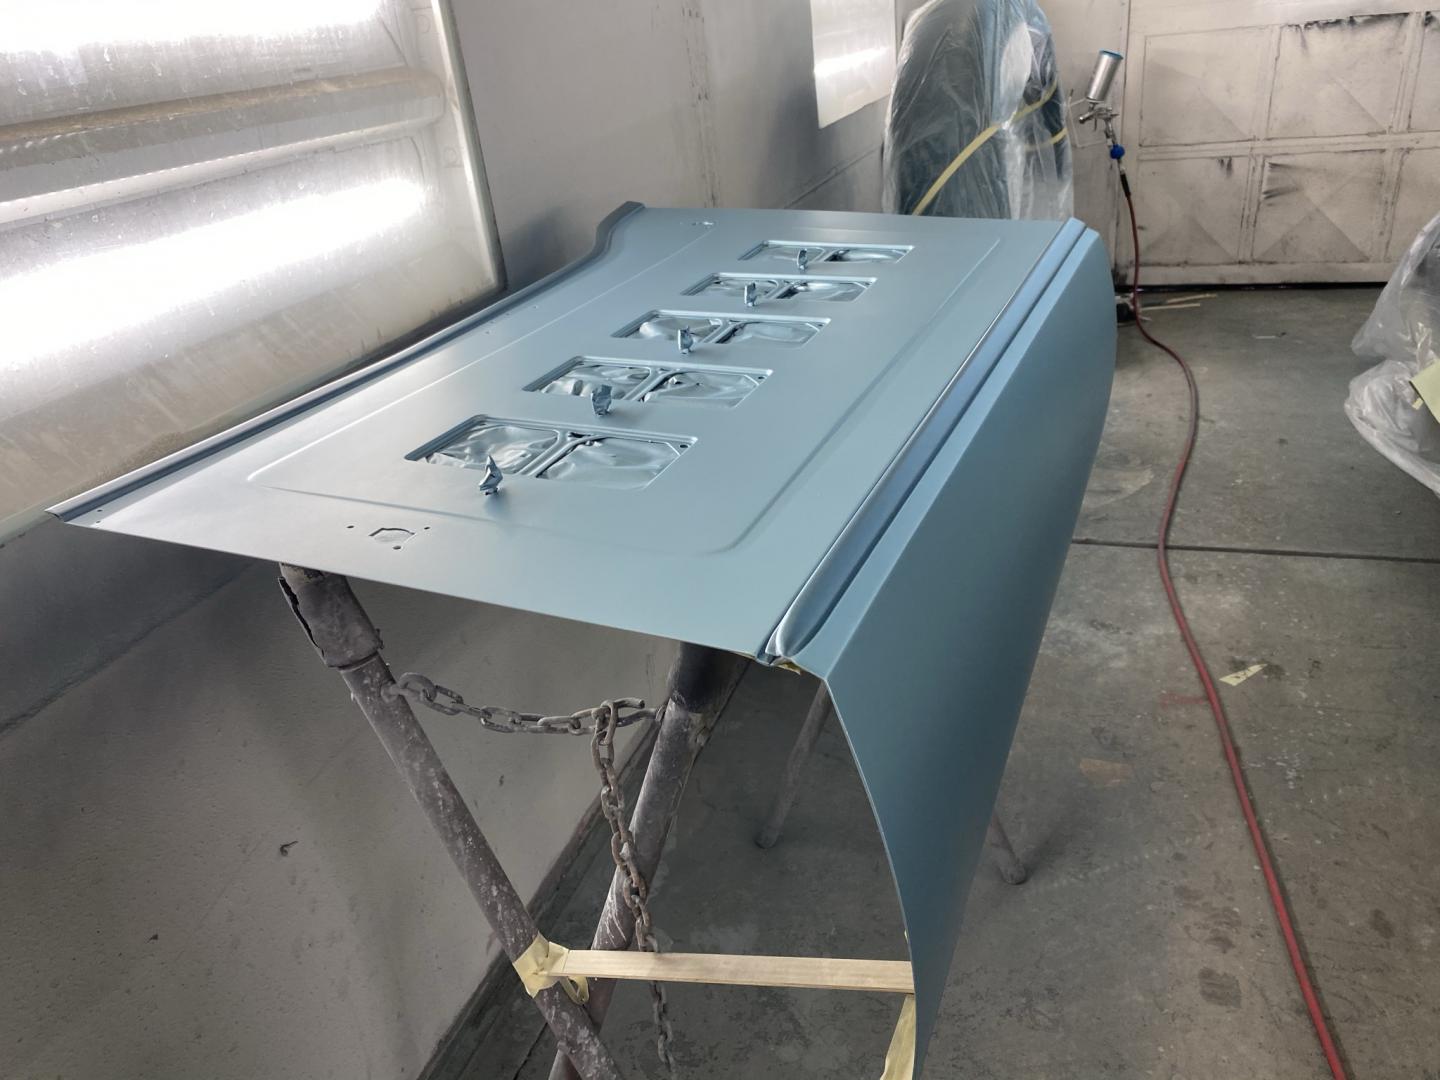
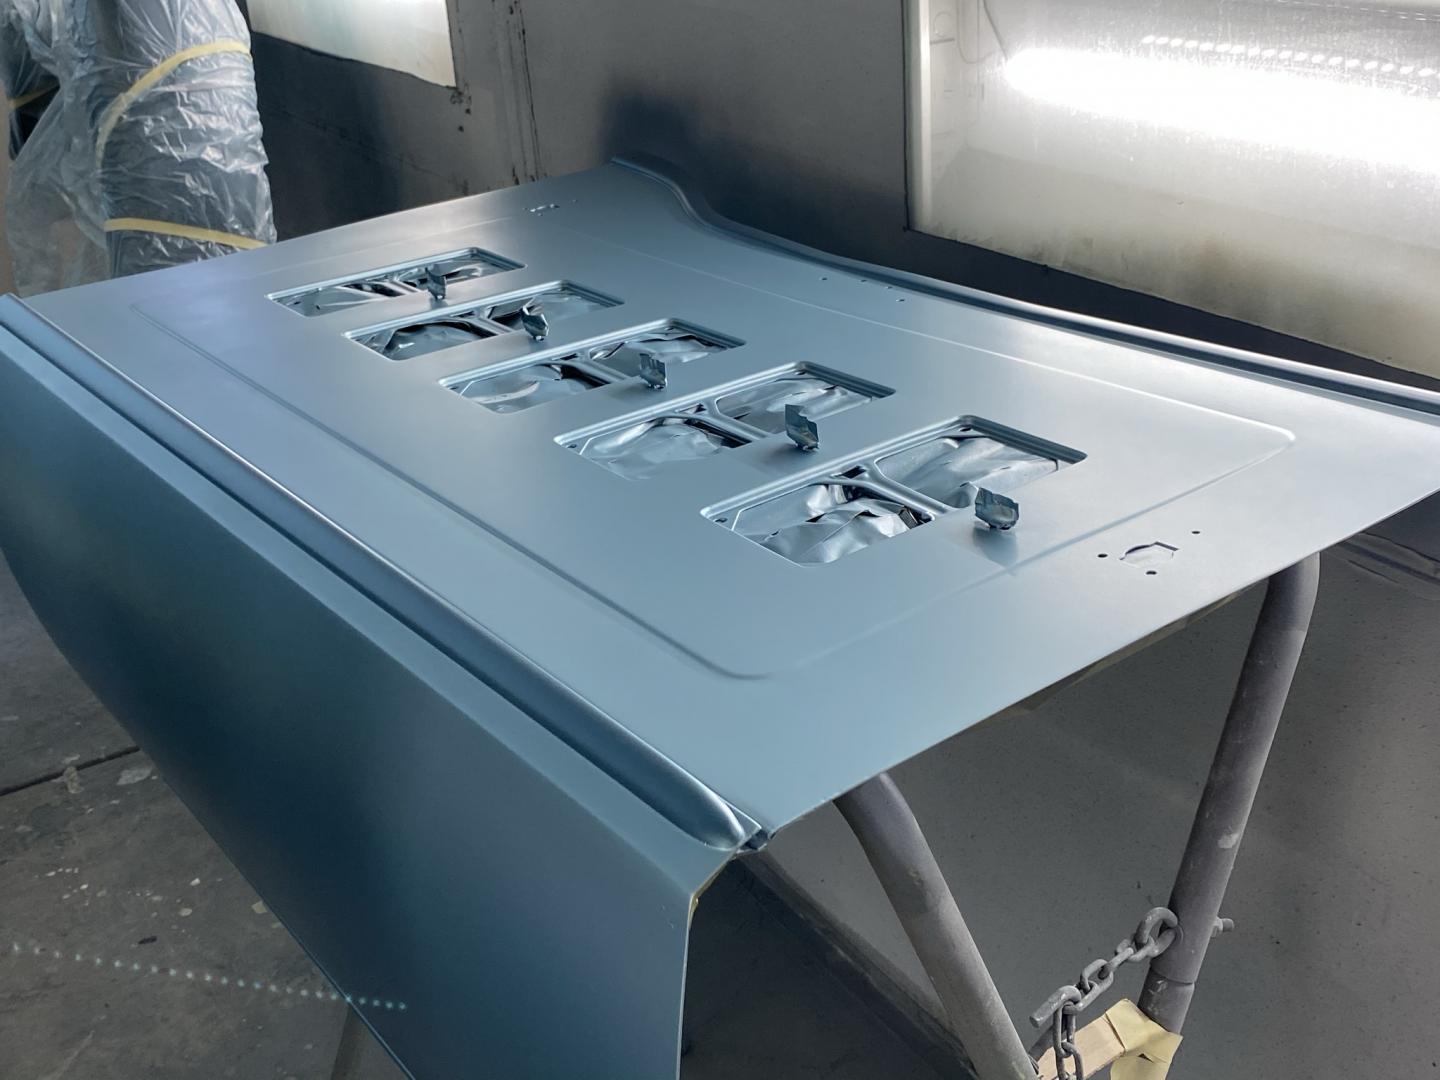
Kevin, you are correct. I have included pictures of my 1931 Model 42 hood while it was in paint. My 1934 840A has the same hood configuration.


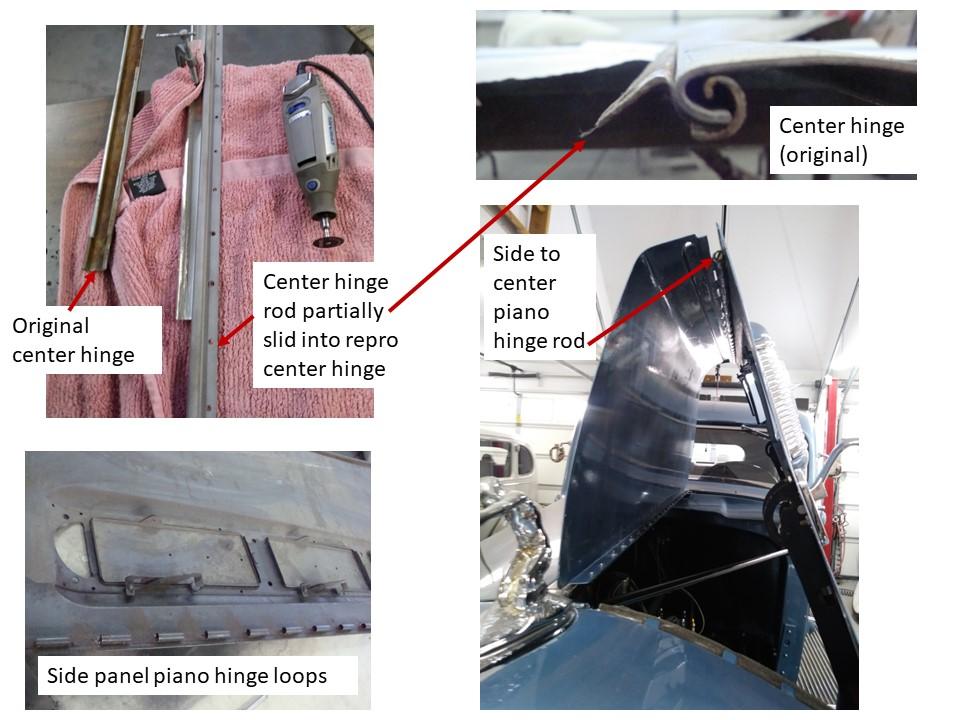
Some more pics showing my ’35 hood hinges. The chromed or SS repro center hinge piece slides into the archer at the front and the tail of the arrow at the back. I don’t know if originally P-A used rivets to attach the center hinge rod to the top hood panels. I used SS screws and nuts to attach the top hood panels to the center hinge rods after the center hinge, hood ornament and tail of the arrow were installed. After the top panels I installed the side panels as noted. The screwdriver slot cut into the end of the side-to-top panel threaded rod is visible. 
The pictures of fitting the center hinge rods (as shown they are actually curled and bent sheet metal that nests into the curled flanges of the center hinge, not just cylindrical rods) were taken while I was cutting back the flanges of the repro SS center hinge. The center hinge rod must be able to rotate over 90 degrees inside the center hinge between open and closed, basically with flanges pointing straight down in closed position and straight out in open position (as shown in the picture). My rods would not rotate that far in either the original or repro center hinges when tried off the car, so I did a lot of cut and try grinding to get the repro to work. There was no visible reason why the originals wouldn’t work, but of course they must have originally. There was a possibility the original would have worked when actually fully installed with the heavy panels forcing the issue but I didn’t want to take that chance. I have seen evidence on other Pierces of trouble with that hinge.
Again, Thanks for all the pictures and info from both of you! By the way what is the name of the light blue I see in the picture of the 840A I see? I had a 30 model A street rod that was light continental blue Met body with Dark blue Met fenders and trim! The paint was Imron Enamel paint at the time. Thank you again for all the great information!
