- Home
- About Us
- Join/Renew
- Member Benefits
- Member Pages
- Log In
- Help
- Museum Store
Home Page › Forums › What did you do with your P-A today? › Fixed the roof
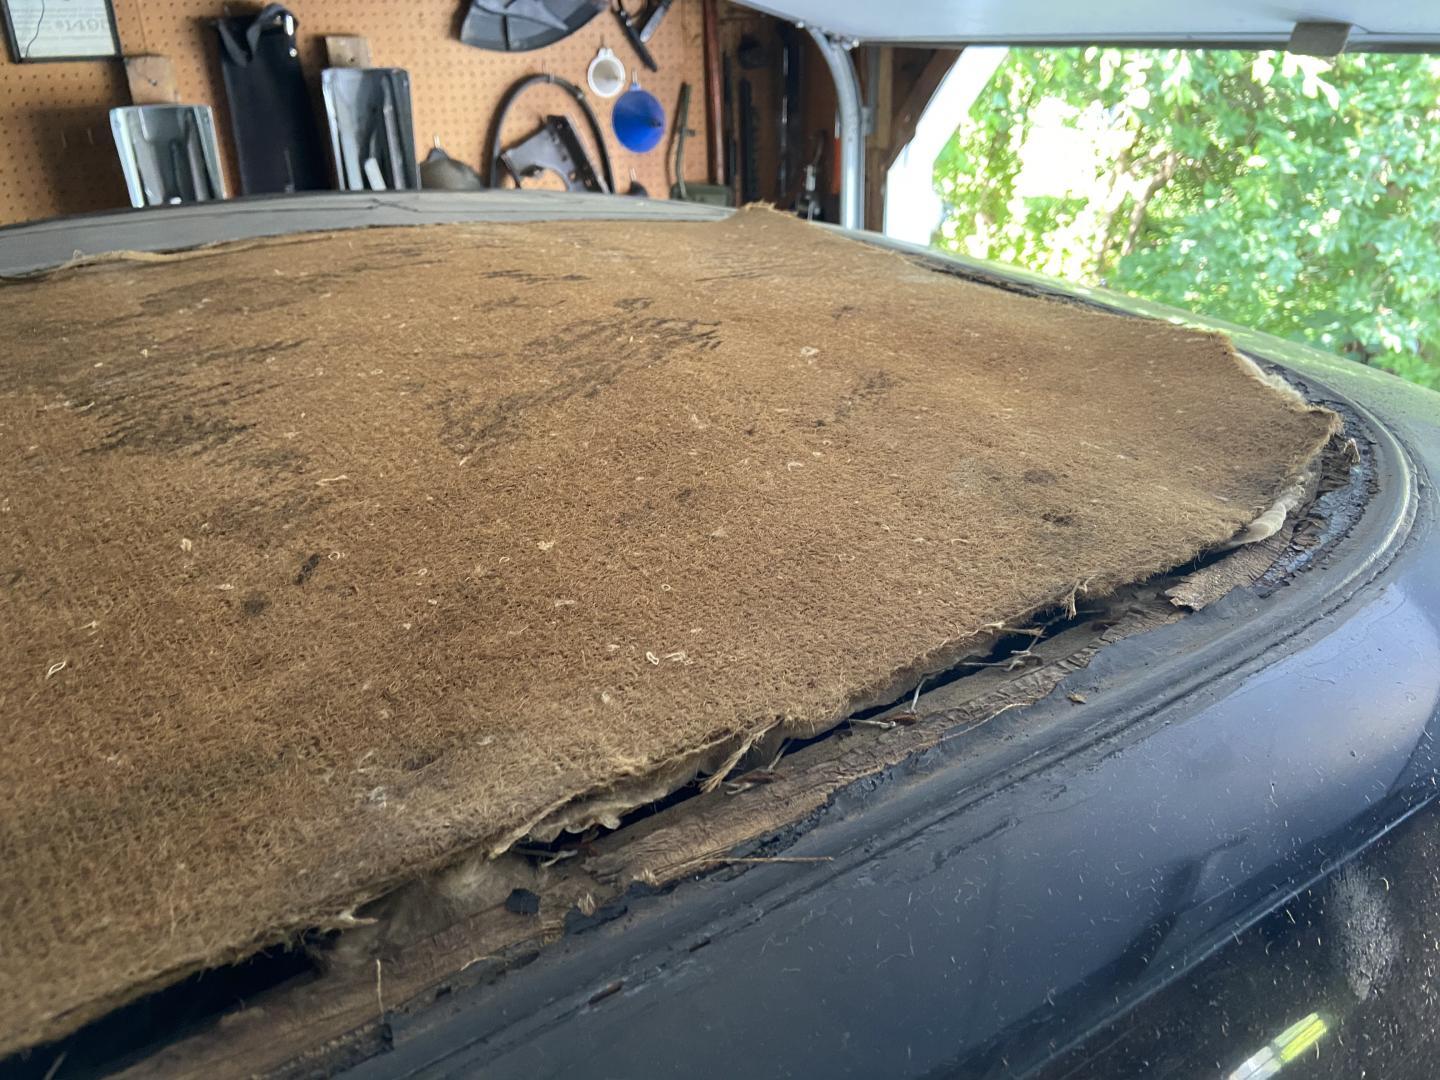
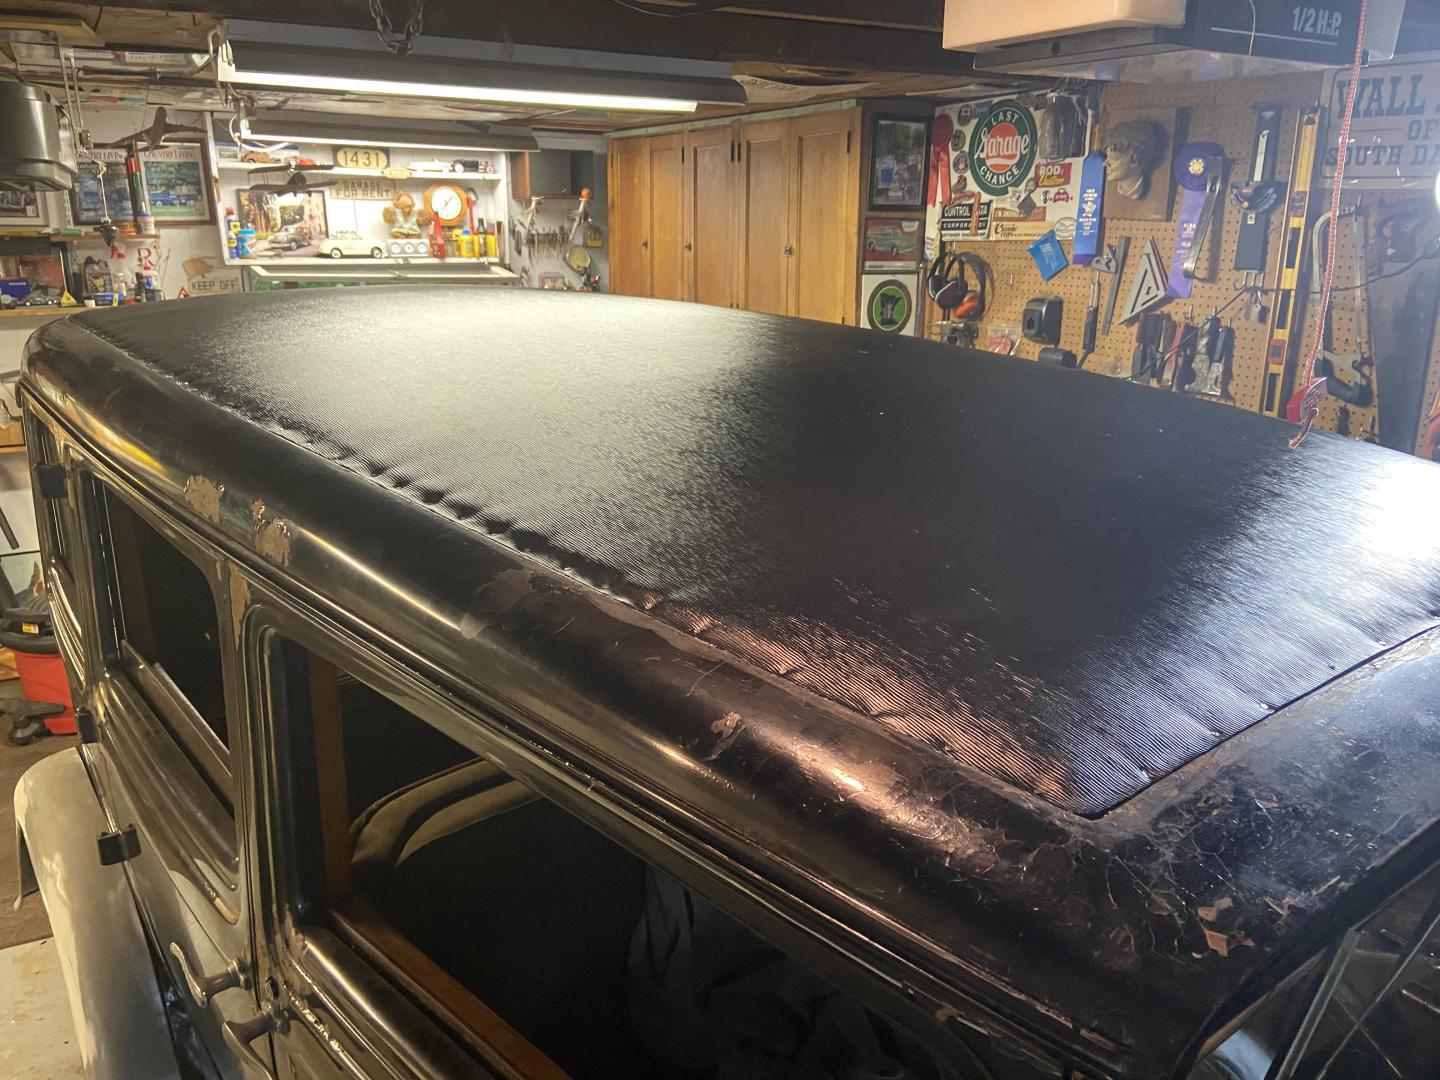
Finally put the vinyl layer on today. I put new chicken wire and padding in too. Thank you to Eric Haartz for the material. 

Is this the material that was tslked about a couple years ago hete that was closer to the originsl pattern? I didn’t see anything whether a run was made after that thread.
Appears to be a long grain cobra material. Eric Haartz does have some oddball material stashed away, Bjorn could clarify exactly what he put on the car.
My opinion is that the original material was a very faint grain, and not the pronounced grain of most top material now found. Not quite a smooth Pantasote material, but not the heavy raised ridges either. That’s just my opinion.
Kudos to Eric, he’s a great resource for us early car guys, always willing to help in any way he can, when he could just as easily ignore that part of his huge business…
I asked Eric for cobra long grain and he said this is what he has that is most authentic. I will note that the material I took off was in extremely poor condition, I would strongly believe it was original, and it was covered with some other sort of materials over the years. But I think the original material was almost completely smooth. I’ll post another pic with the trim on soon.
It was common practice to coat the original top with a dressing to help keep it waterproof. A lot of companies supplied these dressings.
As you mention, I think the original material had a slight pattern to it, but it was much smoother than the (what I call) heavy grain on current cobra materials.
I think the replicated Pantasote is possibly closer, it has a slight pattern but not much.
I’d be interested to know what trim you’re using. Do you have some original metal trim, or?
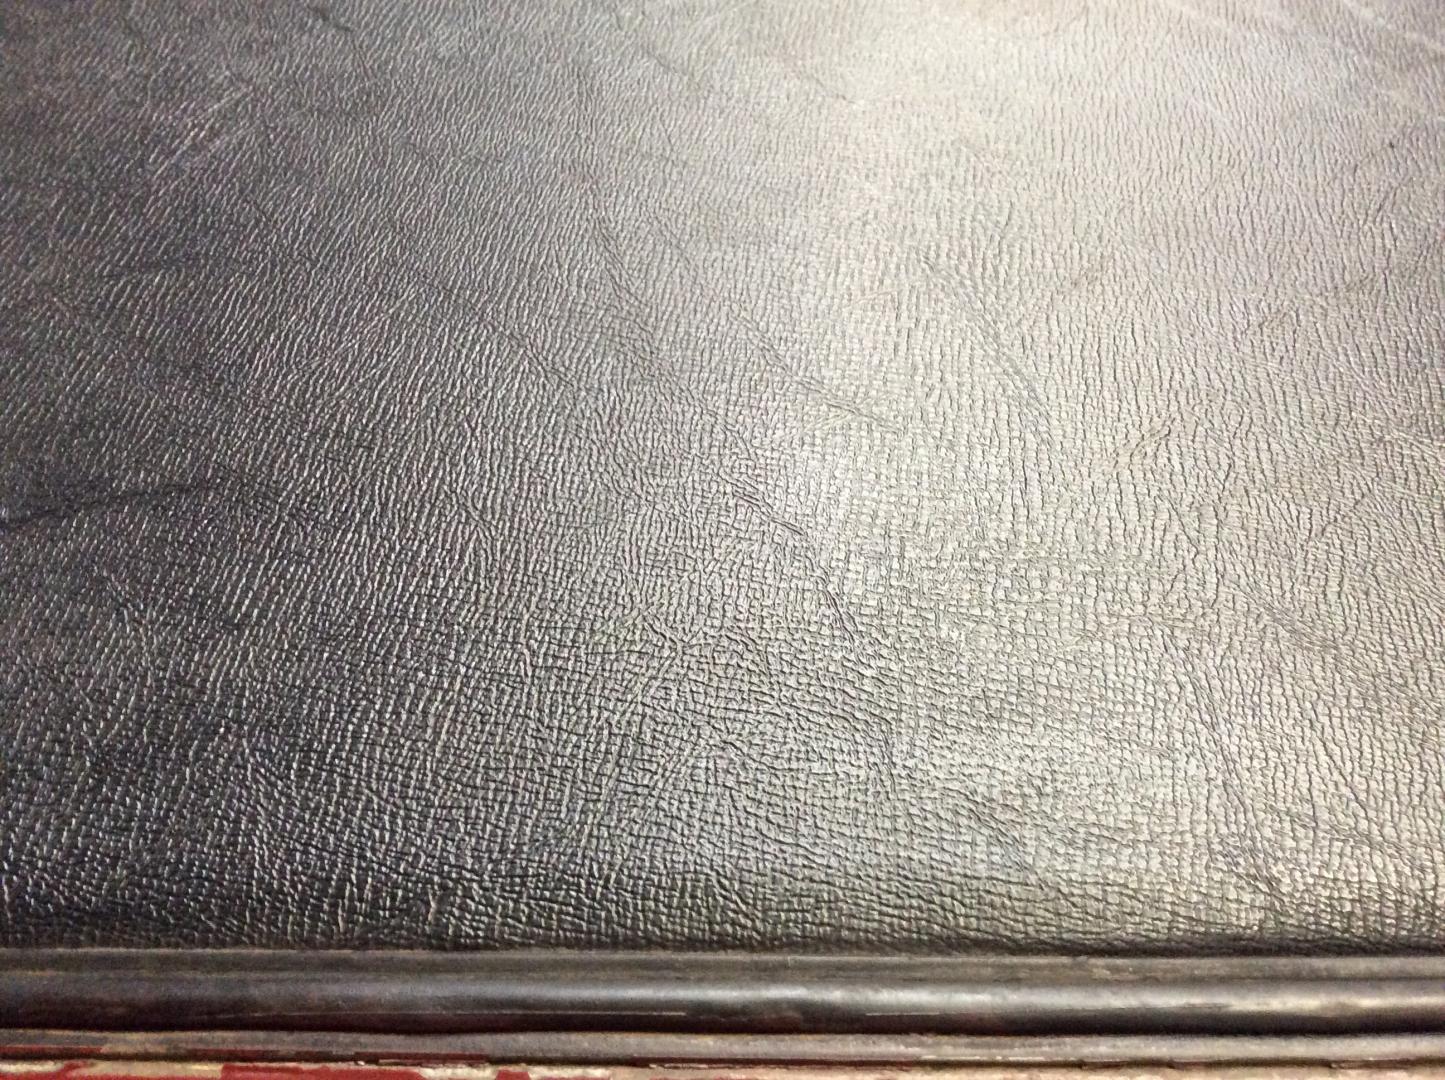
 For what it’s worth, here is a photo of the top insert on my 1931 model 43 coupe. The car has never really been restored, so I think this is the original top insert. Not many have survived. As you can see, the pattern is rather restrained. In can send photos of the original two piece trim if needed.
Tom Barrett
Thanks Tom,
that is definitely different than cobra grain. I do have that same trim that you do also. Thanks for the pic! It’s easy to see there that the trim is black like the insert and not body color.
Eric has (or had) a top material called Morocco or Moroccan that is very similar to what is posted by Tom and Joan Barrett.
While we’re on the subject, I am wondering if any type of caulking or weather strip is used under the top fabric when it is tacked in before the nail strip, and then also between the nail strip and the top fabric. I have perused the PAS service bulletins and and recent posts here and don’t see it discussed. I don’t think the surface of my sedan’s channel is uniform enough at the many leaded panel joints to get a seal without something.
Jim
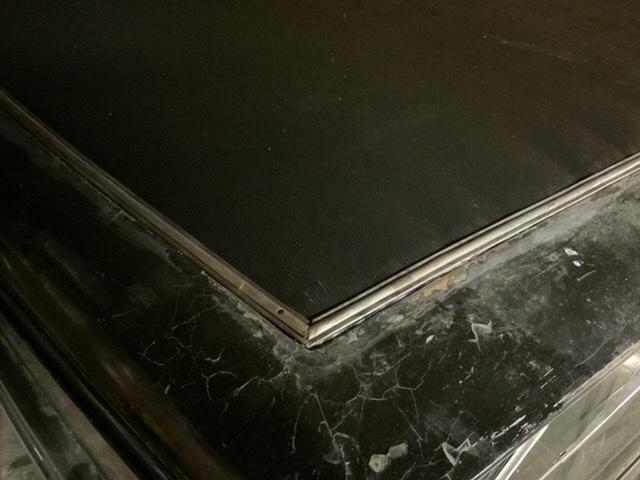
Hi Jim. I used window weld on mine. There was a similar material there when I tore my roof off. It’s a pliable tar like goop that comes on a roll in varying thicknesses. I worked mine to fit the channel just right and it remains pliable so you can make mistakes and do-over as you go. I then used rtv sparingly on top of the vinyl/under the tack strip. As you can see in the pic my roof is a little rough but the metal is good under all the “remuddling “. This is also the first roof I did and I will not be sad if I have to redo it either because of more restoration or because of errors I made.

In the photo from Tom Barrett, there is a rubber piece that is inserted into the nail strip after it is nailed in to cover the nail heads. Is there a source for the rubber strip?
Thanks, it seemed like something like that must be used, I will look for it. I think I used a soft non curing caulking on my Packard 3 decades ago, but not sure. It seems like something rubbery, tacky, and a bit gooey would be ideal. The gooey rubber in dynamat sound insulation might be great if it weren’t for the aluminum backing on one side.
I have been fussing over how to do this, mainly concerned with how to make sure that the nails of the pre drilled nail strips don’t hit either the heads of the first tacks holding the top before the nail strip or the sheet metal between the holes in the body. I am thinking of making marks on tape on the body next to the nail strip as a guide for the tacks.
I have already bent the nail strips to fit the channels and pre drilled. I am still a few months from doing the top.
Thanks! Jim
Most cars had oval shaped slots in the metal roof edge, usually the tack that holds top material goes in one end, the fastener for trim goes in the other end.
David, I guess I am overthinking this, I spend a lot more time thinking how I am going to do stuff than it takes to actually do them, hence why it takes me so many years on one car.
Some sources for doing this say to predrill the nail strips before bending them, as it should be done on a drill press. This means the nail strip holes cannot be guaranteed to hit the oval holes in the sheet metal consistently after bending and trimming. I bent the nail strips first then marked the locations to drill the nail strips that would miss the sheet metal between the oval holes. I chose one of the Ford nail strips instead of the more “correct” solid oval strips partly because the pre drilling is on a flat surface instead of on top of a curve so it could be hand drilled after bending instead of a drill press. Snyders if I remember recommends about 1 1/2 inch spacing for nails in the nail strip, which on my car is every other oval hole in the sheet metal. Since the top insert material covers up the holes their location is blind while driving the tacks, so I am thinking I need to to have some marks outside the top fabric to indicate where the tacks can be put in that will not coincide with the nail strip nail locations. Basically I don’t see how one places tacks on one side of an oval hole that is covered up by the fabric while driving them except with some way of marking on the body outside of the fabric, or maybe on the fabric?
Jim,
Run a strip of masking tape along the outside of where the moulding goes and mark the holes on the tape, when done drilling remove the tape.
Jim L
I run a small bead of sealant on the ridge inside of the tack holes, then I can peek under the fabric to see where the holes are. Once you get a few tacks in, then finding the edge of the other holes is by eyesight. Using a piece of blue painter’s tape isn’t a bad idea at all, I use that (and the green body shop paper) all the time when I’m doing upholstery work.
I’d be interested to know what people are using for final trim, if they don’t have the original pieces. I know you can buy aluminum strips and bend them, is there anything more flexible out there that works? I don’t want to use that ugly hot rod stuff that’s available, and I have a top to do right now.
hi everyone, give me the best take on driving my 1601 1936 direct drive or free wheeling. free wheeling 50 mph. a little scary with this weight and size. thank you be safe. larry sorcher
<p style=”text-align: left;”>Thanks for the roof repair thread; this is interesting and useful information. There is a video of a Ford Model A top replacement on YouTube which might help us amateurs.
As for the free wheeling: forget it and drive it like it is- a manual transmission. It was a mildly interesting attempt at creating something to market cars during the Depression, pre-automatic. Didn’t last long which speaks volumes.</p>
Hi Randy!
Larry’s questions were addressed in another thread later. Hopefully he has seen those responses.
Overdrive only freewheels below the engagement/disengagement speed. When engaged it locks up like any manual trans to provide engine braking. It offers reduced engine wear, improves gas mileage and this Borg-Warner unit was used by Most US manufacturers into the 1970’s. The centrifugal action used by Pierce and others prior to 1940 can be adjusted to a lower engage/disengage speed by changing the weights in the flywheel. The in and out speed on a 1601 is 35-40 mph if stock. Our 1601 is 25 in and 20 out. Later they went to a solenoid control set to 20 in and 15 out
The “Freewheeling ” on earlier cars is wholly different and offered only extreme danger and clutchless shifting. It is unsafe on anything except the ’33 to ’35 P-A’s that have the phenomenal Stewart-Warner power brake units.
When we are at a Meet I’d be glad to let you or any other member drive my 1601 to see how the Overdrive is used safely. Also how good the 1247 stops while freewheeling. Both are as safe as any large pre-war car except possibly the Chrysler Imperial Airflow.
Dave
Hi, Dave, my only freewheel is on the ’31 and I have never really driven it, so… but I see only limited if any value in it apart from the historical aspect. Later cars with overdrive are as you say, different, and I missed this part of his question entirely…
