- Home
- About Us
- Join/Renew
- Member Benefits
- Member Pages
- Log In
- Help
- Museum Store
Home Page › Forums › What did you do with your P-A today? › Installed the dash
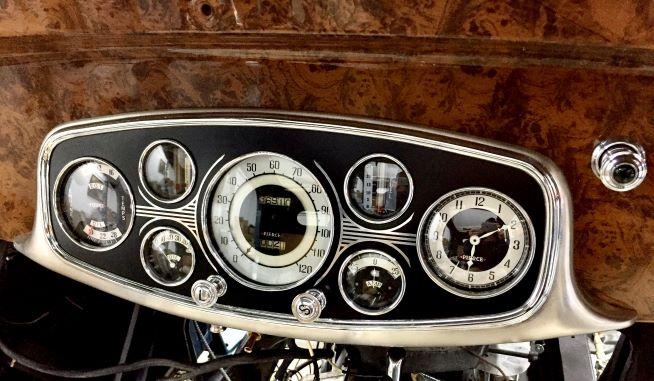
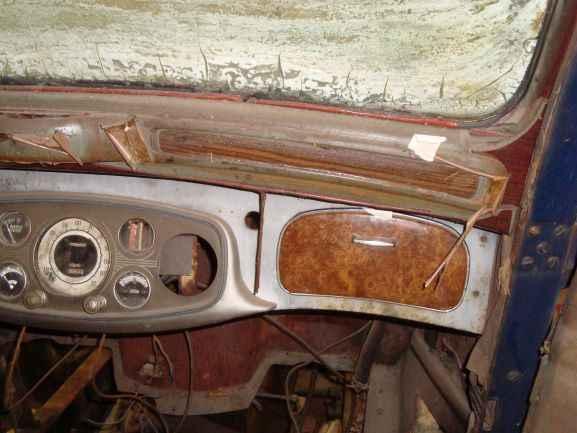
I finally got the dash and instruments mounted. I think 95% of restoration work doesn’t yield anything that looks much better than before, so it helps when something resembles visual progress.


WOW, very impressive. Is the wood real or simulated?
Who did the gauges?
Thanks, it’s not concours but it will do for a driver. The dash is woodgrained metal per original. I had all the woodgrain bits redone several years ago by Undercover Paint and Upholstery for a very reasonable price.
The gauges are a bit mix and match. The amp and oil pressure are originals in very good condition that I found over the years that I basically did nothing to. The temp gauge is also original that a previous owner must have found that was in pretty good condition but the white on the facia is more browned from age than the rest. I don’t like redoing original stuff that is in pretty good condition but not perfect. Somewhat inspiring when things manage to survive 85 years and still look fairly good. I debated even yesterday on taking it out and redoing the facia, but I am paranoid about disturbing it any more than necessary. In the box of parts it was still sealed with K-S fluid but for some reason it seemed to have a bubble somewhere that screwed up the readings and I couldn’t get it corrected myself. Years ago I had “The Temperature Gauge Guy” replace the capillary tube and fluid to get it reading correctly again. I suspect it got screwed up by having it lay on its side in the box over the years, so I have kept it more or less upright since and it is the last gauge I installed in the cluster while hanging the dash vertically. Hopefully the whole mess will work
The speedometer face is glass with translucent white with black numbers painted on the back. That usually flakes off and this facia is a reproduction I was very luck to find. It had been done to restore another ’35 and a few extras were made. Before this I had created a complete CAD file to have one silk screened but finding this one saved me the trouble. If anyone needs one in future I still have the CAD file. Being fresh and new it is whiter than the others.
Being a DIY’er like you, I did the gas gauge and clock face using CAD and inkjet printing. Because the K-S fluid is corrosive and ruins fuel gauges over time I left the little top cover off in hopes it would reduce the trapping of KS fluid vapor in the gauge. Maybe a mistake.
The far left is non-authentic to replace the radio blank (my car did not have the optional radio and I feel like a radio blank makes it look like one cheaped out). It has an EGT and oil temp gauge I made from the innards of new gauges. I have bypassed the oil temp regulator/cooler since mine leaked and wanted to track oil temperatures. I have also been curious about exhaust temperatures for many years as it is an instigator for exhaust valve seat recession. The design matches the style for the most part of the oil pressure and amp gauges.
The dash looks great. The car has come a long way. Thanks for sharing your expertise. Do you think it will keep up with your Packard?
Thanks Tony. Well, the Pierce has 10 more hp and the original 4.23 rear end ratio so it should inch past the Packard uphill. But, my Packard has a 3.58 rear end and copper lead bearings, so better at higher speeds. Pierce would be better for those wine tastings tour stops, where one is stopped on steep upgrades waiting for everyone ahead to back into parking spots. A real clutch burner with a tall rear end!
