- Home
- About Us
- Join/Renew
- Member Benefits
- Member Pages
- Log In
- Help
- Museum Store
Home Page › Forums › What did you do with your P-A today? › Restoration started on the 1936 – 1601 s/n 2600193
Tagged: 1936 1601
Hi folks!
I “officially” started on the restoration of our ’36 P-A today. I’ve previously done a few things like checking condition of the wood, getting new glass cut, had the fuel tank cleaned and did a engine check and startup to verify condition, but today I pulled the hood and supports and started on the headlights and radiator support. Cheers! Chris
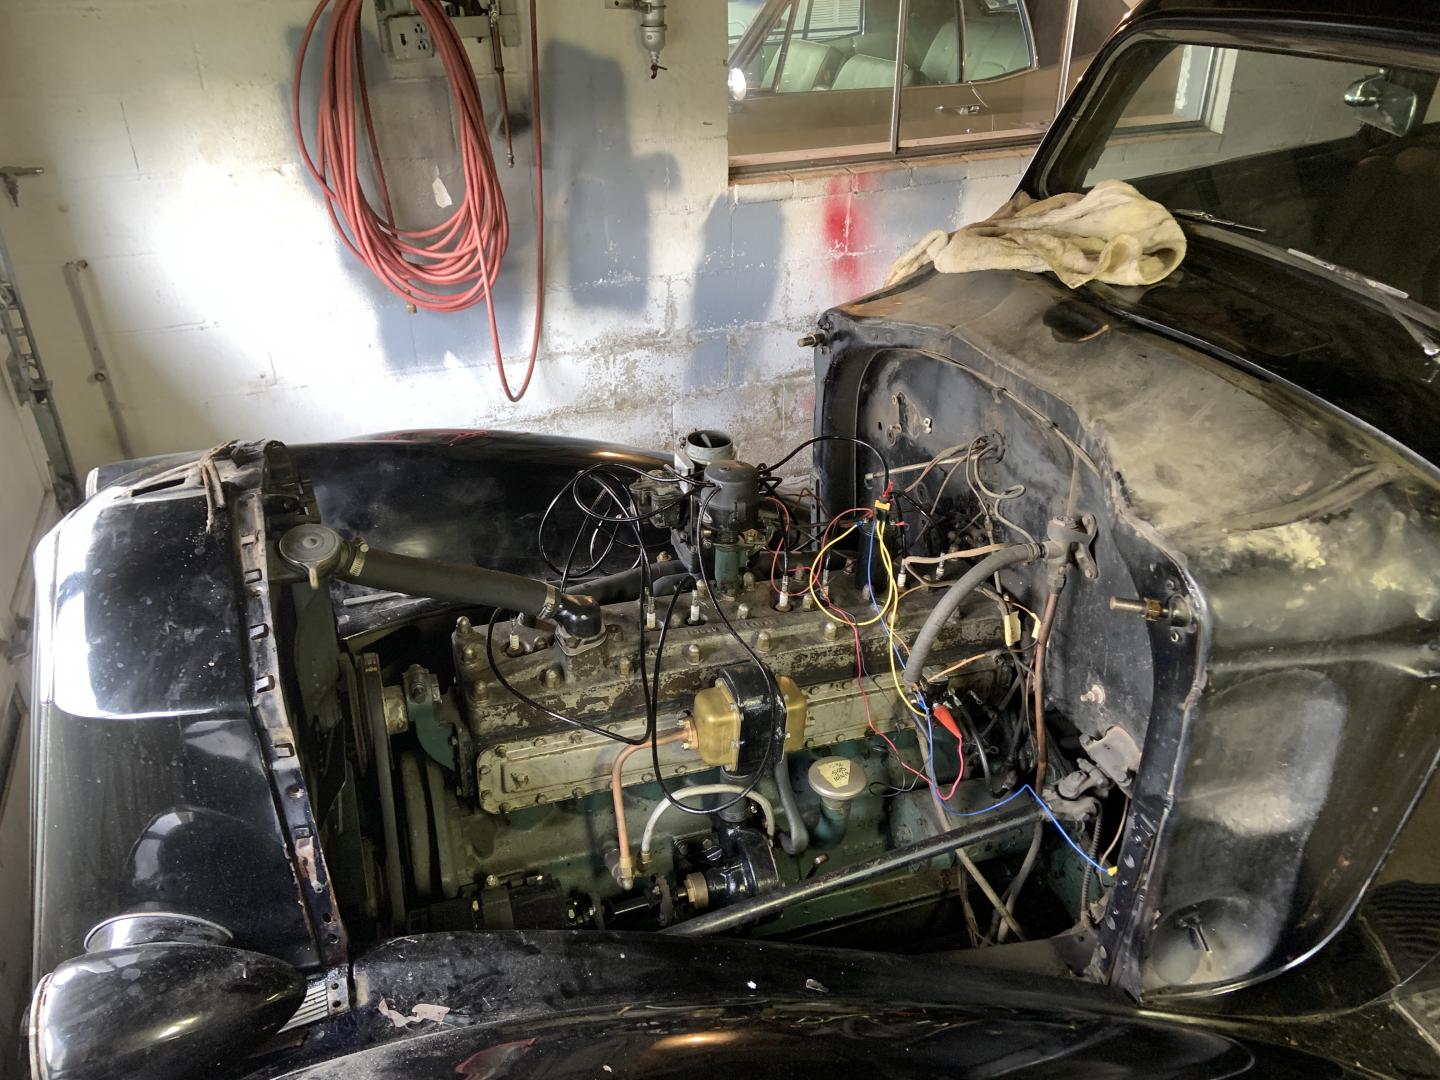
I hope you enjoy the process as much as I have. As another member told me, “it’s not one big job, but many little jobs.” Good luck and hope to see progress pictures.
Eagerly awaiting an update!
I’ve been slowly making progress on disassembly. Takes me a while to photograph, bag, label and store all the parts.
I previously checked out the engine, rebuilt the water pump, generator, carb and verifed the internals and operations. There are a couple of videos on my channel, here is one of it idling.
All fenders, running boards, and engine and transmission are out of the vehicle. I’ve also pulled the shocks. Miracle of miracles, all Houdi shocks are in good working order. They’ve been cleaned and primed. I do have a couple stuck needle valves, but that won’t negatively affect operation for the miles it will see (shocks still work fine).
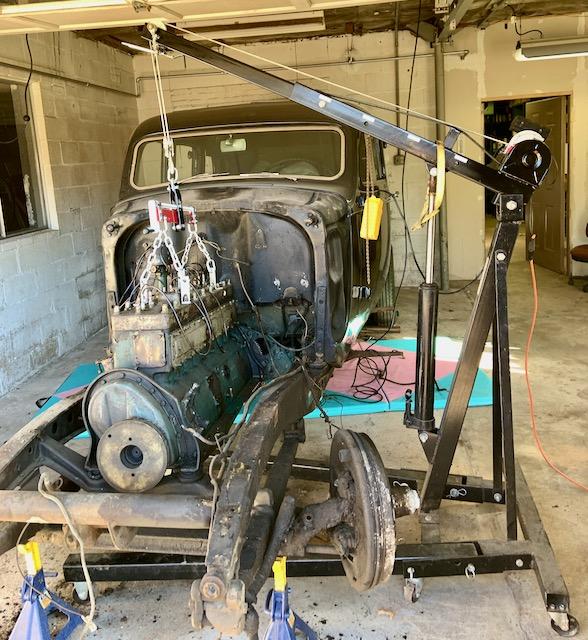
Out she comes. Engine and transmission are a VERY heavy assembly.
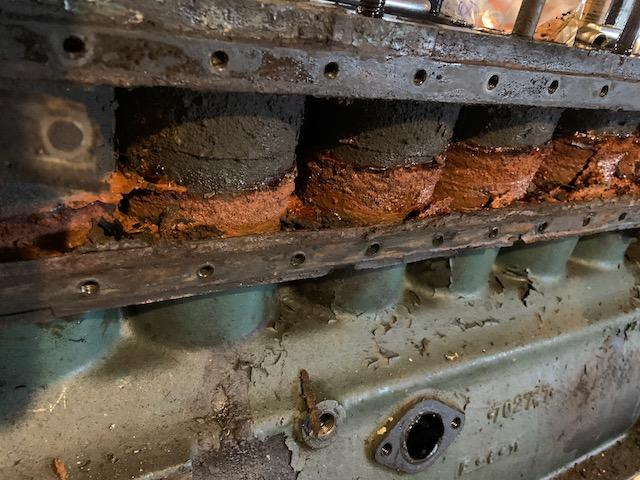
Wee bit of scale in the water jacket.
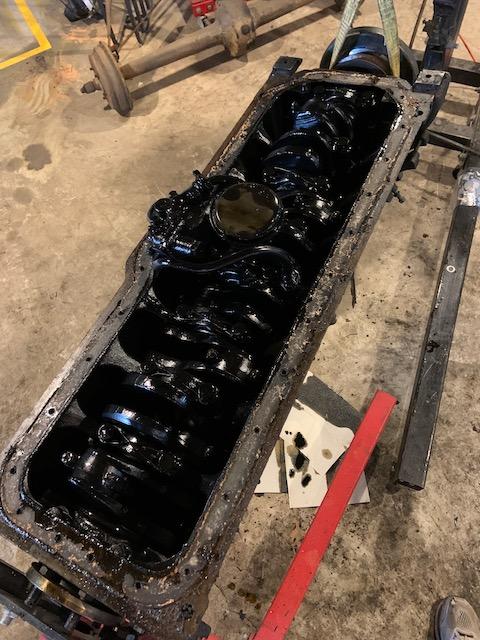
Bottom end looks great.
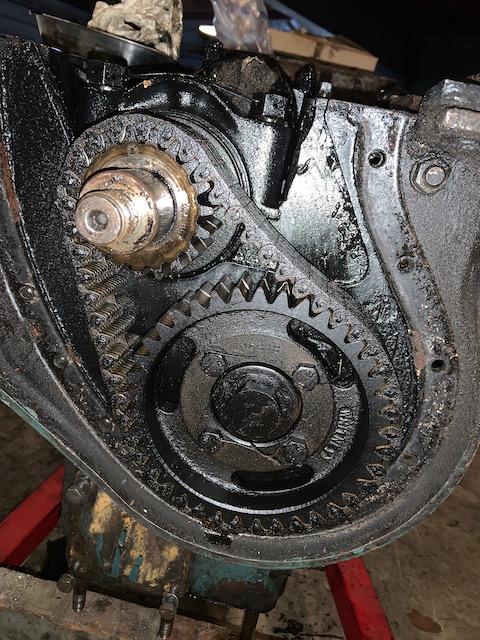
Bit of sludge, but otherwise looks good to me. See anything I’m missing?
Great progress!
Hi Chris: It is not clear if you removed the engine for some general clean up and painting, or if you are planning on rebuilding the engine. If you are not planning on rebuilding the engine, it is very important to remove each connecting rod cap and push the rod and piston up a bit to clear the crankshaft, then closely inspect the babbit bearing material and surfaces. Some radial lines or minor ridges are not a critical item. But cracks in the babbit are a major red flag. Use micrometers or Plasti-Gauge to check the oil clearance.. Original clearance was .001″-.002″.
The babbit can crack and a piece be loose, but retained in the bolted together connecting rod. But the loose piece is not supporting a good oil film/layer, and soon the bearing will fail. I have driven several very good running Pierce Arrow cars that had no alarming noises, and had good oil pressure. But when I dropped the oil pan and inspected each connecting rod bearing, several had large pieces of the babbit loose in the rod, and had excess oil clearances. It is certainly best to discover this and repair it now when the engine is out of the car.
Make sure to check the oil pump carefully for excess gear end-clearance, and excess gear tooth to pump body clearances. This is a fairly common problem. For my cars and a few other engines I have rebuilt, I had several sets of slightly oversize oil pump gears made up. This way the pump body can be used and rebuilt to original oil clearances for the best oil pressure and flow..
Greg Long
Greg,
Thank you for the tips. My goal for the engine is really just inspection, cleanup and painting. It was running well, but I will do a thourough inspection. The tips on the oil pump are particularly useful as there isn’t too much in the tech bulletins. A friend is a race car engine builder and he’s signed up to help me with the inspection.
I’m in the process of modifying an engine stand to hold this engine, off the shelf ones are great for a V8, but not a straight 8. I’m leaving as much of the rotating assembly in place unless we find something we don’t like. The engine show signs of being rebuilt (witness marks, stamped numbers on rod ends, etc.), so my hope is to get another 10k out of the engine, which will likely last my lifetime.
I’m also in the middle of a couple other restorations, plus plating some of the P/A’s suspension parts. I’m lacking getting an update here, which I will work on doing.
Thanks again, Chris
You are welcome Chris. For an engine stand, I used two fairly average engine stands, much like you can buy at Harbor Freight or similar retail outlets.. What I found that worked for me was two similar designed stands, that were made by different companies, but had several features that made them ideal for my project.
First, the stands had the typical vertical post with the rotating mount within a steel sleeve welded on the top if the post.
At the bottom of the post was a cross bar with a caster-wheel on each end, making sort of ‘outriggers’. Also welded on the bottom of the vertical post was another square steel tube that went forward, under where the engine would be hanging. At the end of this forward support was another steel tube at right angles with another pair of casters at each end.. So this engine stand had 4 caster wheels.
The second engine stand was built along nearly identical lines, but the forward support was a slightly smaller dimension: and it fit perfectly INSIDE the other stand’s central support. I removed the cross bar and caster wheels from the smaller stand, and slid the central support inside the other stand’s central support..
The result is a telescoping two ended engine stand that will safely hold the very heavy and long Pierce Straight Eight engine.
One note regarding making engine mounting plates to adapt the engine stand to the engine itself: The engine is NOT symmetrical on each side of the crankshaft: One side of the engine has the valves, valve springs, lifter assemblies, camshaft, oil pump and oil pump drive. I did not account very well when making my mounts for the Pierce Eight to mount in the engine stand.. So the engine has a definite ‘heavy side’ and can be a bit of work to turn to work on the other side of the engine.
Greg Long
Hi Chris,
Don’t forget to install a correct full flow oil filter if you’re gonna drive it.
Bob
Good progress on teardown. Doors off, dash out, trunk cleared out. That’s about as far as the interior teardown goes. Now to separate the body from the chassis. Transmission is almost done with the rebuild. Only needed two new bearings; only the throw-out was “bad”. I replaced the front main bearing out of an abundance of caution.
Still looking for midwest engine rebuilder. Lund, Perf Eng. Mach, and Hass are on the short list. Any other recommendations? I don’t want to drive 16 hours to Maryland or Virginia, but will listen to any knowledge that you can pass on.
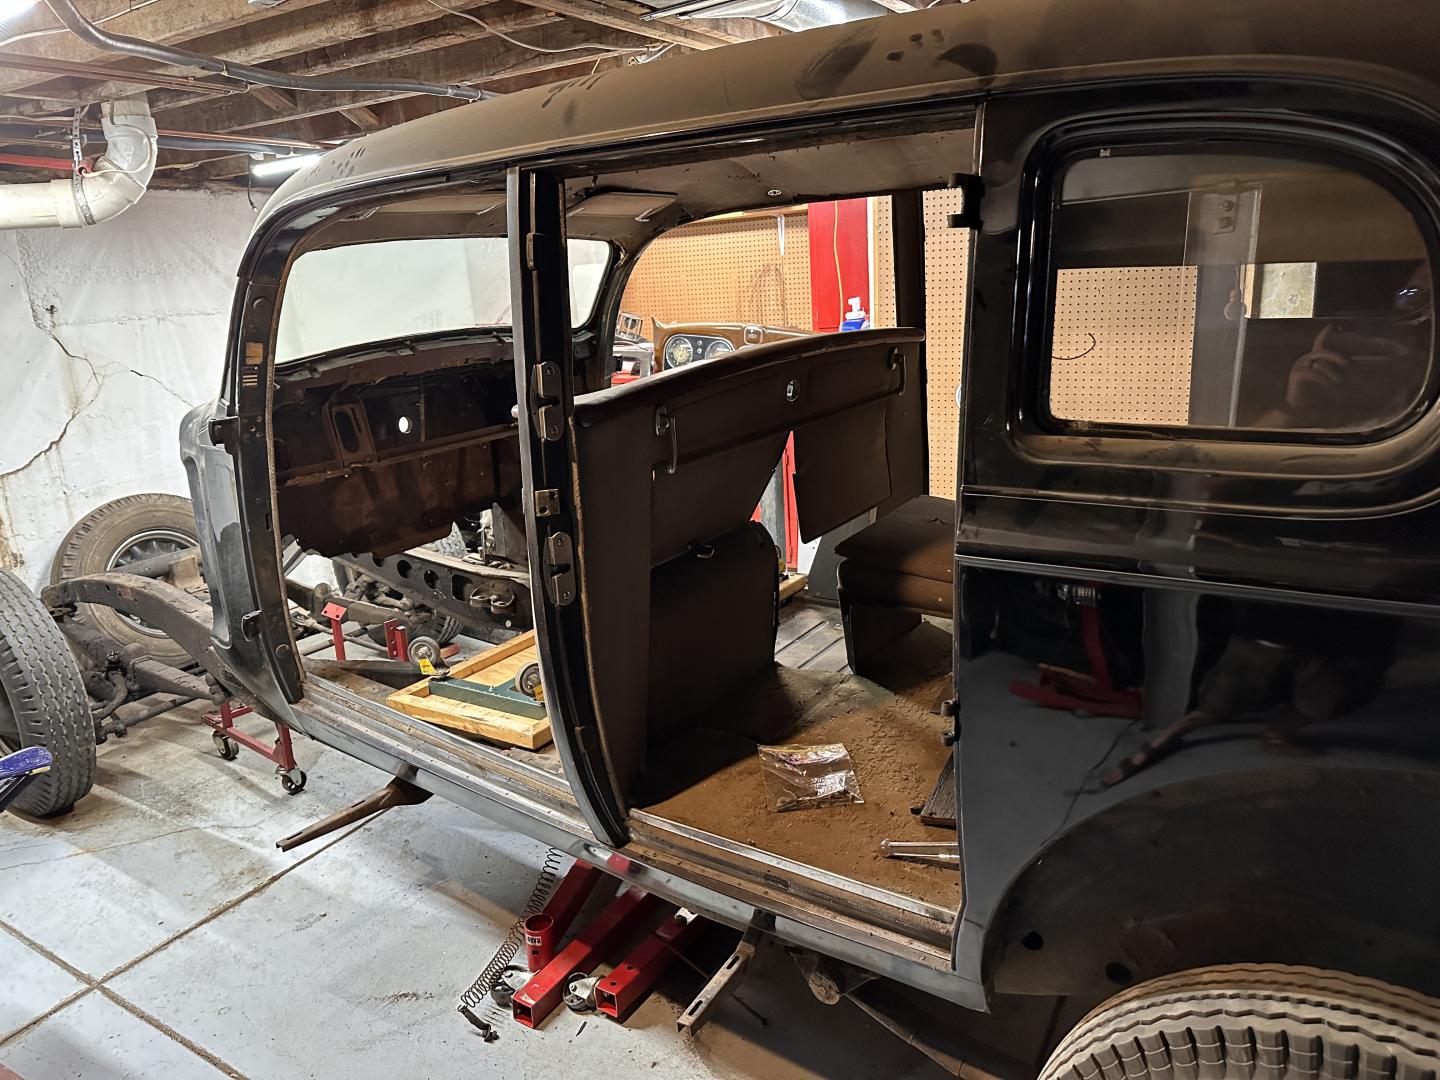
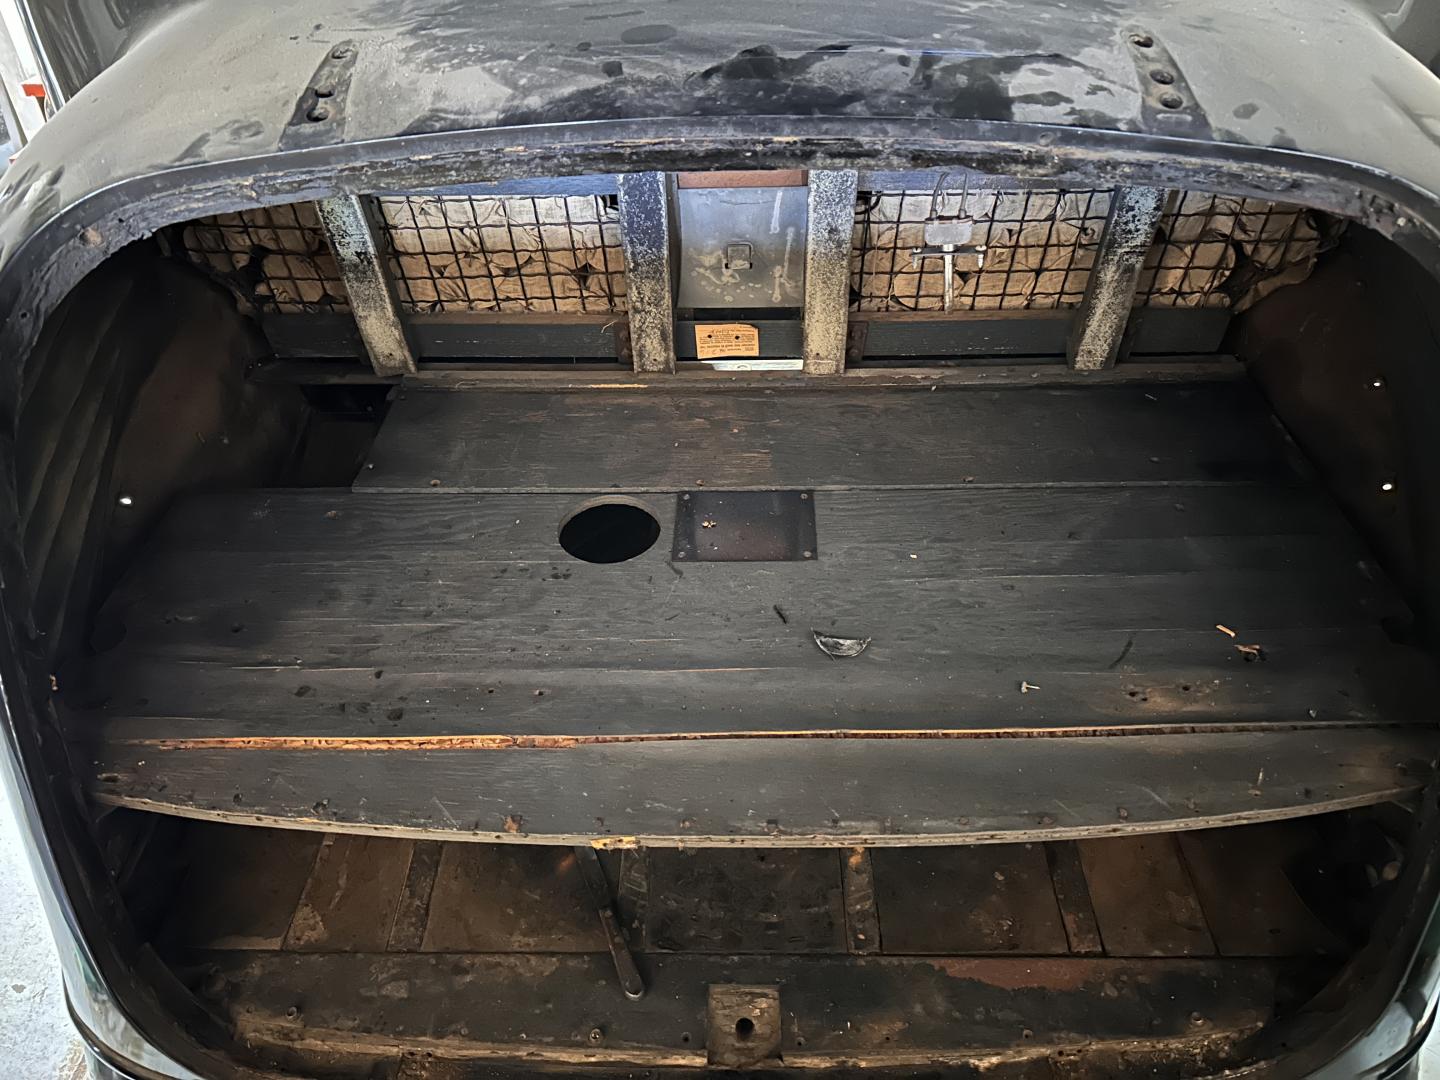
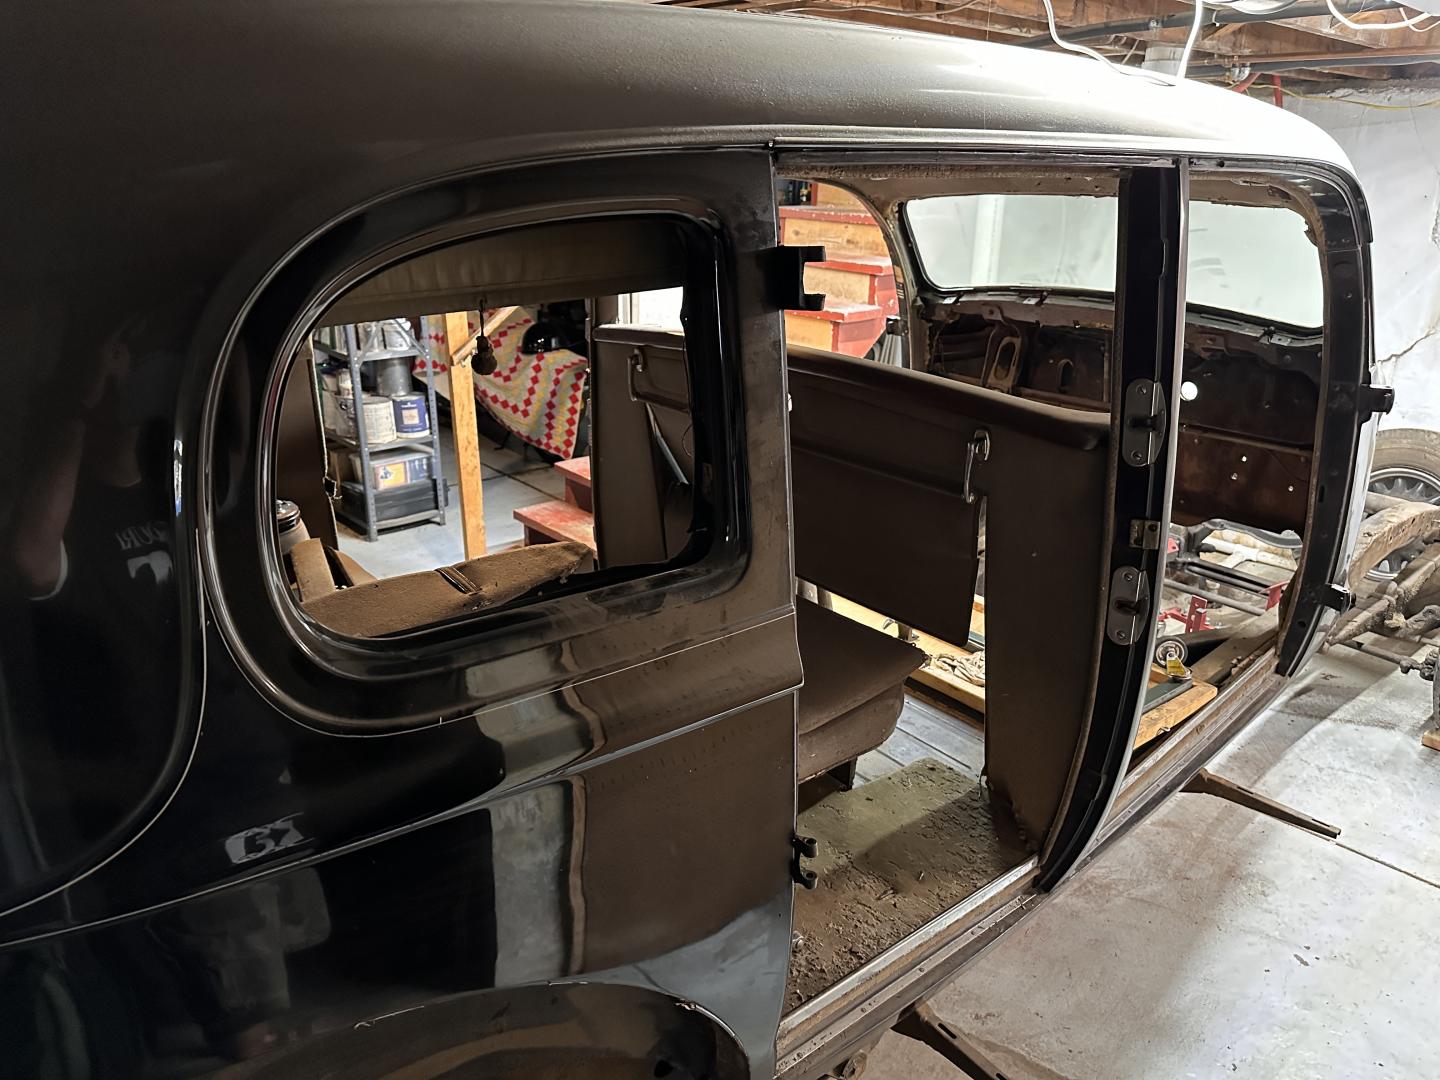
Hi, Chris:
Industrious you are…good progress! I’m at the rewiring point on my Pierce, and some chassis work…so, more of those “many, little jobs”.
You could give Todd Cory (Cory Engines and Parts) a ring and see about his availability. He’s one of the few that still does crankshaft grinding and babbitting, and has done so for Leno. A quick MapQuest shows that you’re about 8 hrs from his shop in Delavan, MN.
His website has a lot of vintage tractor rebuilds, but he’s done Packards and others. Cory is about 30 mins from me, and I’ve had marine blocks there, so know his work. Like any good machinist, he’s in great demand, but maybe give him a try?
-Carl
transMission Complete! I put the finishing touches on the transmission today. I’m very happy with the bearing replacements and overall job. I can turn it by hand with less effort than I originally hoped for. Blasted, MetalPrep, POR-15 TopCoat. Happy Holidays to all!!
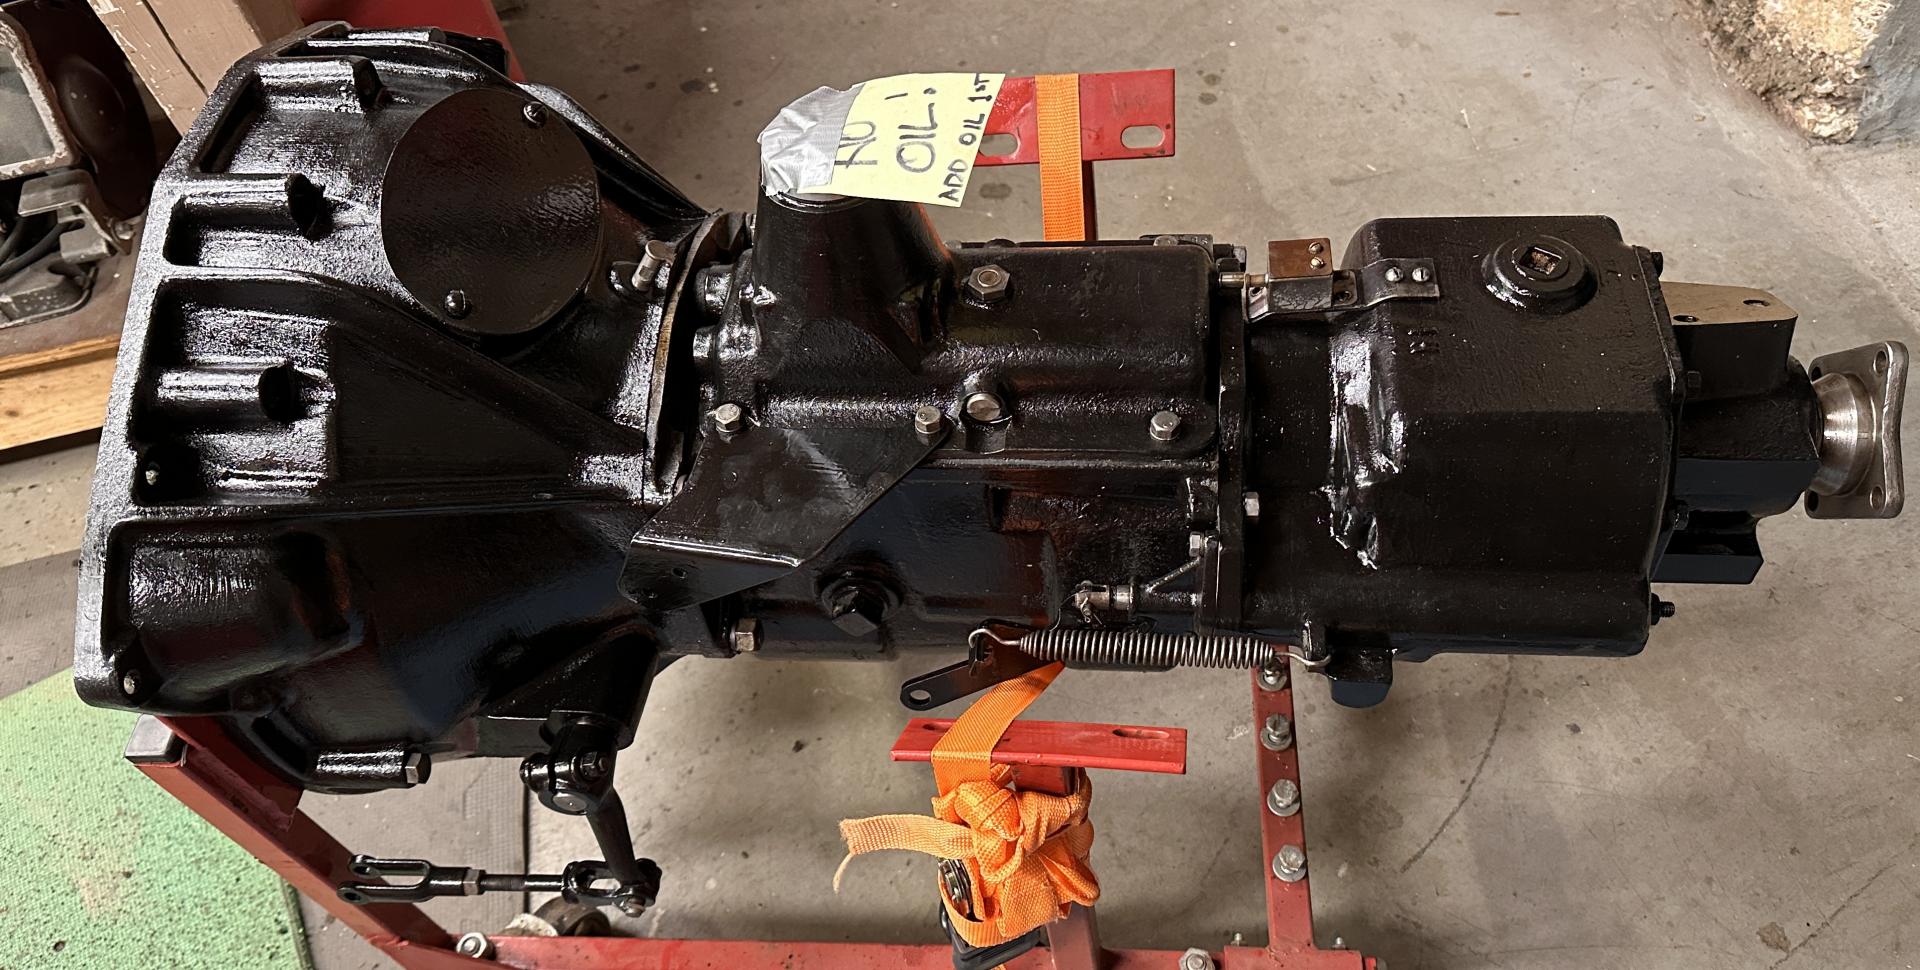
Nice work! Hope your engine build goes as smoothly. Looking forward to seeing another Pierce on the road…
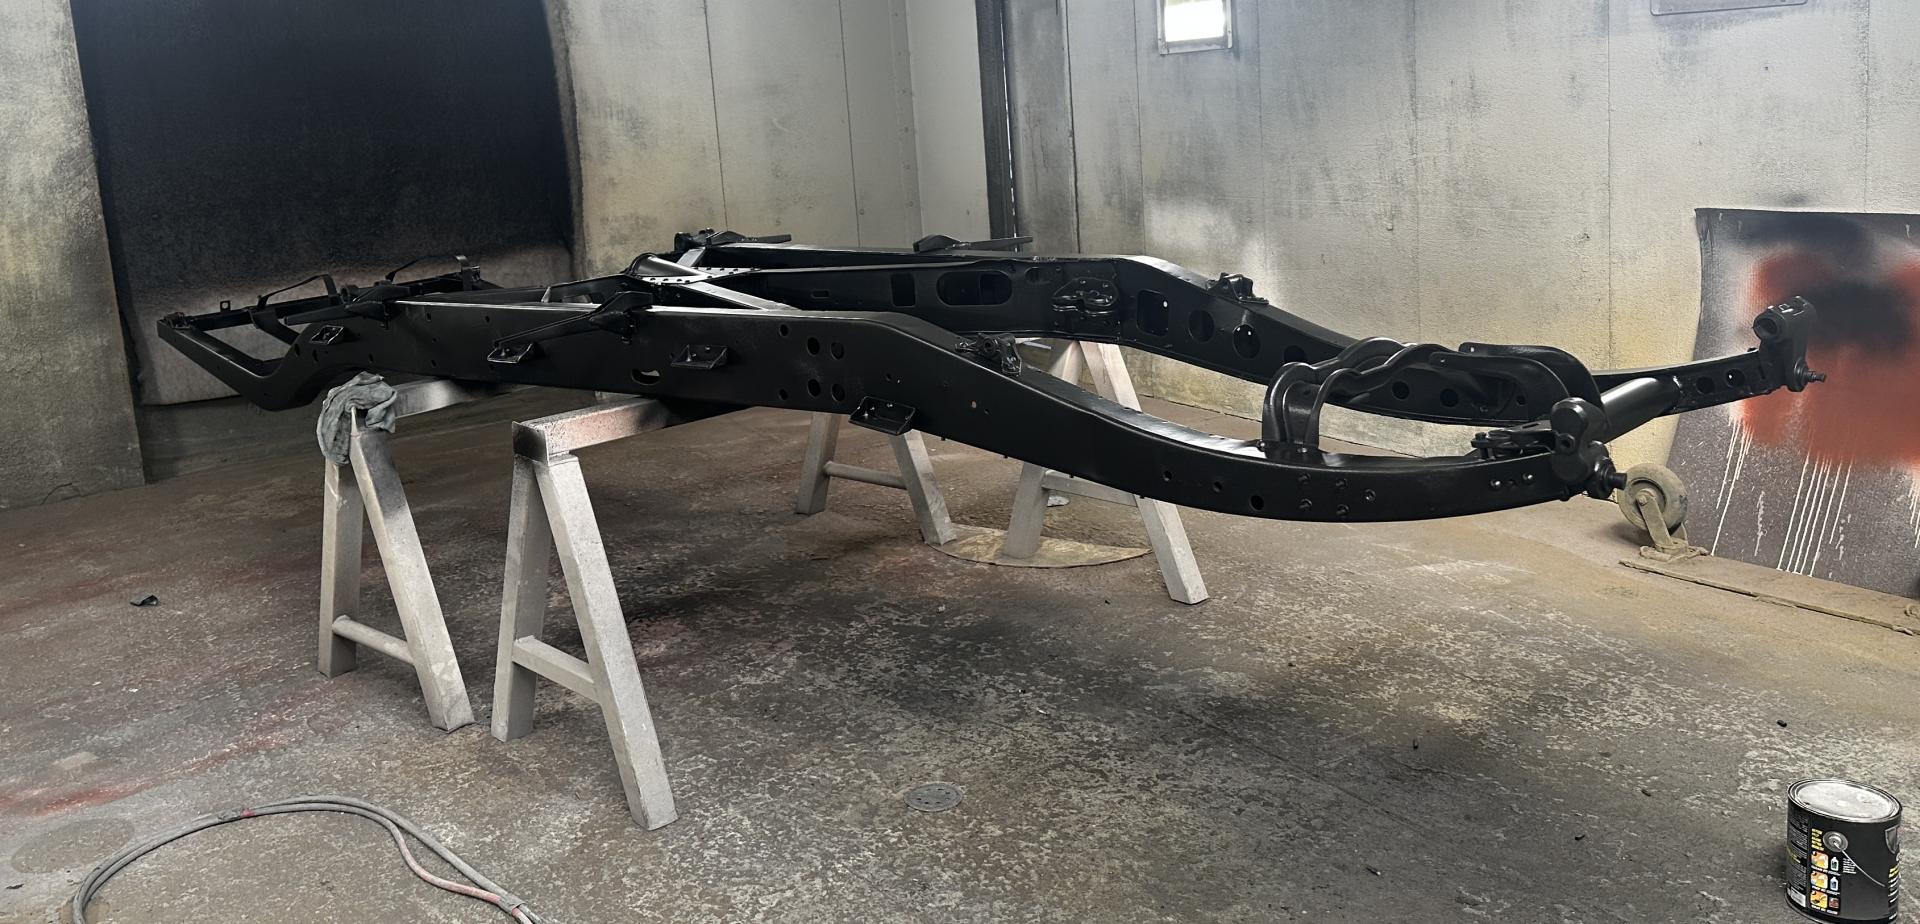
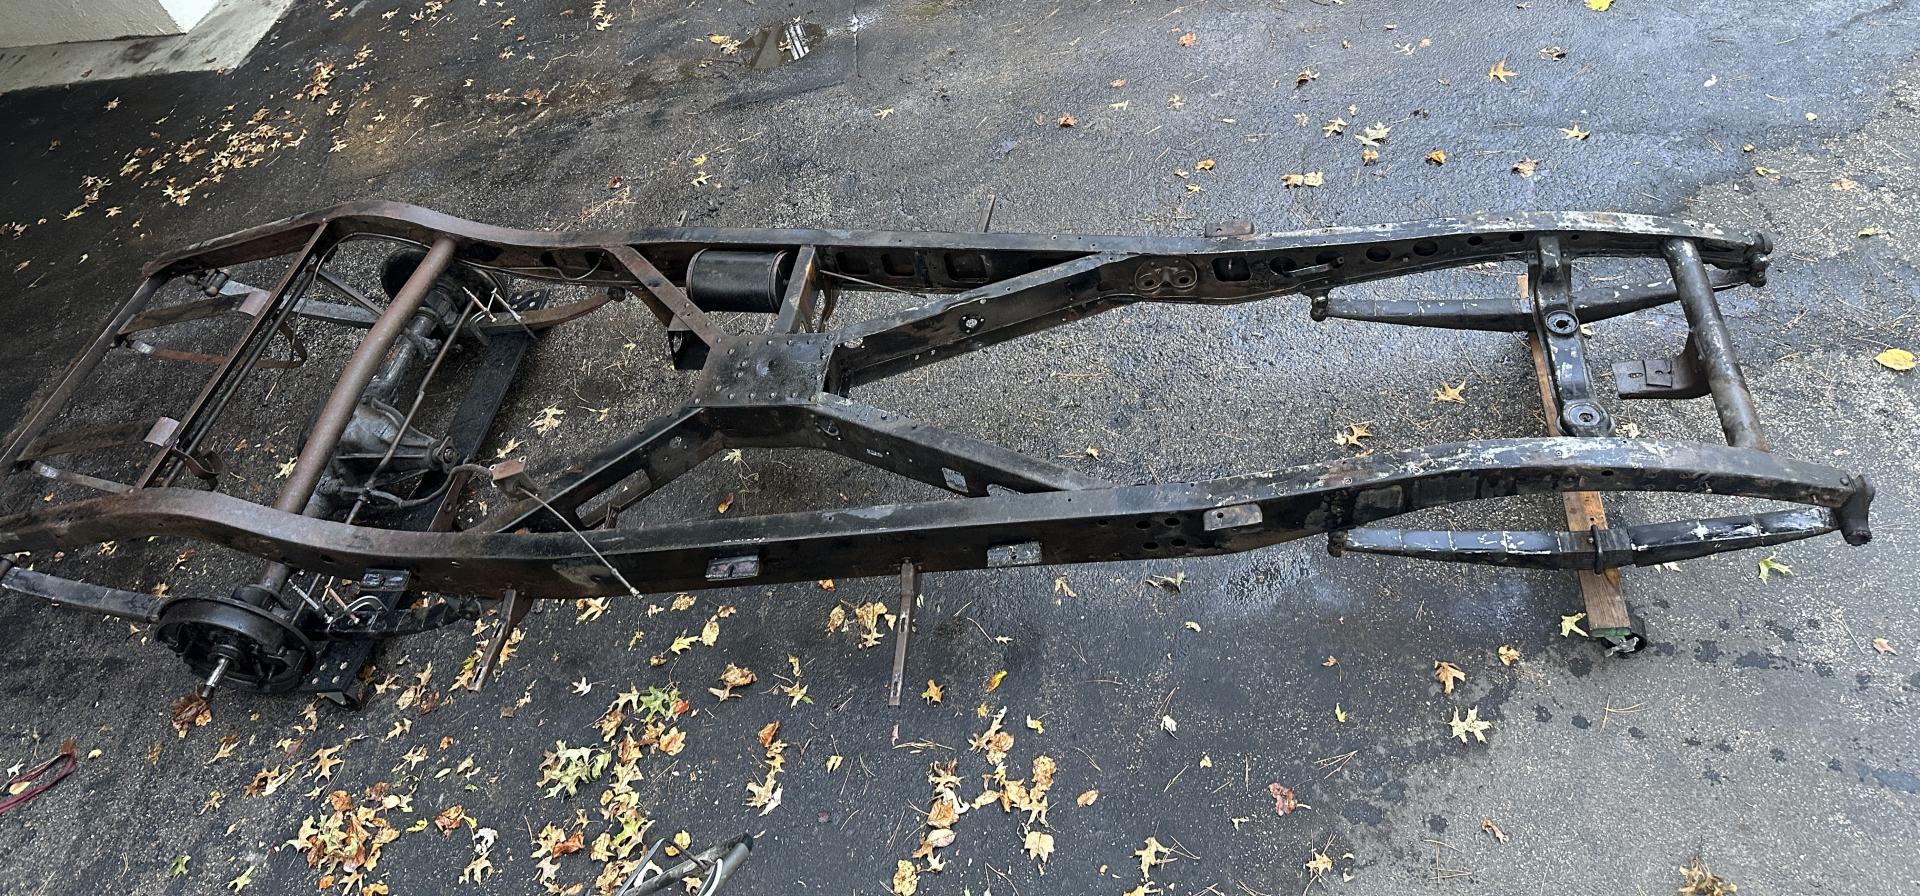
My sincere apologies for my lack of updates. Too many projects going on. But, the good news is that progress has been made. I got the engine back from Lund. Measurements look good. Only had one valve guide that Gene had to source from Leno. Got the frame back from blast/paint yesterday and finished most of the machining on the spring shackle upgrade to needle bearings (I could do a tech writeup on this because I’ve heard of others doing it, but not seen any documentation; let me know if this is of interest).
Chris,
A write up and photos would be great for the Service Bulletin. Our members like to read articles about what people have done to bring their cars back.
Thanks, Dave
