- Home
- About Us
- Join/Renew
- Member Benefits
- Member Pages
- Log In
- Help
- Museum Store
I am starting on replacing the wood in the roof of my 836.
I am using white oak as it is less pervious to water than red oak, it is fairly available, reasonably cost effective, has good strength and fairly easy to work with. It also happens to be the same wood I am using for the structural part of my boat, so it is in stock.
I also have ash, for the Morgans but that seems harder to find locally so I am saving that.
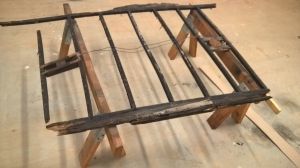
Attached is a photo of the roof out of my guinea pig car. One might note that it is not out of a Pierce but a lesser “P”” car of the era.
“
One of the problems I am facing is some of the roof bows are warped, have damage or are missing. That is where the steel strapping comes in.
Since I am in the steel business, I have easy access to steel strapping that the industry uses to secure 40,000# steel coils. The material is high strength, has spring like qualities, and creates great arch’s. It can also be obtained in long lengths.
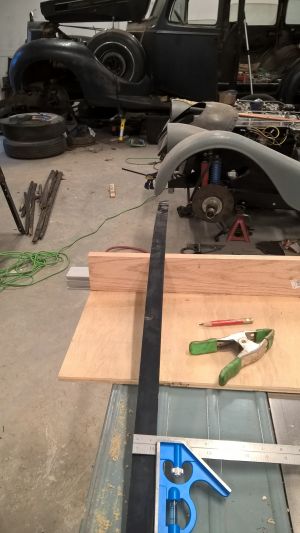
The strapping I have is 1 1/4″ wide and is the same width as the gas tank strapping. You can bend it on itself and drill it, but I wouldn’t weld it. It is a little thinner than the original tank strapping but it is high strength, so I think it will be ok.
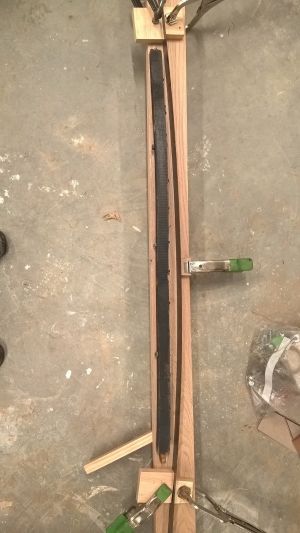
Back to the roof. This is a picture of one of the bows out of my project roof. I has been warped but has the correct ends. To duplicate it I anchor the two ends of the strapping and put an adjustment block in the middle. Then I adjust the strap (via the middle block) until I get what looks like the correct arc., then trace it on the wood replacement stock.
Well, since we are sharing pictures, I am also in the midst of replacing the top picture frame and bows. I am using white ash, it is easy to get mailorder from woodworkerssource.com. I think ash is less prone to splitting than oak. When I did my Packard 35 years ago I switched midway in the restoration from ash to maple as it was more available locally and I preferred it best for working without splitting – all of those countersunk wood screws.
Packards were originally white ash, not sure about Pierce. A Packard expert waxed poetic about the superiority of ash for car bodies, however my dad, who had been in the sawmill industry in Wisconsin said it probably had more to due with the availability of ash in the midwest at that time.
I have been stalled for two weeks before installing the picture frame as I found hidden rot in the driver side longeron below the picture frame that is part of the primary structure keeping the top of the “B”” pillar in place. I am finishing up that repair today.
Jim”
The problem with using oak is that it’s a loose grain wood, and splits very easily when using tacks or nails. Ash is a tight grain wood, much better for wood framing.
This is from the viewpoint of a trimmer who’s had to deal with poor wood in a restoration.
Bill & Jim, your ambition shames me! Great work.
Dave
Jim,
Man you are way ahead of me. Nice looking work.
I thought there were 3 options for attachment of the sides to the bows.
1. Original mortise and tenon. (See Photo).The problem with that is you need a tenoning jig which are about $400 for a good one. Or a lot of hand chiseling.
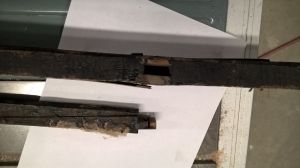
The second option was to do a modified M&T., which is what I am doing on this roof. I used a forstner bit to cut the slot and then chiseled off the waste to make the sides square. This leaves round ends which I think will help with alignment and adhesive.
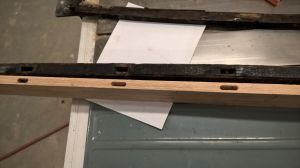
The last option is to do a length wise channel and the regular tenon.
Since one of the roofs I am doing doesn’t have any cross pieces, this method will allow you to slide them to what ever spacing is necessary, so there is no fixed point you need to accurately duplicate.
I plan to use 3M 5200 adhesive which is what they use for wood boat bottoms. It has some flexibility, is waterproof and best of all has about a 7 day cure time so you can assemble and adjust as needed without having to rush to beat the glue setup.
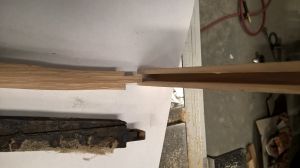
Another point on the 5200. Once it goes together and sets up, you have to destroy the joint to get it apart.
To David’s point, this roof must have a 1000 screws in it and very few tacks or nails. Might try a few tacks before I button everything up.
Whatever wood you end up with try to get quartersawn it is less prone to warping/cupping
Here is the loosely assembled roof. The black stripe down the middle is the steel strapping. This is the fine tuning stage.
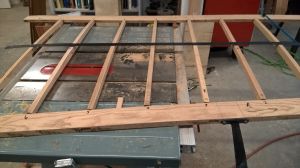
Here is what you are looking for. This is a spot where the strapping does not touch a cross member. Either it is too low or one or the other or both of the bows on either side are off.
The “X””‘s represent low spots”
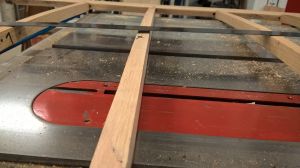
I then check where the bows attach to the side headers. I had 2 low spots along the center and one on the side that will need to be corrected.
Can’t keep up with Jim’s presentation skills which are really awesome.
Bill, thanks and great work. I find this part a bit fun because in my former life I did aircraft surface loft design and generation. Getting a fair loft curve is tricky. To get the vertical profile I ran a datum string line from front to back under the left side sheet metal and measured distances to the string at 6″ intervals then smoothed the curve results on a CAD program and translated the dimensions onto the wood.
I haven’t cut my bows yet, but the measurements on my 845 club seem to indicate that they were all a constant radius from front to back, so I can use the cut from the first to do the rest and just change length. I suspect the factory might have steam bent them all in a single tool and cut to different lengths.
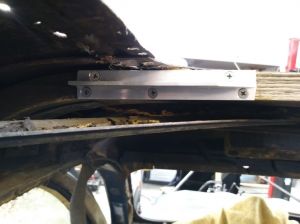
I am planning to use a different option for attaching the bows to get around the retrofit problem of the original mortise and tenon with the longerons already installed. To attach my Packard bows years ago I simply routed pockets into the top of the longerons and mating cuts into the bottom of the bows, but it bugged me that method weakens the structure of both longeron and bow. Jack Guyomar had suggested using a biscuit, and chewing on that thought I came up with the alternative of using 6061-T6 aluminum TEE extrusions – 1″ width with 1″ leg instead of the biscuit. I can screw them into the sides of the longerons and slot the bows. I can then screw through the bows and leg of the tee and lose less strength – admittedly this is gilding the lily structurally, since simply eliminating the finger joints makes the longerons much stronger than original.
I am also using that tee extrusion to attach the front of the longerons to the front rib/bow that is still solid and I didn’t need to replace. The original wood screw attachment is completely inaccessible under the skin. The tee extrusion does double duty to splice across one of the front bow/ribs finger joints that I would have to destroy to find out if it is still good.
Obviously this isn’t how the factory did it – that would require cutting the steel body panels off, rebuilding the wood frame then rewelding/releading the body panels. Since restore means to return to a previous condition, I guess my method is more a local repair rather than a restoration.
This also shows I am using incorrect for the period phillips head screws for the repairs – I’m not trying to pretend this is as original. I could have created something that looked original from surface appearance with very poor structural integrity.
Jim
“To David’s point, this roof must have a 1000 screws in it and very few tacks or nails. Might try a few tacks before I button everything up.”
My comment was directed toward the insert fabric roof that would be installed on a closed car, it gets tacks around the perimeter, although one could argue that staples (which I don’t use) would hold in most woods.
