- Home
- About Us
- Join/Renew
- Member Benefits
- Member Pages
- Log In
- Help
- Museum Store
Hi friends, over there!
For the 2 last year my clutch has begun to drag on my 1930 model B. I thought may be the friction facing had turn out to be worn out or in bad chape. In may 2010 I teared it out and got a professional work shop riveting a new set.
To my surprise I now have problems to to shift into 1. gear or into the reverse without making a terrible nois!!! When in speed there is no problems to shift.
We have used many hours to adjust the clutch without any sucsess.
Could the new friction facing be to thick? Do anybody know the correct measurement?
I am now on my way to tear the clutch unit out again.
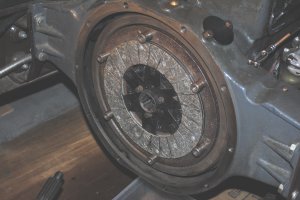
Oivind, my guess is you are correct, the lining is too thick, or if when the flywheel was ground, the top support posts were not ground the same amount, possibly too much. Also, if new clutch springs were installed on the pressure plate, they could be to strong, or their compressed height is too long, thus causing the clutch to drag. I will see if I have any factory measurements in my files. Ed
Edgar is correct. The lining thickness has a dimension given in a old bulletin on servicing the Long clutch. I am out of town and don’t have the issue number. I had the same problem 40 years ago and know of several members with the same. The thickness is critical and thinner than the standard linning used by clutch shops. I had my lining ground down on a Blanchard grinder.
Motor’s Factory Shop Manual (1937) shows clutch facing specifications for 1931 thru 1933 as 6-1/4 x 9-3/4 x .130 inches. My P-A parts list shows 1929 thru 1933 used the same clucth plate, p/n 701005. So, your facing should be .130″.”
Thanks to all of you !
I have the PASB 73-5 which contents the Clutch Service Manual for the Long Clutch (model 29 AM) – 4 pages. There are plenty of adjustment advices and distances but no thickness measurement for the Friction Facing as far as I have observed.
Service bulletin 75-2 page 6 lists the thickness as .130″.
Bill”
Thank you for that important information, Bill. I look forward to check it out!
Oivind
The thickness of the friction facing of my clutch was almost .2″. I now have to ground down the faces to the correct thickness.
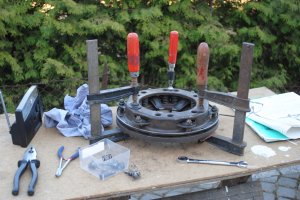
Unfortuneatly I also found that the coverplate (photo) was not even on two different places – downside (see next photo).”
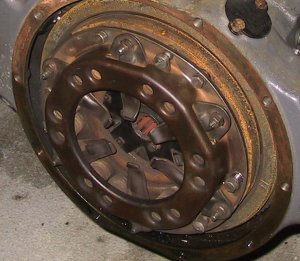
Does anyone of you have some spare clutch parts like the cover plate (only)? May be I can have it straghten but it will most likely never be 100%.
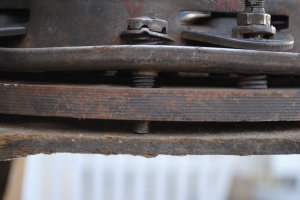
I don,t think I would grind down the face. They may have used rivits too thick, then once it was ground, you may not have much life left on the disk. I would have a new face installed to the correct thickness, and use both rivets and a bonding glue on it. Make sure the rivets set deep enough on the disk. Ed
Now I have enstalled 4 new friction facing with the correct thickness of .130″ – infact I got it free from the shop. The four they installed last year was to thick.
I also disassembled the cover plate both to check the springs and also straitend the stamped steel cover plate.”
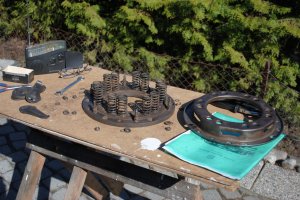
Here is the correct way to assemble the cover plate assembly.
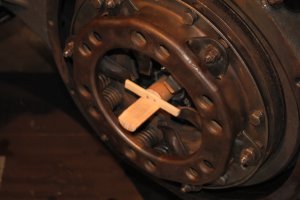
Well installed I made a litte wood tool as alignment fixture to get the wright distance from the end of the splined hub an the 6 release lever tips. This should be 1 1/16″.”
Hi Oivind,
I couldn’t tell from the pictures, but you may want to make sure that the 6 cone nuts that adjust the release levers have sufficient material left (in the right spots) to peen over into the bolt slots and lock the nuts (using a locking punch made from a cold chisel as pictured in the Long clutch bulletin or PASB 73-5).
On my ’33 several nuts had loosened and the clutch would not release properly (and the nuts were in danger of coming off!).
Since I could not find new cone nuts, I took new long brass nuts and drilled a 1/16″ hole thru each face (near the top end), and then installed small cotter pins thru the bolt slots when the nuts were adjusted to the right position.
Best regards,
Bob
Thank you for the information Bob.
I learned about that in the Long Clutch Bulletin and did as described. So far the clutch is now working fine.
Sincerely,
Oivind in Norway
