- Home
- About Us
- Join/Renew
- Member Benefits
- Member Pages
- Log In
- Help
- Museum Store
Dave, Jim:
May I suggest using a Nord-Lock washer? These are superior to a split ring or toothed lock washer. A bit pricey, but worth it.
http://Nord-Lock® Washers https://www.mcmaster.com/Nord-Lock®-Washers
@Karl – the one’s from the PAF are for a ’33-35 car. Luckily, Mr. Cislak had one set remaining for a ’32 and that’s the last of ’em. I now have them in-hand. I can see that this was not a simple part to make. +PROGRESS+
<p style=”text-align: left;”>Since I am relatively new to the PAS, I don’t have the long-term attachment to the old style of The Arrow. I think the new format is terrific and conveys the style and elegance of the Marque. Thumbs-up from me. 👍</p>
@Karl, not throwing in the towel, yet. It took four hands and close to six hours to puzzle the one headlight reflector mount back together. Used a band of Gorilla tape to bodge it together; not the sort of repair that I do, every temporarily.
I will check into replacement castings, as suggested – thanks for the lead. One headlight to go, yet. Work is cutting into my personal time, so I only have evenings to play.
I didn’t realize the the two dome light bulbs aren’t wired in parallel. The one wired to the toggle switch is working now – yay! Need to get another bulb and connect up the new battery cables to see if the rear door light works.
So much to do and so little time 🤯.
OK, so I removed the fan mounting assembly for another look. There are two bars that I figured are for reinforcement on the front of the hub mounting bracket. The hub bracket has ‘6’ holes, two on top and four on the bottom. To get the bar to line up with four holes on the hub bracket, that puts the bracket in the ‘high’ position – aha! To put the bracket in the low position, requires the two top bolts to go through the bar, but +NOT+ into the top holes of the hub mounting bracket. Seems like a goofy arrangement.
Now that I have this in the lower mounting position, perhaps I can get a couple of belts of the correct size?
@William:
Excellent, thanks. Ordered one today.
👍👍
@Karl:
Nope, only four holes on the bracket. I had the entire assembly off to install Cislak’s sealed fan hub. I ordered a couple of belts 1″ longer, Dayco 17560 (13A1420), hopefully that’ll do the trick. If not, I will have enough extra belts here I can start my own belt warehouse. Presuming that works, I will buy a spare.
My car ain’t gonna be towed back to to the hotel with fan trouble and I am trying to do everything I can possibly do to ensure it’s not towed back for nuthin’ else, neither. Been there, done that.
=Adam=
Hi @Karl:
Thanks for the help on this. Until now, I never knew there’s a decoder ring for belts.
At first I purchased three 3550’s – two to install and one as a spare to keep in the trunk. Then I found the number in the resource directory and on Gates’ website they listed a superseded number, TR22534, so I ordered those Green Stripe belts, instead, which are too short.
I installed the two 3550’s and with the fan eccentric adjustment at the minimum distance, these belts were a mutha to skootch onto the fan pulley. I did it by hand rotating the fan and sliding the belts on. They’re on, but tighter than I’d like them to be; not in love with it. Dayco makes a belt 13A1420, 56″ long x .53″ wide. Or, a 13A1410 that is 55.5″ long.
Thoughts?
Nice Jim!
Always thought a vacuum bag was for the filter/collector in a vacuum cleaner. Shows what I know (knew).
@Jim Fredrick,
Check your email. I just sent you a lead with photos.
=Adam=
Hey, thanks, everyone. Thrilled to have this car. @David Coco – nice color combo.
First up, I removed the oil pan. This was such a fun task, atop the creeper, layin’ on my back. When the engine work was done, the pan gasket was gray RTV’d on – thank you 🙄. A lot of time with a putty knife and some words for whoever installed the pan, and it was off. Didn’t look bad – no real build-up sludge to speak of.
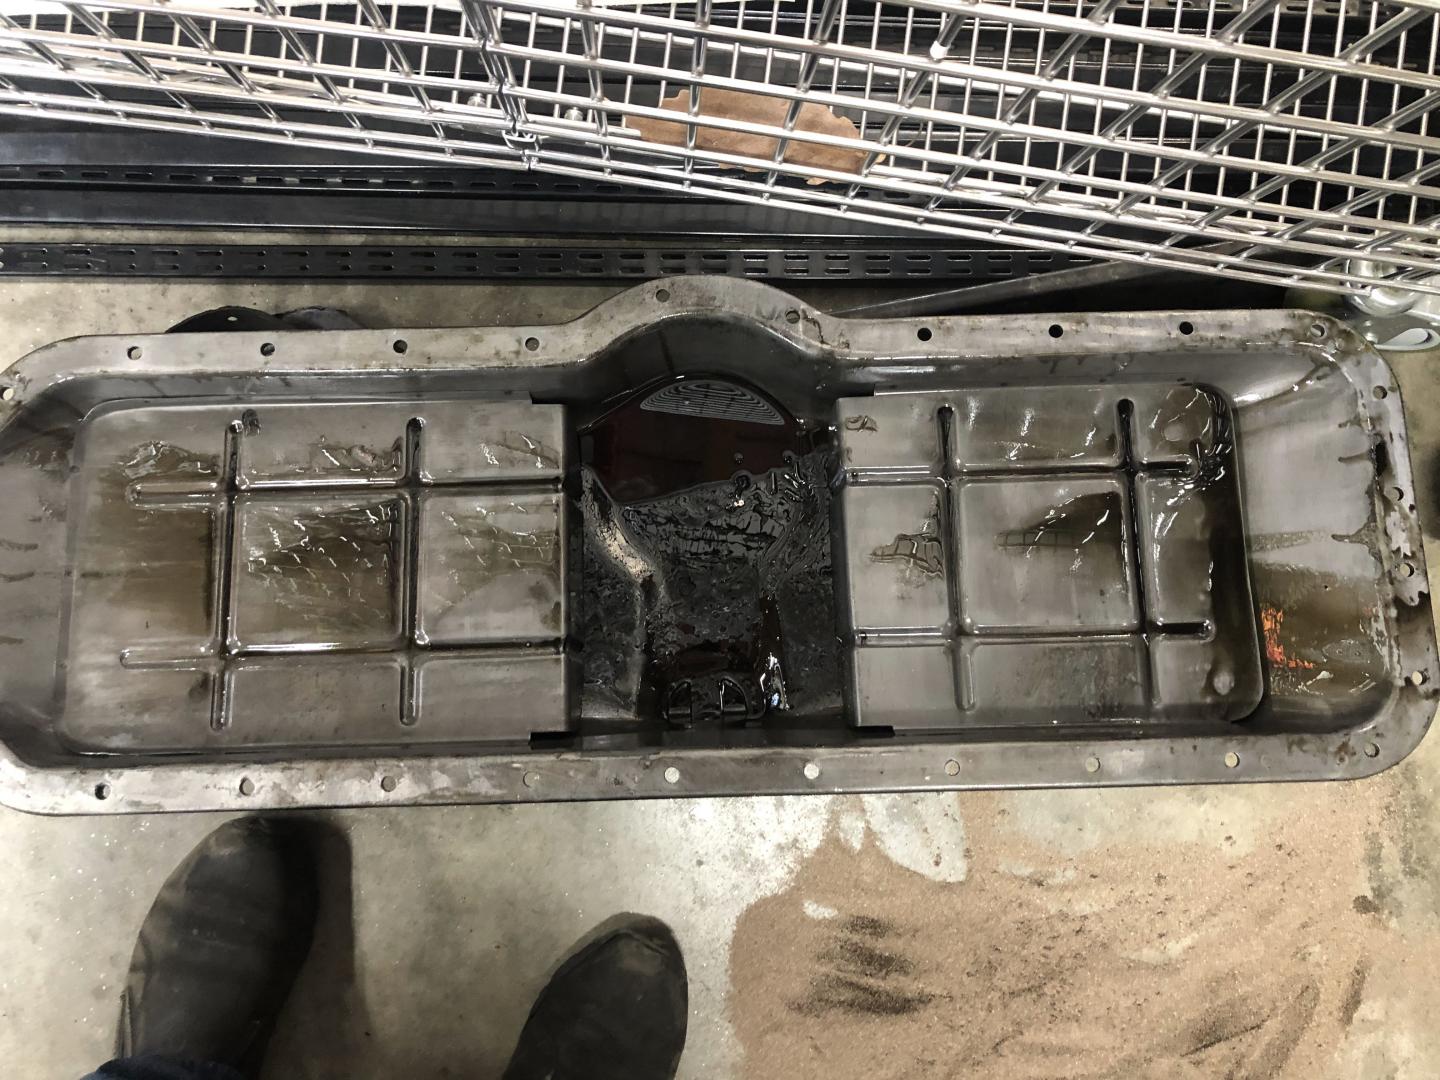
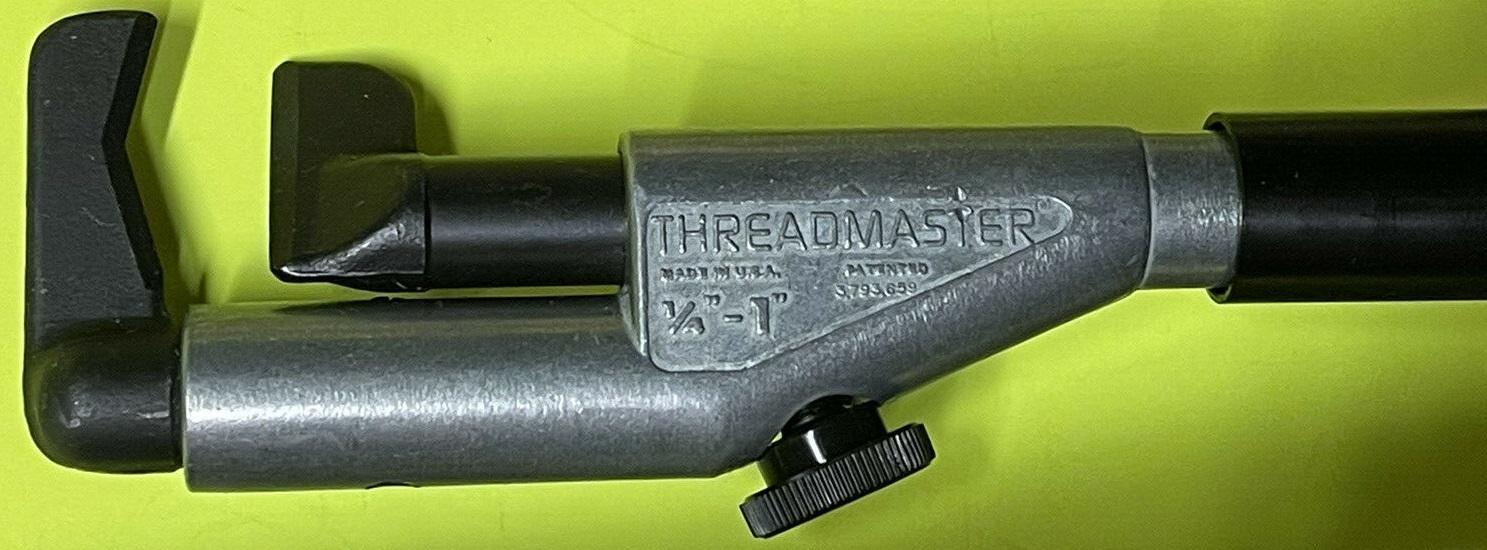
Wire-wheeled all of the pan bolts and used one of my favorite tools to reform threads on a few of the bolts. THIS is the best thread reforming tool ever. I bought one over 40 years ago from the company that made them in Pasadena,CA – and they haven’t been made for close to 30. They turn up on eBay from time to time. Trust me – you’ll thank me every time you use it. 😘
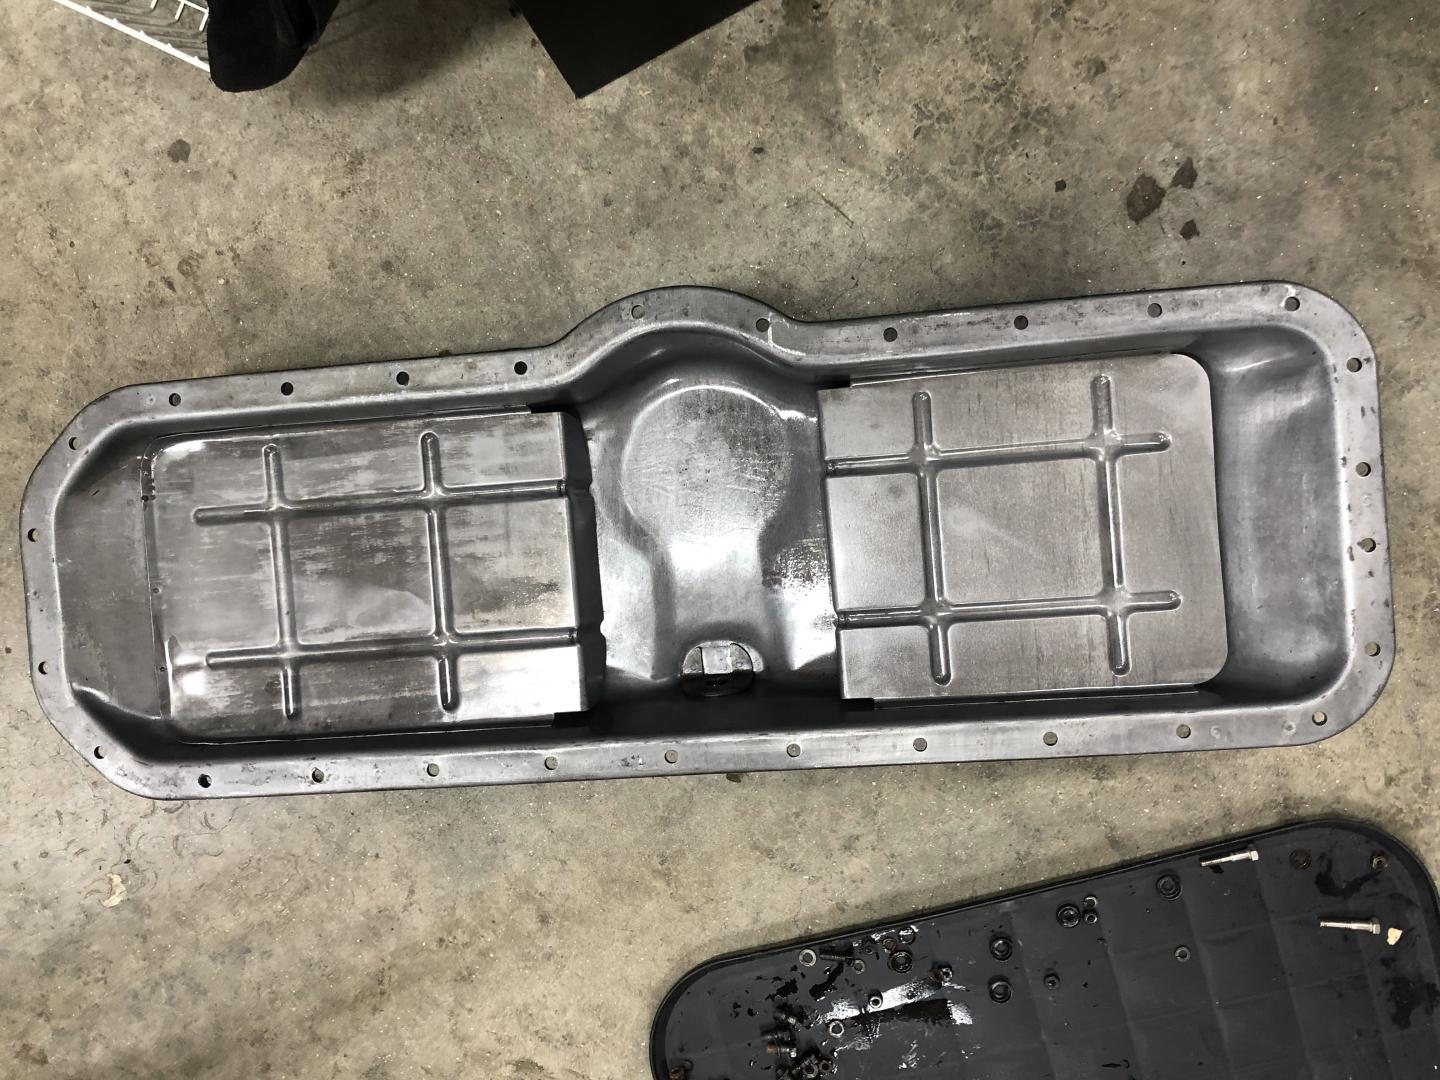
I scrubbed and flushed this in my solvent parts washer best as I could. Talking with @Ed-Minnie, he suggested removing the windage trays for a thorough cleaning. So, I gave it to a friend of mine that will broach out the spot welds, clean ‘er up, plug the holes, weld and repaint the pan. Not a big deal, as I ordered up a complete gasket set from Olson’s plus a second pan gasket, and that’ll take a week+ to arrive.
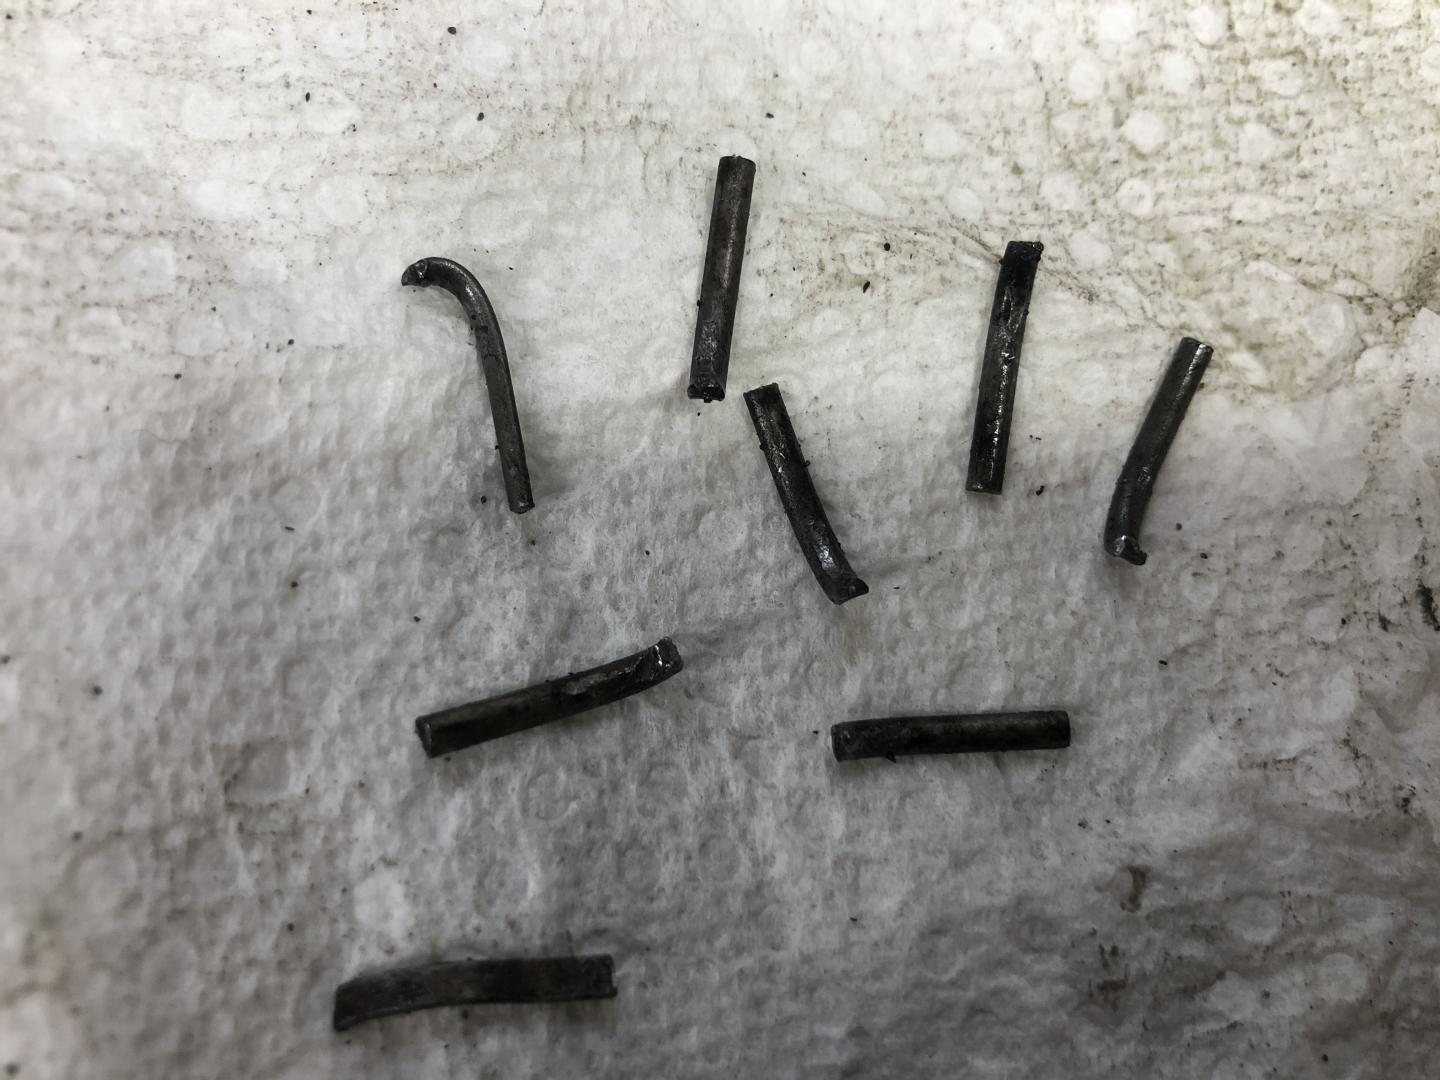
Now, I was surprised [not the delighted kind of surprise] to see these cotter pin remnants in the bottom of the pan 😖. I am not thrilled with the way the cotters are installed on the rod bearing caps, they’re not tight. So I am going to replace them all to ensure that they fit tightly. These bits look to me like the part of the pin that was clipped off. I don’t see how these could have sheared off.
I removed and cleaned the oil pickup screen. This is the +before+ photo.
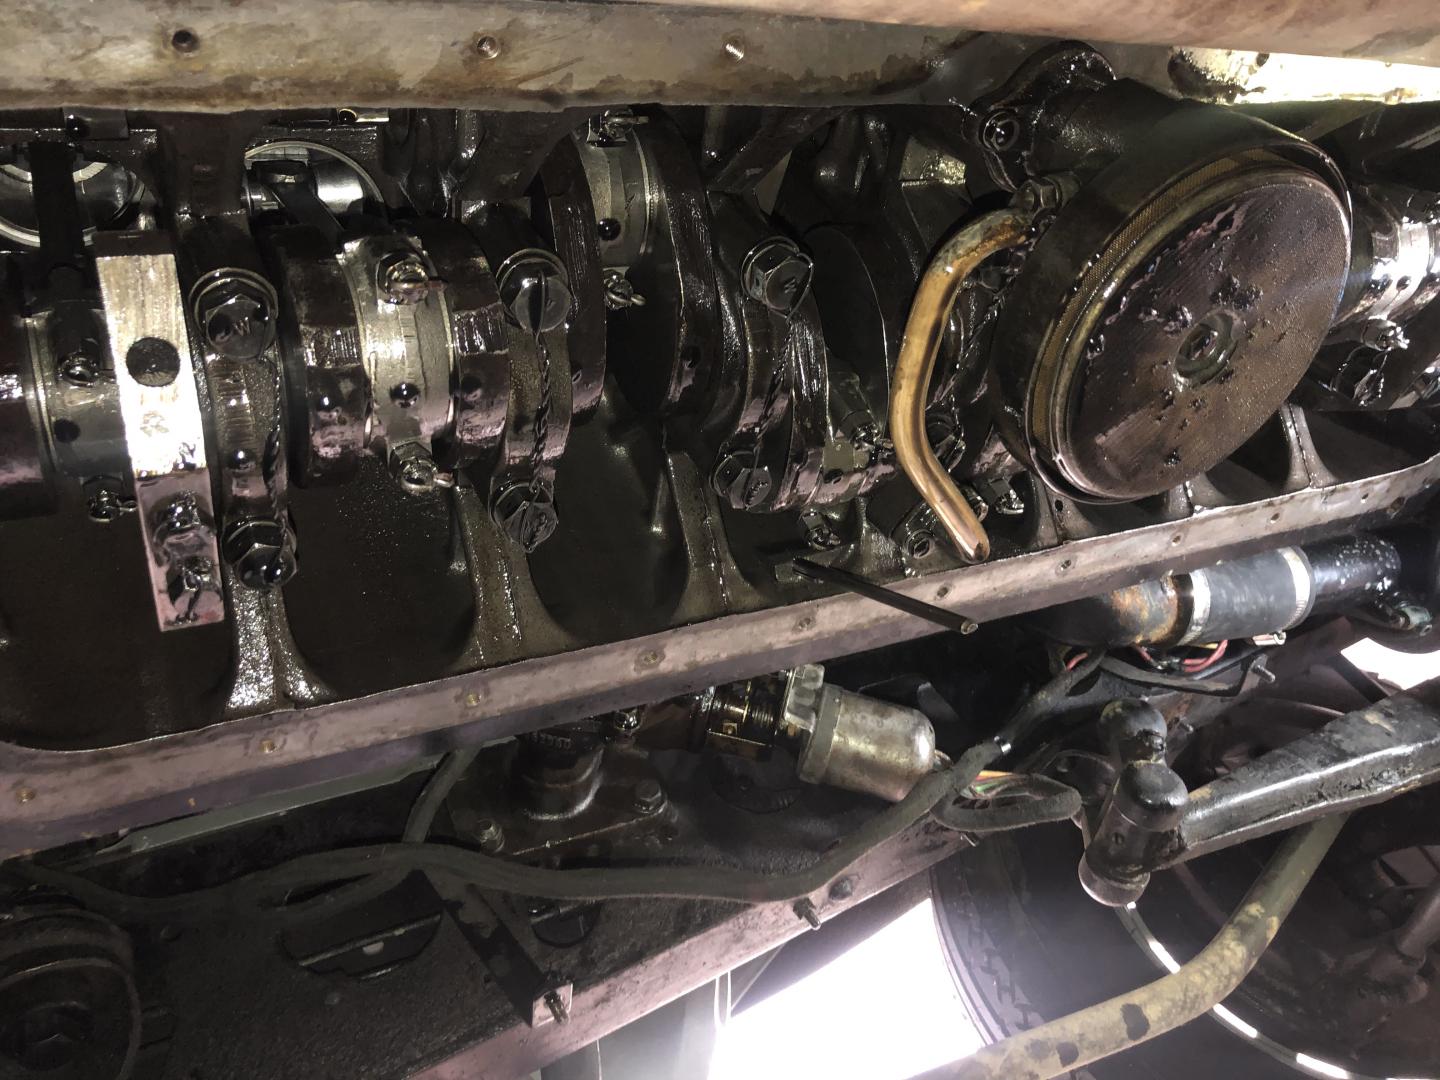
The steering box has oil in it – that’s good. The fan hub was dry, so I added engine oil. I’ll get the improved version from Cislak. Cleaned and oiled the air filter screen. QUESTION: Is there a suitable paper filter replacement for this oil bath screen?
I’ll service the transmission and differential next. Gotta get a fuse for the clock and see what I need to do to get it running. I guess I could pull the distributor and carburetor and bring to Cislak while I am waiting for the pan gasket. Not like I can run it, for a couple of weeks, anyway. @Jim-Chase pointed me to his excellent three-part treatise on vapor lock and how to mitigate it most effectively. I have a new Carter electric pump, gauge and Holley pressure regulator to fit. @John-Cislak suggests installing larger diameter fuel line from the tank to the pump. I am not sure I’ll get to everything before Hershey, but will do as much as I can. I could work with greater efficiency if not laying on my back. [Say with Bahstan accent] “Dis is +fuh da burdz+.”
I got +TWO+ too.
My new-to-me ’32 has an Optima battery in it. Much to my amazement, that the last date code sticker on it, none of which are punched-out. is ‘99‘. Whoever heard of a car battery lasting 20+ years? This thing should be in the Optima museum. Yup, still sarts the car.
Thanks @DaveW Looking forward to the P-A experience.
=Adam=
@JimC and @DaveW – I bought the ’32 54-Club Sedan that was advertised in the Emporium, recently. Spent a good bit of time with the seller on the phone, email and photos. I flew to Chicago last weekend to see the car in-person and drive it. As a comparo, there’s a ’33 V12 Club Sedan on offer in Wisconsin. I drove there to check it out and take it on the road. Nice car, but I like this particular ’32 better.
Photos: https://drive.google.com/drive/folders/1-T2JaLRNc4oOru2c6moE9gEFTaAZU-MR?usp=sharing
The ’32 is a nice car and surprisingly, there weren’t any suprises – yet 😏. I’ve learned to never buy a vehicle from photos – unless I’m the one selling, then my photos are detailed enough to make a reasonable assessment.
My initial plans are a routine service and any things I might see that I can do so that when (hopefully) I’m at the National meet, I will have none, or minimal issues during the week. Detail the undercarriage a bit. Maybe the engine compartment a tad. Or not. The water and fuel gauges definitely need repair – they ain’t workin’.
Where can I find or purchase a parts manual?
@Jim Chase – I will give a go at making the fuel and water temp gauges operational, as original. Maybe put in an auxilliary water temp gauge under the dash, as a backup. May need some guidance once I get into it. Ya… I bought a Pierce.
Reviving an old thread, here…
Back when I was actively restoring vintage tube radios, jukebox amplifiers and tube Hi-Fi equipment, I learned of a couple of products made by Caig Labs. The first is DeoxIt. This is a unique contact cleaner that removes oxidation. This stuff was the magic bullet on irreplaceable late 20’s and early 30’s carbon volume controls that were noisy and scratchy. 30+ years later, these still work like new.
After using the DeoxIt, then I apply the DeoxIt Shield. This improves the conductivity of the connection and keeps further degradation from occurring. A tiny bit goes a long way. What’s different about these chemicals, than Stabilant 22 is their lubricating qualities makes them better in environments where the contact has to be mated and unmated or if there’s movement or vibration present. Further, when the connection is unmated, and re-mated, there’s no need to reapply the DeoxIt Shield, which is different than the Stabilant.
Caig also makes a range of greases and marine greases with unique properties, although I’ve never used any of them.
=Adam=
@David & Diana Stevens – thanks for the insight on the S-W braking system, Dave. I just figured that all drum brakes on early passenger cars were marginal – they have been on any of the cars I’ve had previously, compared to modern, of course. As a side question, did racing cars of the era have a system like the S-W, super soft linings, or just lousy brakes?
On the worm drive, when did Pierce move away from ring & pinion? Was the ’33 worm drive a one-year change, then back to a conventional rear end?
@Jim Chase – thirty years !?! Yikes – time’s a wastin’. The kick shackle, on the ’35 Packard I had, I think that was called a ‘trunnion block’ – the setup with 4 springs on it, no?
Thanks, everyone, for helping to educate a P-A +noob+. 😏
=Adam=
@Bill, any idea what the rationale was to use the worm drive differential on the ‘33? The ‘32 (at least the model 54) had a conventional final drive. Were there leftover parts in the stockroom to use up?
@Jim, does the S-W per brake setup work better or have advantages over a vacuum booster? I had a ‘35 Packard with vacuum assisted mechanical brakes and they worked pretty well.
Ah, very interesting. Thanks @Jim.
Were there any other makes that used the Stewart-Warner power brake setup? Studebaker, perhaps?
=Adam=
