- Home
- About Us
- Join/Renew
- Member Benefits
- Member Pages
- Log In
- Help
- Museum Store
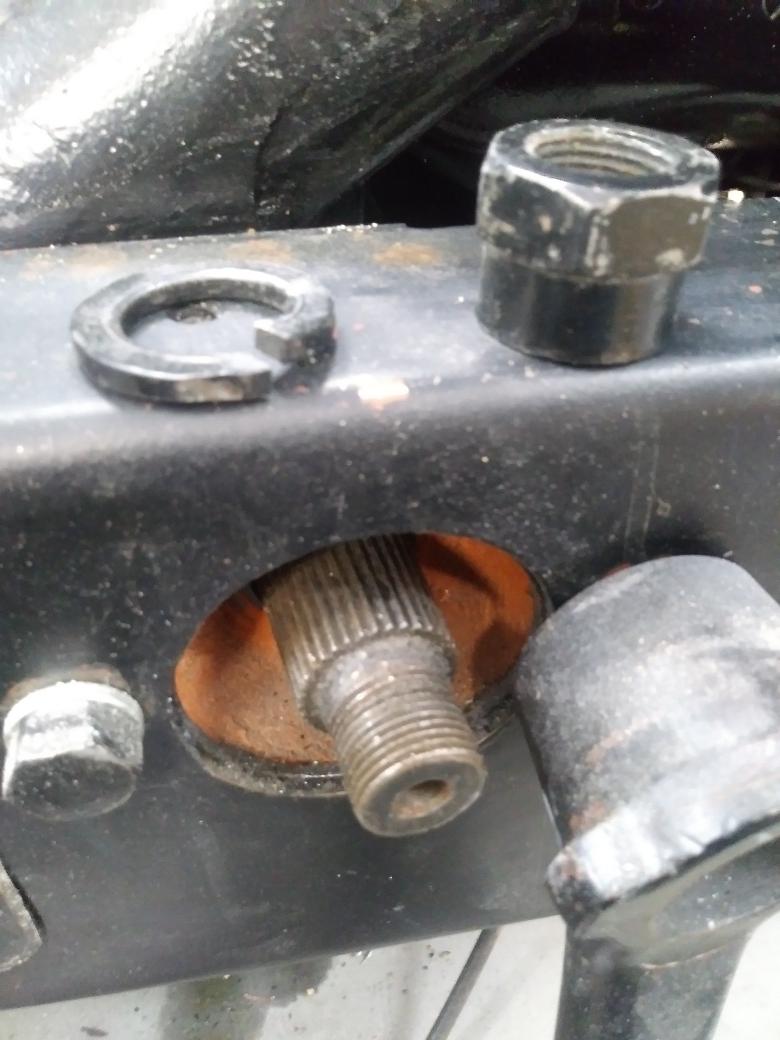
Interesting, both the Nordlock and the original bent washer that wraps around the Pitman. Presumeably my ’35 had this originally.
I have never seen one of these, not that I have had much reason to look. I assume they are not available and missing on a lot of cars.
This looks like something that lends itself to computer controlled laser cutting of the flat pattern. It could be bent in situ after that.
I have had several other pieces laser cut for my Pierce so far at really inexpensive cost and currently getting a quote for several bits to make grille louver hinges and links.
Do you think there would be interest in making a short run of these?
Great, thanks!
I think my ’35 with a Ross steering box is a similar arrangement, there is no provision for a cotter or grooves in the tapered spline to hold a toothed bend washer. I don’t know if original, but mine has a split ring lock washer.
I am in the same position, not sure how much to torque. The 1948 MoToRs manual just says to make sure the nut and lock washer are “tight’. Of course with the tapered spline it is very challenging to remove the arm with a puller after being heavily torqued. Split ring lock washers do not provide any resistance to loosening when flattened, the teeth can only dig in to resist loosening after the nut has turned enough for it to unflatten. This may be enough to keep the pitman engaged in the splines and start warning something is amiss from clunking and before disaster – maybe not.
My plan is to use a new grade 8 split ring washer so the teeth don’t blunt when the nut is reversed and use Locktite 242. Locktite is considered more reliable than split rings. I am thinking of doing around 70 ft lbs torque but in the end will do it more by feel.

It is more complicated, as the actual dimensions for any given size were not standardized. I found that Lester 700:17’s were small enough to fit in my Packard sidemounts, Denmans definitely not. I assume that the Lesters conformed to the original size put on the cars at the factory, perhaps less expensive. Coker used to publish the actual dimensions of each tire in their booklet, but I haven’t seen one in years. The diameter of the Lester was something like 1″ smaller and the width of the tread was about 1″ smaller than Denman. The narrower tread of the Lesters also behaved better on my Packard with less rut following but probably didn’t last as long. I think many of the tires are no longet produced. Perhaps a call to Coker could get dimensions of currently available tires.
Great point! Thanks, didn’t realize that. On my Packard the latch bolt is locked when the inside door handle is in lock position, so you can’t close the door. The Pierce is more convenient in not having that bang when someone inadvertently pulls the handle back to lock when closing the door, and the doors can be locked from the outside without crawling over the back seat to lock the rear doors and slide to exit out the passenger side to lock the drivers door.
On the other hand, the Packard has positive confirmation that the latch is fully engaged when you pull the handle to lock, important to me for suicide doors.
A bit concerned on my Pierce, I have gone through 4 iterations now to get the doors aligned and one rear (suicide) door still requires a bit of a push to fully latch.
Can you unscrew the dome light fixture and pull it down enough to access the connections? It may be corrosion of the wire connections or the light sockets. There should be a ground wire to the fixture. There were a couple of comments a few years ago about bad connections to the dome light causing enough heat to char the top wood framing and could have easily led to a fire. If you can’t solve it it may be best to disconnect it.
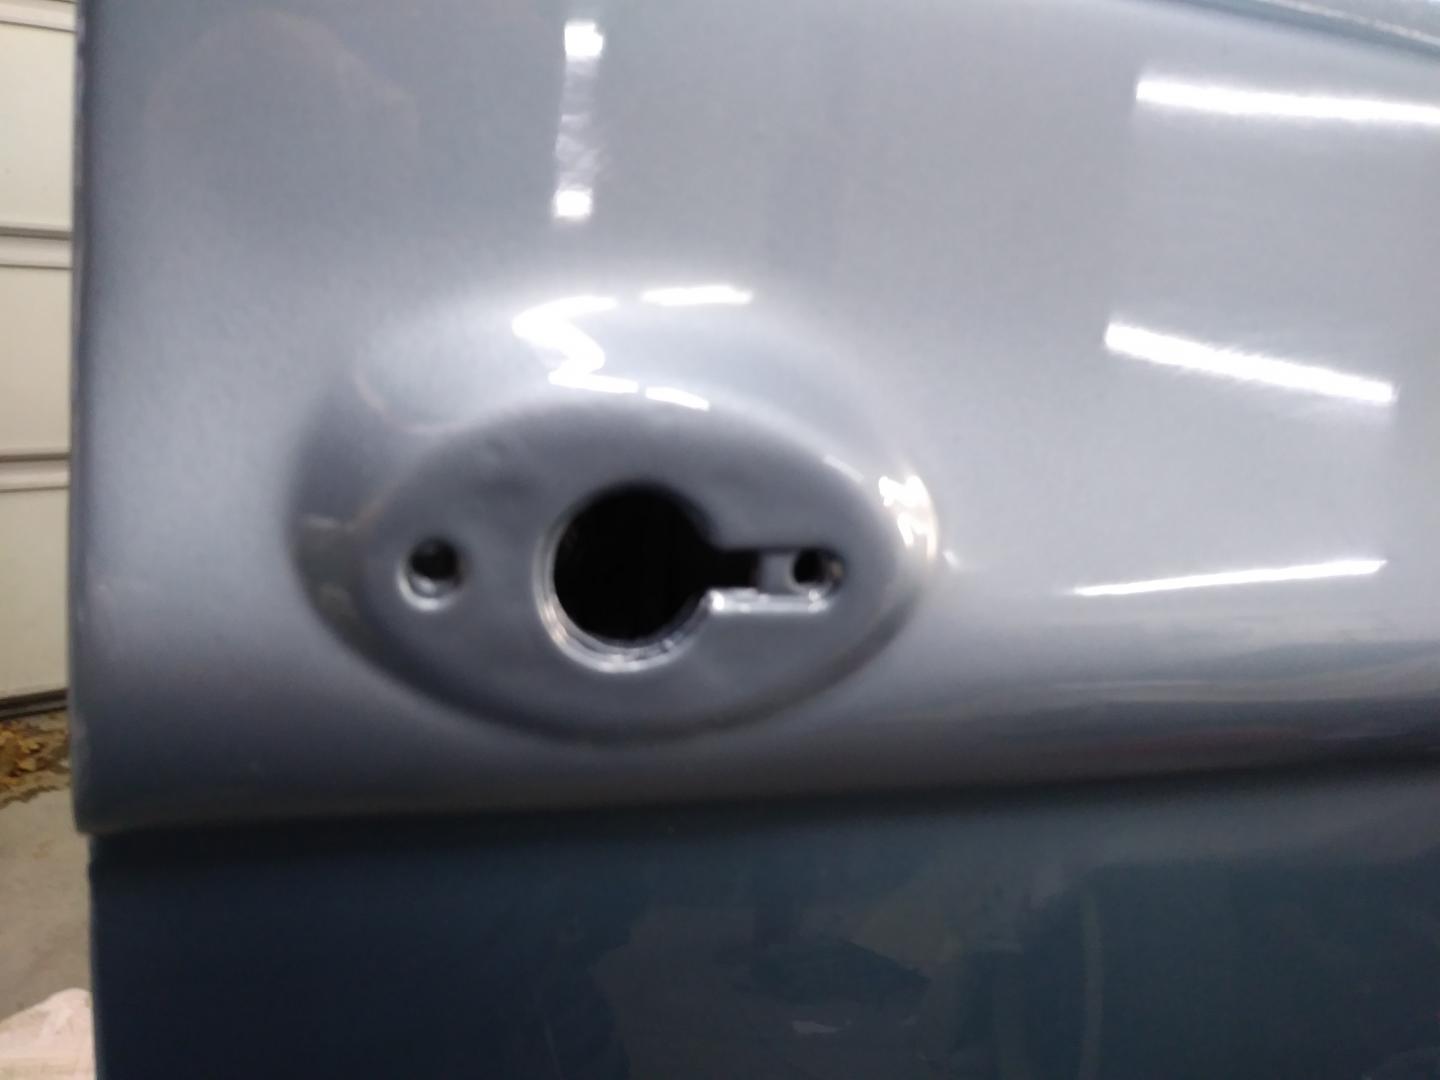
Dave, again mine is a ’35 so your results may vary, but on mine you can’t even get to the threads from the inside without removing the wood framing. Here is a close-up of mine from the outside showing the threaded backup plate welded to the inside door panel.
I happen to be in the process of installing my door and window hardware now.
Is there a possibility if doing this from the outside with a helicoil or oversize screw? On my 35 the screws are threaded directly into the door panel, removing both allows the outside handle to be withdrawn and a clear shot to the threads to drill and retap.
That’s the radio speaker grille that goes between the sun visors. I just had a new one created out of laser cut stainless and aluminum sheet, domed by putting it in a vacuum bag. Is the middle section painted brass?
Congrats to all involved, a lot of excellent work well appreciated!
The biggest problem was compound curvature of the smoking vanities. Even with veneer softener and the vacuum bag the veneer won’t drape completely, so it had to be snipped at 4 corners and let it overlap under the bag. The first try was pretty bad and had to pry and sand off the veneer for a second try. The overlaps at the slits sanded out very nicely but there are a couple small patches visible on really close inspection.
It would be interesting to know how it was done originally (steamed?), as well as how these pieces were carved in production (traced mill?).
Beautiful car!
I found some cheap plastic tarp clamps that I could grab the insert to stretch within a 1/4 inch of the edge of the channel. This was handy for being able to trim the insert very close to the edge to see where the tacks should go. I had tape at the outside edge previously marked to show where the tacks needed to go to avoid the sheet metal between oval holes and the previously pilot drilled nail strip holes. I did mine in the winter and I was very slow, so I hung an infrared heater above the car to keep the top warm continuously.
I wouldn’t, by faulty memory years ago I was setting the gap on my Packard to a wider value and kept burning the points. It runs much better on the recommended gap.
That is probably what I will do. McmasterCarr is a source for spring/piano wire. Maybe Hobby Lobby, hobby stores used to carry different gauge piano wire for making model airplane bits like landing gear, but they seem to have disappeared in the last decade.
Robert, thanks for doing this. I don’t think these are still on my hood and I don’t remember seeing these in my boxes of parts. I will have to hold off on these until I can deal with the hoods.
My ’35 hood is semi buried in the attic and I can’t see the inside at the moment to see these springs. Is their purpose to be just a friction source to hold the door in any position or are they doing an over-center to keep the door in either fully closed or fully open? My doors have friction and no apparent over-center action.
I am wondering if someone has a picture they could post of one of these springs to see the configuration and dimensions?
I have ordered small batches of 10 of various springs for my Pierce if I can find a close enough facsimile, or if nothing workable custom springs can be done for a small batch with a setup charge. The last time I had a special spring quote it was something like $700 for maybe 10 springs, I managed to hand wind them myself but they were small gauge wire.
Peter, thanks for the heads up. It looks like a single bidder got the 2nd one for the starting bid of 300.
The link to the other lens says it is 7 1/2″ dia, smaller than ’35 Pierce unfortunately. There is yet another listing for a multibeam for $87 but it is only 7″. Oh well. Fortunately I am only worried about spares and hope the winning bidder was someone who doesn’t have a glass lens.
That’s great! What kind if condition is the car, and what are your plans? Drive it as is fixing what needs to be fixed or some level of restorion?
Have you determined the gauges aren’t working?
I have been using the stabilant 22 on some of the semi permanent junction block connectuons on the Pierce, I have no idea if it is just over egging the pudding.
I did find the deox but for a different application – the pot on my 40+ year old Marantz turntable speed sync control. It wouldn’t hold speed, but a few squirts helped. Thanks, Jim
