- Home
- About Us
- Join/Renew
- Member Benefits
- Member Pages
- Log In
- Help
- Museum Store
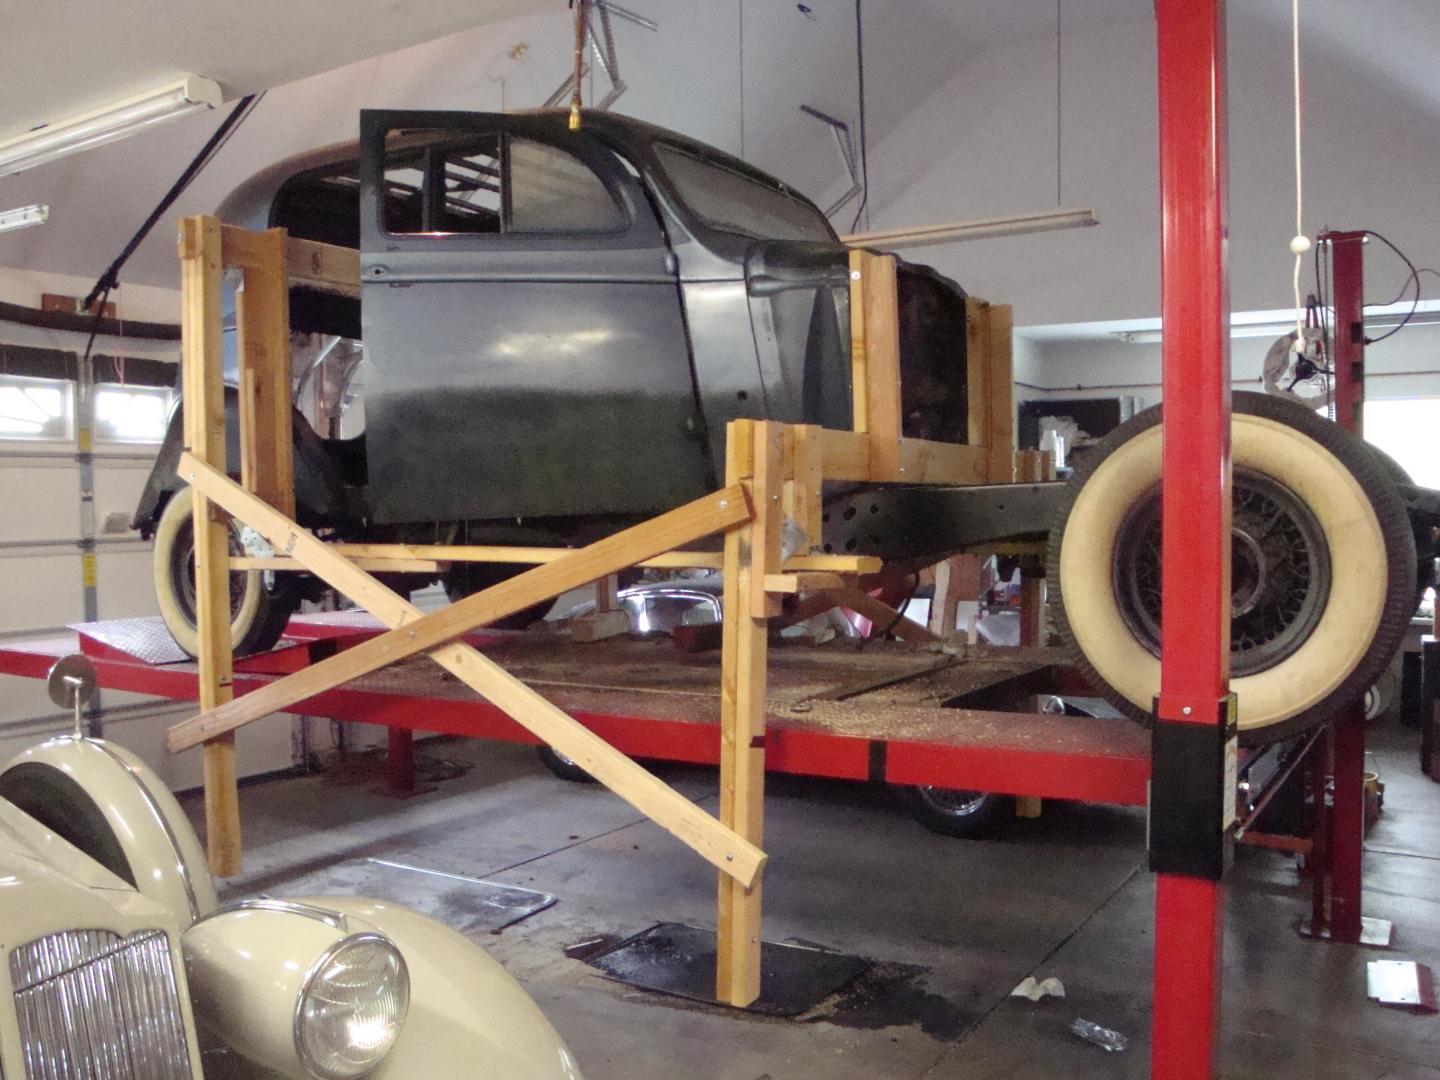
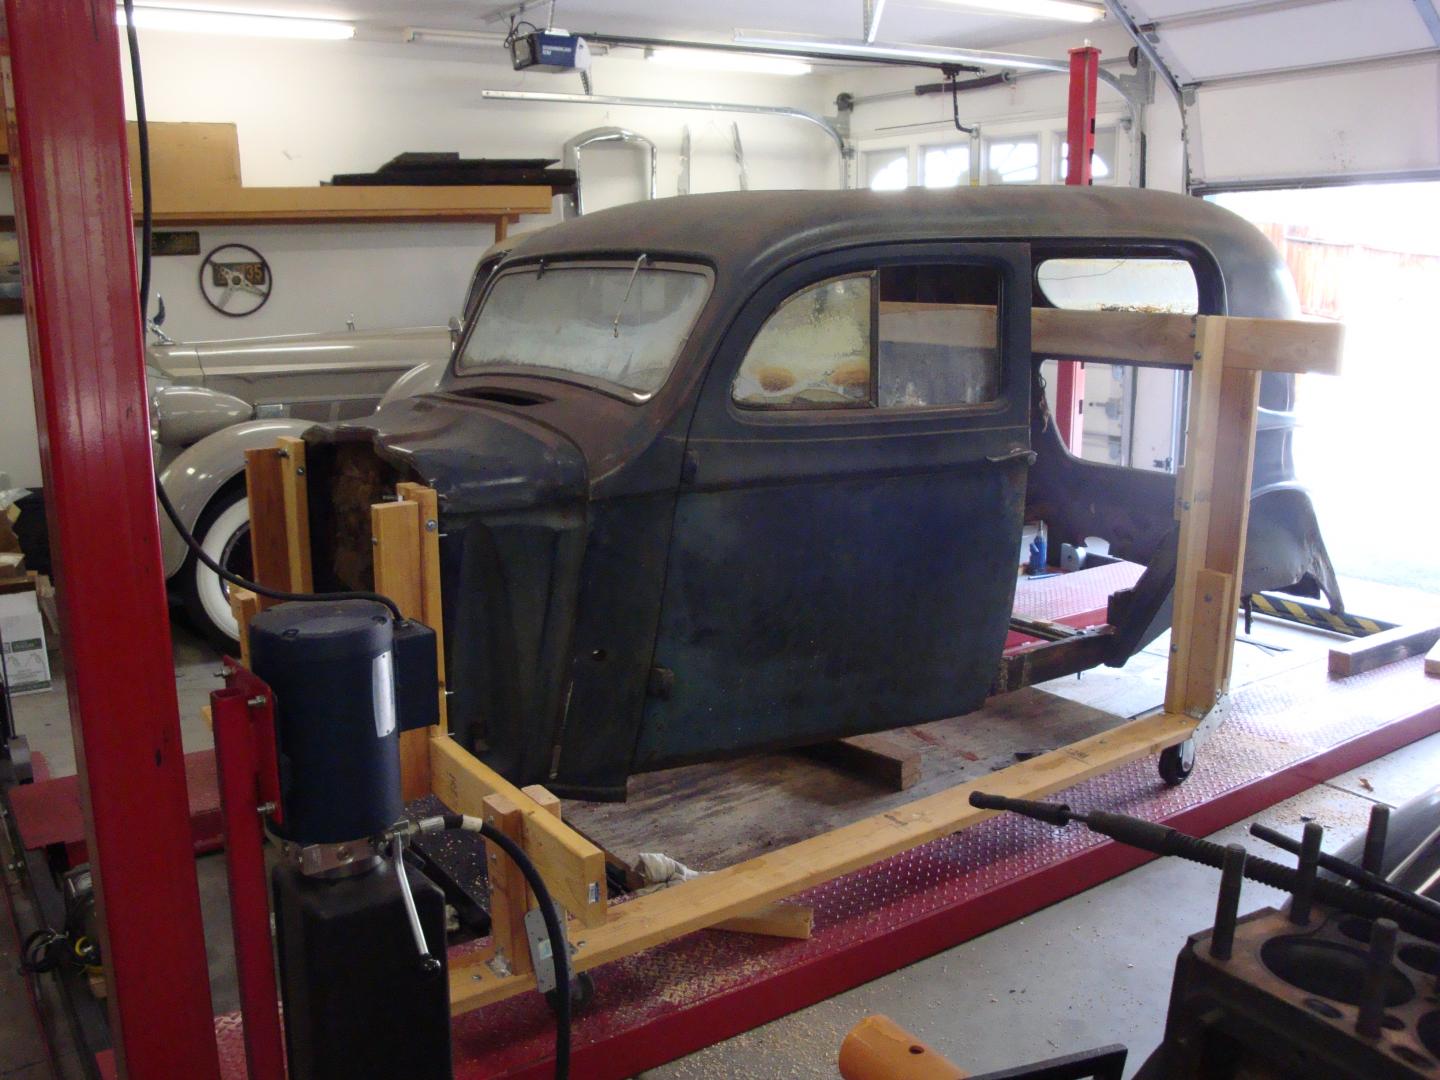
There are probably other better ways but here is how I did mine. I believe the ’36 body structure configuration is basically the same as the ’35 but widened and some added reinforcement. I built a truss out of 2×4’s and supported the body at the firewall via the threaded sockets that the radiator support bars screw into. At the back I supported it via the rear door hinge screws.
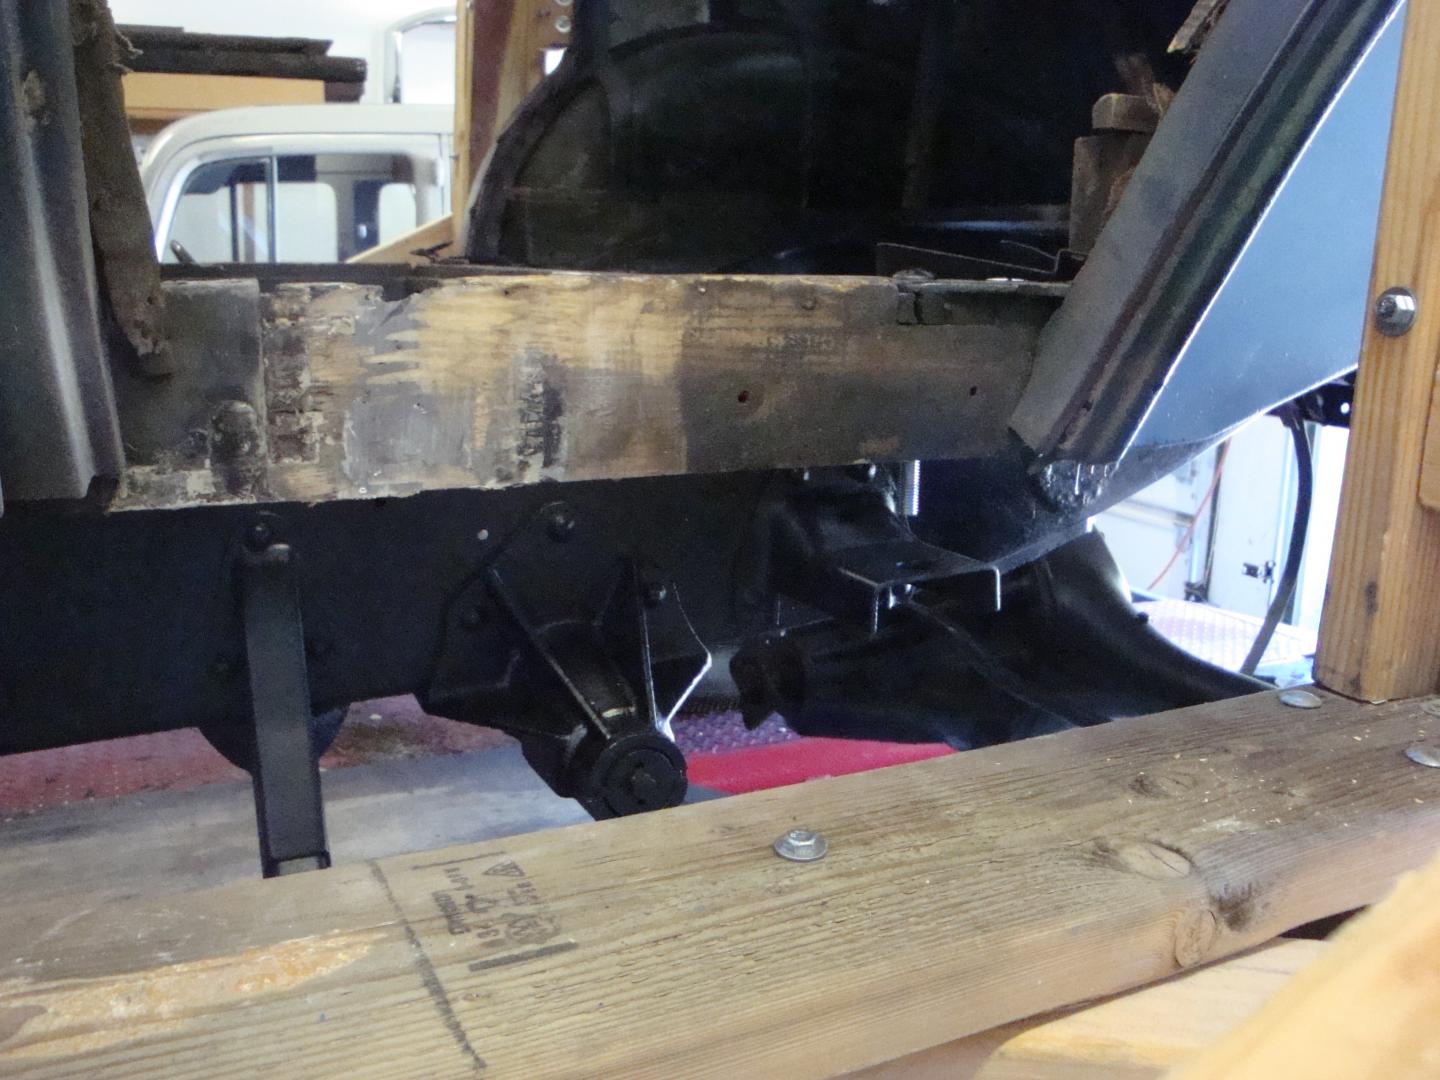
One of the worries was that the only longitudinal support holding the bottom of the body in position when it is off the frame is the large hardwood rail along the floor. That is made from multiple pieces finger jointed together and even if they look okay the old cassein glue might have lost its adhesion. On mine the worrisome joint was in the rear door area and there was some rot and the finger joint was probably bad. I drilled a small vertical hole down through the finger joint, dammed up around the joint with plastic and caulking then poured epoxy down into the joint. I then added metal doubler plates to the side of the joint screwed across the joint before I lifted the body. I had the same issue with my ’36 Packard but its bottom wood rails were completely toast and I replaced those with all new ash in situ before removing the body with a similar wooden truss. The Packard was done without a handy 4 post lift using bottle jacks and jack stands.
The picture is probably confusing. There is an outer truss attached to an inner truss structure with castors. The outer truss was fixed and high enough that the frame would clear the body after dropping the frame away from it. After the frame was rolled out the lift went back up to support the inner truss on the castors and the outer truss was disaasembled to drop the body down.


It was a few years ago when I was digging into this. I relied mainly on using the Summit Racing site that has a good search function for a lar ge vaeiety of mufflers. They often list the basic design type and I recall many were steel wool. At the risk of saying 200% of what I know, I think the glass packs and and other fibers such as steel are generally straight through and by themselves have limited sound absorption, popular with hot rudders. The Pierce mufflers were also straight through but were perforated tubes inside the outer tube. They were 3 differant lengths to attenuate different frequency ranges, the idea being to get effective sound absorption wi5h minimum back pressure. Many mufflers use internal baffles to get the sound absorption in a more compact unit with more back pressure.
I used a straight through for the #2 from Summit, but the only source I found at the time for the very long 3 ft last muffler was Waldron.They are custom built and at the time took something like 6 months to get. Hopefully they are doing better now. Waldron had a choice of how much sound absorption, quiet or more hot rod. I chose the quiet since it is a Pierce, but in retrospect would have gone for the less quiet relying on the triple muffler concept to keep it quiet. I imagine the difference in the two sound absorptions is the amount of baffling being employed.
Another reason to use a muffler insulating wrap is Pierce often ran the fuel line down the same side as the exhaust,, sometimes on the inside of the frame rail, bad for vapor lock.
The original Pierce mufflers were “asbestos lagged” using a layer of asbestos inside to reduce heat transfer. I dont think available standard mufflers have any insulation, but I believe the exceptions are straight through glass packs that use internal glass or other fibers for sound absorption. That is what I used for the short #1 under the fuel pump to provide a measure of insulation to reduce the fuel pump heating. The original multiple Pierce mufflers were straight through designs to minimize backpressure. I plan to add muffler wrap to the mufflers or under floor insulation as I found out years ago on another car that the wood flooring and carpet is not enough insulator without “asbestos lagging” on a hot day. My wife had to keep her feet off the floor because it got so hot.
Note that without asbestos lagging there is no such thing as an exact authentic replacement.
I never noticed any residuals of the animal cassein glue in joints I have pulled apart. I think it soaks into the wood and is not water resistant. 40 years ago I used resorcinol adhesive to glue joints in replacement wood, it is one of the strongest, most water and rot resistant glues but requires accurate joints. It is what Howard Hughes used on the “Hercules” (“Spruce Goose”) wooden flying boat. It seems to be very hard to find now, so on my recent ’35 project I used epoxies which are still much better than the original casseins and more forgiving of joint inaccuracies.
I think it was Macs Ford parts but might have been Snyder’s. I recall measuring what the lengths of each quarter would be to determine that they could cut them and ship them straight to avoid having them rolled up or left long for a ridiculous oversize shipping charge. I had to call and talk to a person to get that arranged.
I used regular Labmetal to fill pits in a spare wheel for powder coating. It came out fine, no high temp cure cycle needed. I didn’t want to use Hi temp since I didn’t think my wife would be keen on me baking chemicals in the kitchen oven. The specs say it can go to 350 with one time 20 minute exposure to 425. My powder coater indicated many used JBWeld also. They use Prismatic powders that have a cure temp of 350, but said they go to 400.
The stuff is hard to work, being very thick and harder than body filler for sanding.
I wish I had known about these decades ago, would have been a big help. It’s irritating how even with a tight drill jig a drill can still manage to wander off center.
Let us know what you find out, good luck!
Yes, I would check with them first. I did the conversion to pneumatic cylinders, it took some scrounging and head scratching. First choice is to get an original working. The question probably being whether yours or one of the two people above have a good enough zinc motor casing that isnt too screwed up. Maybe the motor of the 1930 was common enough to have more parts around. When I called David Ficken about mine his first question was what year Pierce?. When I told him ’35 sedan, he immediately said that motor is unique, only used on 34-’35 Pierce and a rare Buick model and he hadn’t run across any parts in 30+ years. He indicated he could grease mine up and it might work for a couple weeks but that I had already done that. I should note that my motor looked perfectly fine but it didn’t have enough oomph to make a cycle. Part of it was also I am at about 4400 ft elevation so there is less vacuum to work with. My Packard’s won’t cycle anymore but started working on a trip close to sea level.
The 6volt electric is probably the most practical but I was concerned there wasn’t enough space in the cove above the windshield for it, I would check that out. I dont know if the electric is compatible with the configuration of how it fits and drives. My ’35 is a single motor driving the passenger side via a push rod and gearing rather than two seperate motors.
My pneumatic cylinder scheme started out to be trying to use the pneumatic cylinder as a simple booster to help the original Trico system tapping off from it and still using the original valving. It didnt work, still not sure why. There was enough room to fit the cylinder in the cove but I had to go to an electric system controlling with solenoid air valves and limit switches. The Trico system is just there for the ride now. It was running so fast originally that I had to throttle it down for fear it would break the zinc gearing of the Trico system. Then it went to the upholstery shop and when it came back it didn’t work, they had bent the limit switching installing the headliner, and after I fixed that it still won’t do a full cycle, won’t do the full return. It is buried behind the fresh headliner and I don’t know why.
The best solution is Rainex, but I might move to a state with annual safety inspections and it won’t pass unless the wipers go back and forth, regardless of how ineffective they are when they do run properly.
I had the long (over 100″) trim moldings made that go along the length of bottom edge from front fender along the running board bottom edge to the rear fender opening. They were one piece easily polished aluminum half oval with bullit ends formed. 3/4″wide seemed to be the right width (mine is an Eight if that makes a difference). They were made by L&L Antique auto trim. Definitely a side business and took several months with little communication, but finally showed up on my door step out of the blue one day. He is pretty affordable, but the biggest expense was overlength shipping, USPS in a 9 ft long PVC tube being by the far the cheapest.
I had to make a lot of little special clips to attach.
That indicates 28th week (July) of 2019, a bit under 4 years old.
What is the manufacture date code on the sidewall?
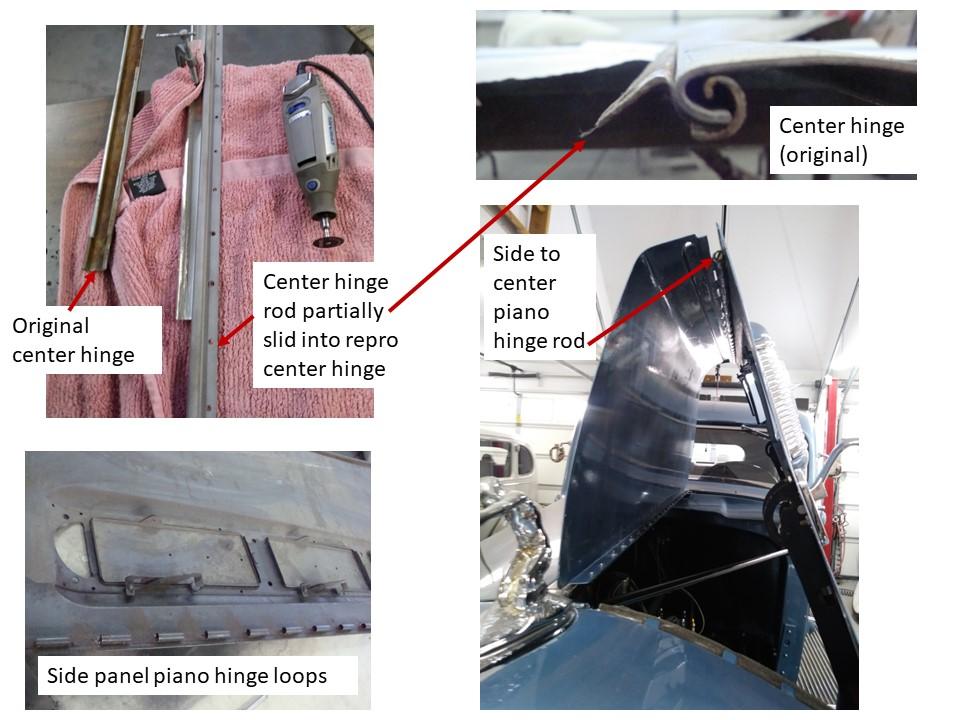
Some more pics showing my ’35 hood hinges. The chromed or SS repro center hinge piece slides into the archer at the front and the tail of the arrow at the back. I don’t know if originally P-A used rivets to attach the center hinge rod to the top hood panels. I used SS screws and nuts to attach the top hood panels to the center hinge rods after the center hinge, hood ornament and tail of the arrow were installed. After the top panels I installed the side panels as noted. The screwdriver slot cut into the end of the side-to-top panel threaded rod is visible. 
The pictures of fitting the center hinge rods (as shown they are actually curled and bent sheet metal that nests into the curled flanges of the center hinge, not just cylindrical rods) were taken while I was cutting back the flanges of the repro SS center hinge. The center hinge rod must be able to rotate over 90 degrees inside the center hinge between open and closed, basically with flanges pointing straight down in closed position and straight out in open position (as shown in the picture). My rods would not rotate that far in either the original or repro center hinges when tried off the car, so I did a lot of cut and try grinding to get the repro to work. There was no visible reason why the originals wouldn’t work, but of course they must have originally. There was a possibility the original would have worked when actually fully installed with the heavy panels forcing the issue but I didn’t want to take that chance. I have seen evidence on other Pierces of trouble with that hinge.
I have a shiny repro cap that looks great but doesn’t have a vent. I had to punt to create a vent. In the pictures you can get an idea of the elaborate vent system built into the original cap to prevent spillage out the vent. If gas burps up through the tiny center hole it lands in a little circular depression that then let’s it drain back down into the filler pipe. That area is vented via the large circular holes seen in the outer inside of the cap. Clever but elaborate. If anyone is operating with a repro cap and has experienced any fuel starvation/vapor lock issues check to see if you have any vent in the cap. Also, in the original cap that hole can be plugged (my original was). It could also possibly screw up the KS fuel gauge because the alternate path to vent as fuel is drawn out is to pull through the KS sending unit vent pipe. “Ask for the time and he tells you how to build a watch……..”
Peter, thanks. I think the Olds headlight lens may fit ’36-38 Pierce. 33-35 are bigger. I bought a park lens from you a few years back so I have 3 original glass now with one split in two. I used super glue to put that one together and it and one of the plastic lenses is what I have on the car at the moment. The closeup of the turn signal posted a few months ago is of the broken lens. At some point I will put in tbe good glass.
As a side note, I left one of the plastic repro lenses in the Clorox for a couple months and it did some surface clouding of the surface without doing much for the yellowing. It appears that plastic lens cleaner will polish the cloudiness back off, but longer soaking not looking like a good idea.
I purchased a repro SS hood center hinge from Irv Blonder many years ago. I imagine that stock was depleted many years ago but you could check with Dave Murray just in case. It didn’t work directly, I had to do a lot of grinding to make it work, the flange legs were too long and I burned out my Dremel cutting them back. I have the original which is surface rusted and would need to be rechromed. Alhough a better design it didn’t work too great either despite having no apparent internal damage. John Cislak has parted out several cars and he may has something better, but I could send mine if it is better than what you have.
My hood was already unscrewed from the center hinge rods when I bought the car, but I assembled it back on by myself on the car, rather than try to coordinate and manhandle it with multiple people installing the whole assembly onto the freshly repainted car. Think of four ushers trying to drop a casket into a hole with 1/8″ clearance without hitting the sides. I attached the center hinge with the attach rods, archer and tail of the arrow first after carefully measuring and adjusting the distances from the body to the radiator shell. I then placed each hood top panel with sheets between the body radiator shell and hood panels and then screwed the top panels to the attach rods. After checking the fit and movement of the top panels I propped the top panels up a bit with so e foam and placed the side panels into the valley of the fenders with thick blankets to protect the paint and raise them enough that the piano hinge rods would clear the radiator shell. It had taken serious bashing and penetrating oil to get those rods out in the first place and I didn’t want to do that with the freshly painted car, so instead of the original piano hinge rods I bought SS all-thread rods to replace them. I cut a taper in one end and cut a screwdriver slot into the other (front end). I then jammed two nuts on the front end and used a drill driver with a socket to turn the rods. Tricky to get started but once the first pair of loops were engaged the threaded rods turned themselves in slowly and methodically. When it was almost all the way in there wasn’t enough clearance for the socket so the last 6 inches or so I used a slotted screwdriver bit to finish driving it in flush. Theoretically it shouldn’t be a heroic effort to remove the side panels if required in the future. It is a lot of screws on the center hinge!
Interesting, besides actually having a parts catalog with drawings! I am guessing that open cars had them because with the top down it is actually possible to see something to the left and right. I just got my next attempt at a rear view mirror, just wide enough to frame the small rear window. I wanted a wide angle convex but since my car is a club sedan with blind rear quarters it wouldn’t have done any good anyway.
I sometimes inevitably end up having to navigate through frenetic multi lane freeways (I-80/I-5 Sacramento) and staying in the RH lane isn’t a comfortable choice with all the merging and exiting going on. I have a 3.58 rear end in the Packard and 65 mph isn’t a problem in traffic. I am keeping the Pierces 4.23 rear end and will probably stay below 60, it may not be going that direction.
Paul, your car’s mirrors are interesting, the pictures I took show that besides the dual interior mirrors it has sidemount mirrors (which I assume are original) and a mirror with a long extension mounted to the door hinge. This seems like a clear case of so not being satisfied with rear visibility!
Paul’s sidemount mirrors are offset to the outside of the covers unlike most that are mounted centerline to the tire, clearly an attempt to improve the view from a sidemount mirror. However, now that I can sit in mine with fenders on and a tire sitting in the well it looks like the windshield post might block the view of the sidemount mirror, and maybe explains the extra door hinge mirror.
My first experience driving a ’30’s car was ferrying a friends ailing and partially stripped Packard V-12 30 miles on four lanes without any mirrors. I discovered I couldn’t see behind to change lanes even sticking my head out the window because of the body being wider at the back than the front. Fortunately I had guys caravaning in front and back that could block for me when I had to change lanes.
I have sidemount mirrors on my Packard which are not ideal but indispensable. I know some find them useless but mine are mission adequate with a lot of head bobbing. A convex on the RH would be a help.
I checked bolt depot, they show course but not fine thread and no pointed end. The pointy end could be a help, I remember struggling to get my toe board screws centered and engaged with regular flat heads.
I ordered mine through Summit racing because the shipping was much less and they have a local retail store. After slipping one month per month they say the estimated ship date was a few days ago. I doubt it. Meanwhile I found that the worn out Denmans won’t fit in the sidemount well let alone getting covers over them. I started looking for Lester’s as they are smaller than any of the others, presumably the dimensions of the original equipment tires. I ran into the same issue on my Packard years ago. Lester’s aren’t available anywhere either, and I worry with the shortages they may never be produced again. I bought four barely used Lester’s on ebay for the sidemounts and now debating whether to use them for the 4 regular road tires. My Pierce is currently sitting on the 35 year old worn Denmans on the front and seriously undersized 650-17’s on the back bought for the Packard sidemounts before I found the Lester’s. The 650’s require about 1.5 inch thick foam around them to fit the sidemount covers. That may be what I have to do. I would end up with emergency only “space saver” spares.
Researching the shortage issue I found there has been a supply chain issue that started before the pandemic that all tire manufacturers are dealing with. It was primarily shortages of carbon black and a lesser extent rubber. It got dramatically worse with the invasion of Ukraine as Russia was supplying about 65% of the world’s carbon black. Not too surprising a boutique mfg like Coker has problems competing with Bridgestone, Michelin, Goodyear etc for materials.
I suspect that 700-17’s may be low on Cokers priority because so many people with cars using 700-17’s like to put on bigger 750-17’s for V-12’s, so there is more demand and higher profit margin on 750-17’s. My personal experience on my Packard was it handled better on the narrower Lester’s than the Firestones that are on it now, so I really don’t want to put an oversized tire on the Pierce. The increasing width of lower pressure “balloon” tires adopted through the thirties was determined to be a factor in the increased problems with shimmy, which, based on previous posts, Pierce’s are prone too.
