- Home
- About Us
- Join/Renew
- Member Benefits
- Member Pages
- Log In
- Help
- Museum Store
I think the Pierce has the wrong dash if I remember correctly. I almost bought it until some medical issues preempted.
Well, it would appear that you have spark and fuel delivery and air, so that leaves something mechanical, which would include wiring, I guess.
To John’s point, if you have the metal wiring conduit, that is kind of like a maze and it is easy to get the leads wrong. I would test continuity from the distributor to the plug end to verify position.
Based on the Pierce-Arrow Wiring and Tune-up guide, which the PAS has assembled and I recommend getting if you don’t have one, Firing order is 1-5-3-6-2-4, with clockwise dizzy rotation. I don’t have an 81 but it looks like # 1 lead on the distributer is the lead on the inside, closest to the block or at 12 O:clock as viewed from the side of the car looking down on the distributor. Also, you haven’t mentioned flywheel timing marks.
On the potential that you have an air leak, you can spray carb cleaner around the joints in the intake system while cranking. If nothing changes, then probably no leaks.
It is probably something simple, it is just a process of elimination.
I did some research and here is what one trouble shooting guide said about Backfiring at the carb.
1. Excessive Lean mixture
2. Late ignition timing
3. Incorrect valve timing
4. Improperly seating valves, particularly intake
5. Obstruction in fuel line
6. Dirt/water in sediment bowl
7. Intake manifold air leaks
8. Poor grade of fuel
9. Secondary wires crossed in the distributor cap
10. Badly worn or improper valve clearance
Couple of diagnosis questions.
Will it run at all or does it just backfire while cranking.
If it will run, is the back fire sporadic or have a cycle to it?
A compression check might help determine John’s point.
If that is not it, I would lean towards timing.
Anybody know what this is and where it goes?
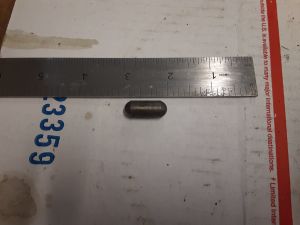
That’s it for now. Have to let some paint dry and get some pieces.
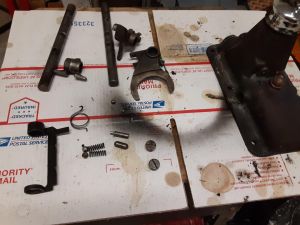
I assembled the 2/3 shaft out of the cover so you could see what it is like. The puzzle is figuring out the sequence to install all of it in the cover.
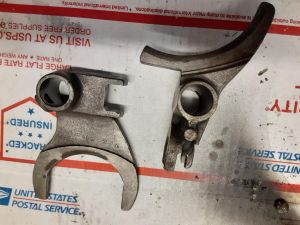
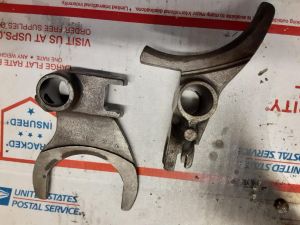
One last thing, if you look at the fork on the right you can see a channel in the bottom. It straddles the rod in the earlier case inside photo.
A little further in the sequence.
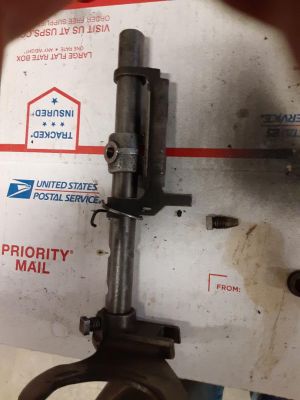
Here is the shifter fork on the 2/3 shaft. It has a notch in it to clear the 1/rev shaft. next is the lock plate that is spring loaded, then the shifter plate that fits between the ends of the lock plate.
The fork on the right is the 1/rev fork and that is the only thing on that shaft.
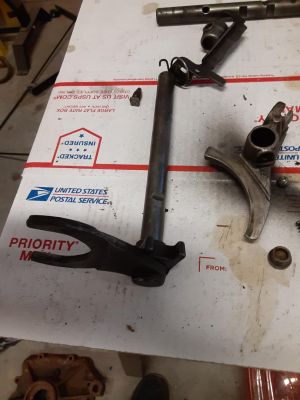
This is the fork that the end of the shifter fits into to engage 2/3. It goes on the 2/3 shaft at the front.
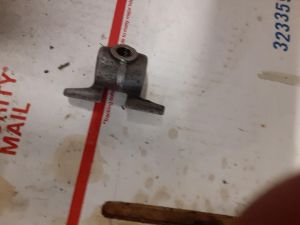
Just got a photo of a top from Dave Tyminski and that will get me over the impasse I was running up against.
There are 3 forks that attach to the shafts. The left 2/3 one has the “C”” fork and the first/reverse shaft has the quarter arch fork.”
Next thing to sort out are the 2 shift rails. They are relatively easy to figure out.
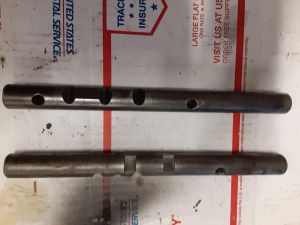
As you look at the previous photo, the 2/3rd rail goes on the left, first and reverse on the right. You can tell them apart because the 2/3 has 2 champhered holes and the first/reverse has only one and has two flats machined in them.
To orient the shafts, there are 3 notches on each and they are offset towards one end. These are the detents and they go towards the back. On the left one the notches face left and on the right one they face right .
The top shaft is the 2/3 and the bottom is the first/reverse. The rear of the gearbox is on the left.
Here it is painted
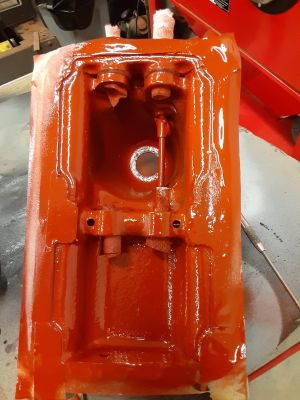
Here is the inside of the tower, the highest part is towards the engine. If you look at the upper right corner you can see a rod. This is a guide for the low and reverse fork.
It appears to have had some red paint internally so I sprayed it with Glyptol which is there to seal any sand from the casting
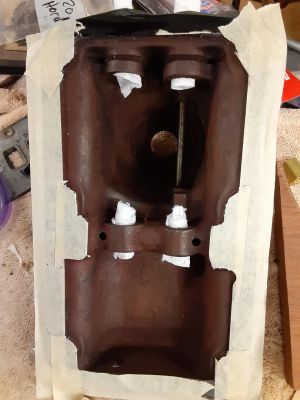
Here are the components of the cover laid out. The detent balls are 3/8″ ball bearings which just happen to be the size of my slingshot ammo.”
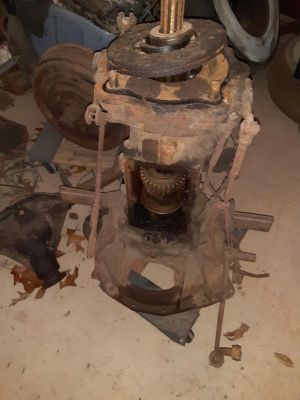
Ok, here is the start. I had taken the rear cover off to check the brake clutch and the shift tower to inspect the internals.
I looked on the site and didn’t see one. If you plug in 1930 you get a chart that goes back to ’29
Specifically this page. The codes are on the left side and you can look up the color ships with that code.
This would be where I would start.
Here is a side view.
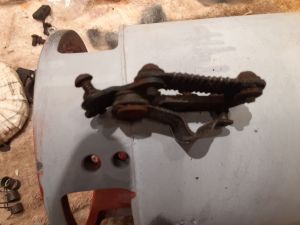
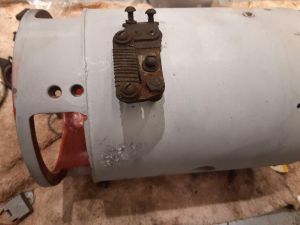
Since we are on this topic, I am putting mine back together and am trying to figure this piece out. It looks like it is a cutout as it has points. Is it a thermal or voltage spike safeguard?
It mounts on the inside of the case where the 2 closely spaced holes are.
