- Home
- About Us
- Join/Renew
- Member Benefits
- Member Pages
- Log In
- Help
- Museum Store
David White,
Finally got my Service Bulletin. Great article!! Thanks to all who make these type of documents possible.
Based on Greg Long’s fine thread comment, I guess the factory realized the folly of their ways as both my ’33 and ’35 blocks have coarse threads.
American Arrow used to carry Pilot Ray setups. Since Don Sommer’s death I don’t know if they are still functioning. Website is up but looks unattended.
Thanks for all the help. A fellow PAS member helped me out.
Bob and Ron,
Thanks for the input.
I have found that you don’t get Pierce, plating and cheap in the same sentence.
Merry Christmas everyone.
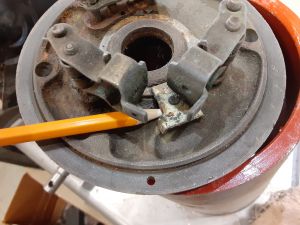
Forgot. The third brush is the one on the right in the second picture and is the one that rotates when the hold down is loosened.
Yours may be totally different but I hope this helps.
And here is a piece on the adjustment.
On the flip side the 3 rd brush is on a ring that rotates around the shaft. There is a plate that when the screw is tightened it acts like a a disc brake
and keeps the ring from turning. Loosen it and it rotates.
Rod,
I am assuming that most Delco Generators are similar. I have mine apart out of my ’33.
In the cover plate nearest the brushes is an external screw that holds the third brush tension plate
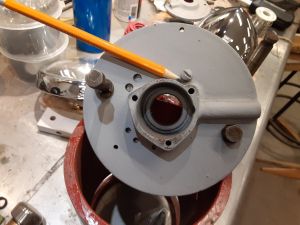
This may help
forums.aaca.org/topic/278462-how-do-i-adjust-the-third-brush/
http://forums.aaca.org/topic/278462-how-do-i-adjust-the-third-brush/
Thomas,
I just got a windshield for my ’65 Morgan cut to size by Whitman’s glass in Carrollton, GA. It was $60. If you can make a pattern they can duplicate it.
I am in Berkeley Lake and I must have tried 20 glass shops in the Atlanta area and none of them wanted to fool with my windshield.
Whitman’s is like going back into a glass shop of the ’60’s or earlier. Very nice people. I gave it to them today at 11 and will have it Monday.
Tolerances are a little sloppy, only 5 places. Try measuring that.
It is 3.49675. Guess it is the bore???
You can also use dry ice to shrink the bolt in the rare case they are proud of the casting.
I need to work on my clairvoyance I guess.
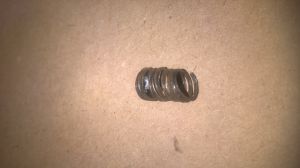
Once done drilling, re-tap the holes. I was lucky enough that the set up drilled close enough to only have the threads left, kind of looked like a slinky. Made very short work of what I thought would be a lengthy process. Now on to the 5 broken bolts in the other block.
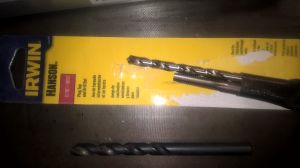
I then bolted the aluminum plate to the block with 5/16-18 bolts with the ¼†hole centered over the broken bolt. Next, start drilling thru the 1/4†center hole with the bit in the Hanson kit, it is an “F†bit or 17/64†(.257â€). I found that if you center drill the broken bolt with an 1/8†bit first, the subsequent drilling with the F bit went much faster and easier. I guess it gives the bit something to grab or it allows chips to be removed. I don’t know the mechanics, but it worked.
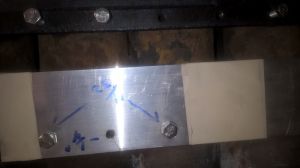
Here is wat the centering “DIVOT”” looks like”
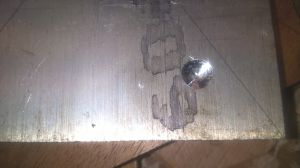
To be able to drill out the remaining bolt fragment requires accuracy. To get that I first clamped the aluminum plate to the back side of the cover and drilled a hole using the holes in the cover as a guide. I started the hole with an 11/32†bit, which is the diameter of the holes in the cover plate. I only drilled until I started to get shavings coming out of the hole. That produces a cavity that is centered in the hole. I did that for 3 holes in a row. I then switched to a 5/16†and drilled all the way thru the first hole using the center point created by the previous bit. I then skipped the next hole and drilled a 5/16†hole in the 3rd hole. I then came back and drilled a ¼†hole in the center hole using the centered point. So 2, 5/16†holes with a ¼†hole between them.
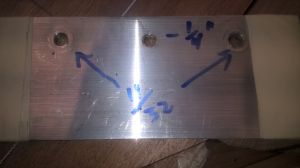
To make the template I used the original side cover plate and a ¼†piece of aluminum that was long enough to cover the distance of 3 consecutive holes in the cover plus ½†extra on each end. Width wasn’t critical but I would think 1†would be a guide. I used ¼†thick plate, but I think ½†would be better.
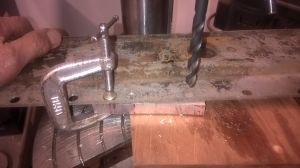
I tried to center punch and hand drill the remaining bolt out with dismal results. Wandering bit, drilling into the side of the block next to the bolt hole, can you spell Heli-coil? etc.
After a little thought I came up with a template solution. It requires a drill press, a ½†block of Ebay sourced aluminum, an 11/16†and ¼†drill bits and a Hanson 5/16-18 bit and tap set.
