- Home
- About Us
- Join/Renew
- Member Benefits
- Member Pages
- Log In
- Help
- Museum Store
Jim,
McMaster is here. Hole is threaded, just using some Kroil and some heat and I will try and remove it tomorrow.
I think I will use acetone or MEK. They smell better than kerosene
Herb,
Thanks for the input, you are a pretty good metallurgist. I think I might use stainless set screws.
I took out a small square headed plug from the front of the block. I turns out that it goes to the front cam bearing and “Y’s” off to the front main.
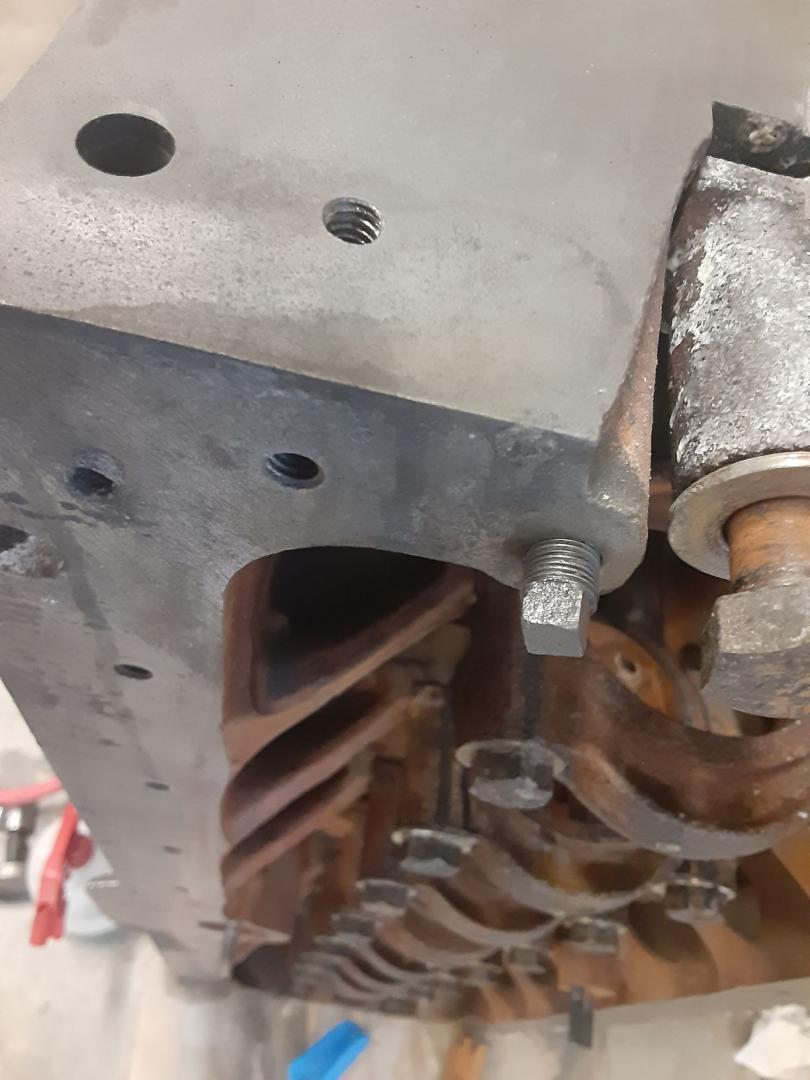
Here is what I found once I got it out
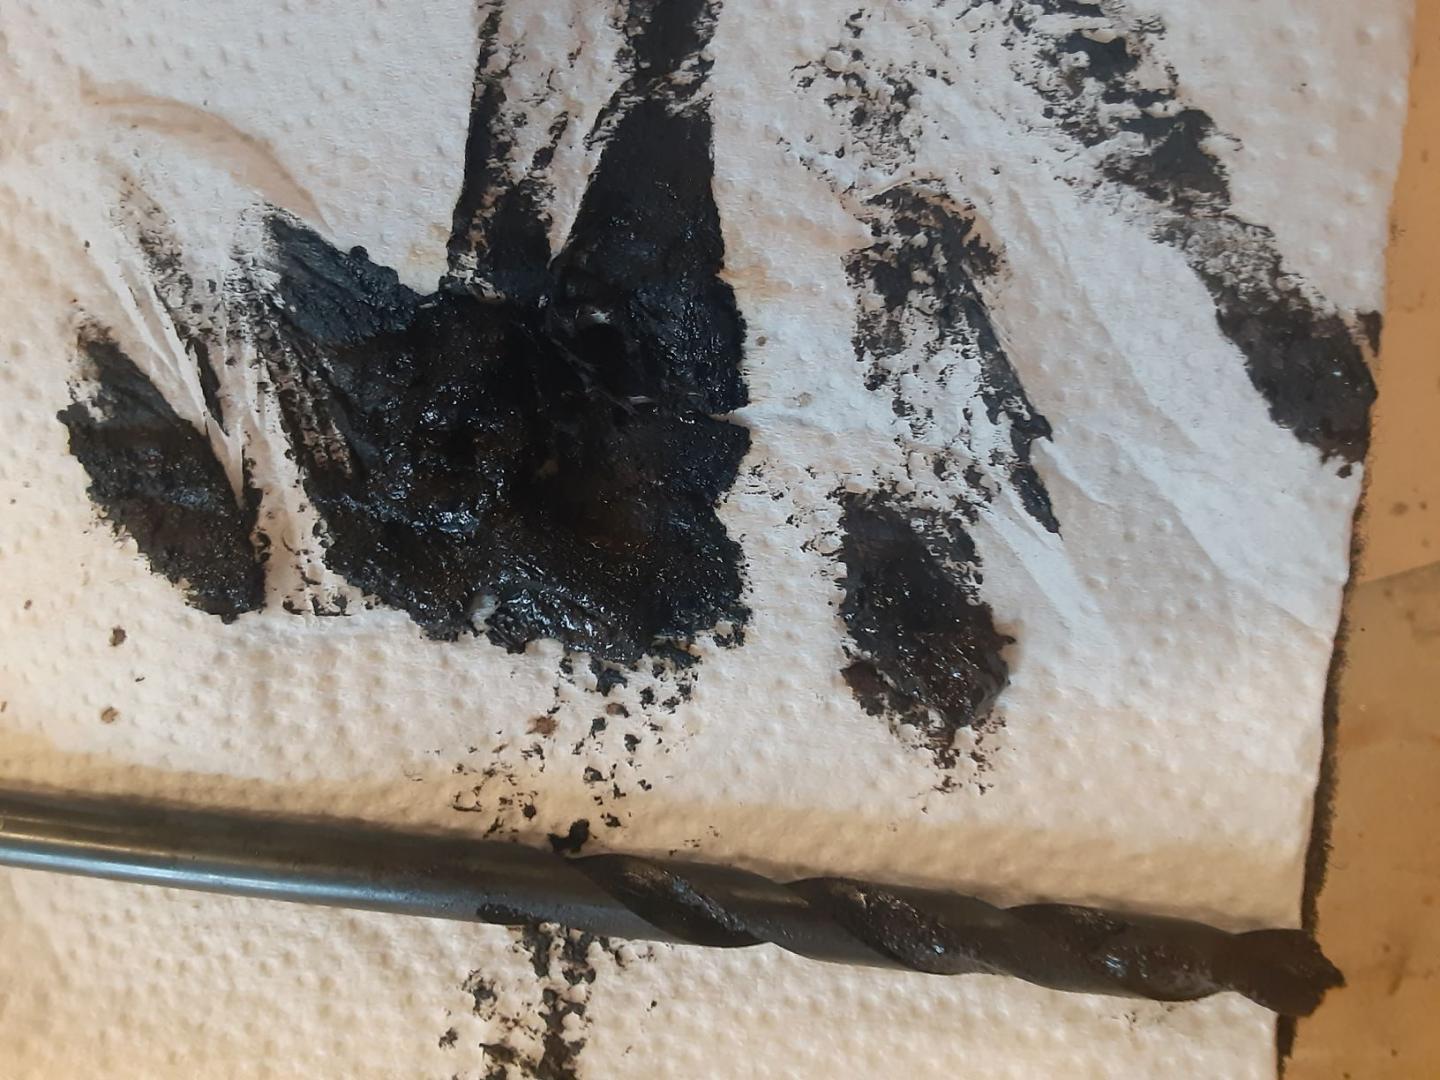
So that would have caused 2 bearing failures.
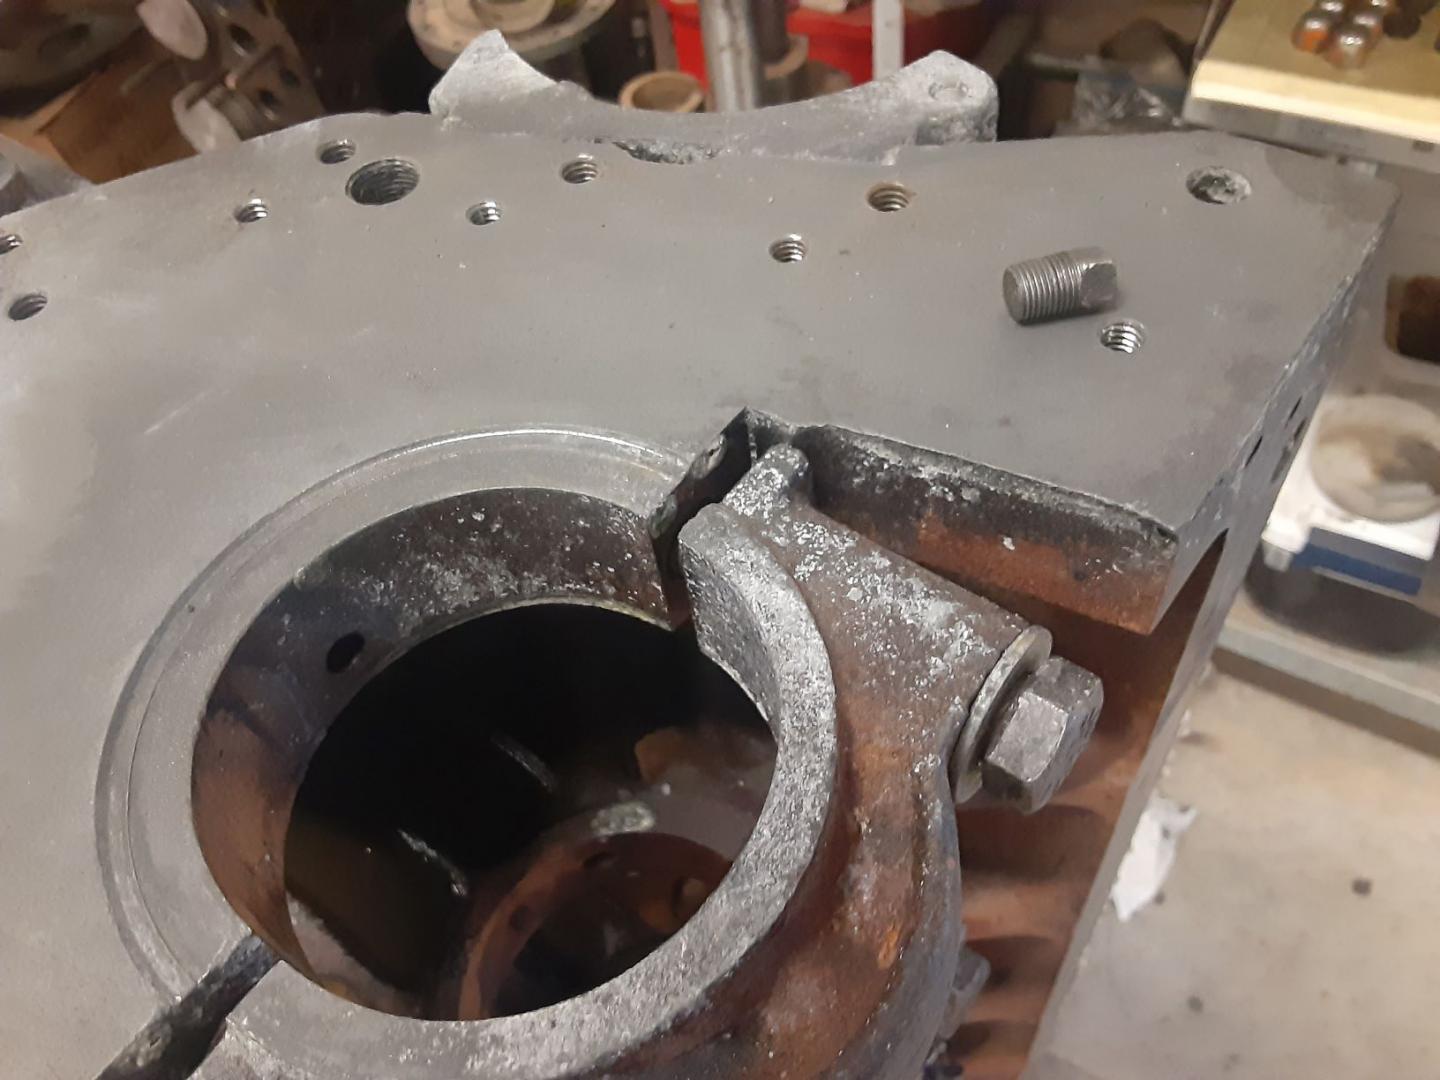
Here is the surface after spraying with OSPHO and using a very coarse scotchbright pad.
No, luckily they just measured it wrong.
Looks like a 12 and/or 16 gauge shotgun cleaning brushes would work for the galley clean up along with some brake cleaner and some Evaporust or something similar.
I am having problems with the plug below #1 cam bearing. The slot stripped so I am going to center drill it, tap the hole for a left hand thread and use a 5/16″ left hand thread bolt to remove it. Have you priced 5/16″ left hand thread bolts lately, not much left from a Jackson.
I noticed the oil gallery plugs didn’t appear to have been removed by the shop.
I removed them and tried to force a wire thru from end to end. Wire stopped after about 3 inches.
I switched to a threaded rod on a drill and was finally able to break thru from end to end.
Ended up with a about a 1/2 a cup of debris falling out.
Going to switch to a gun cleaning brush and some acid/evaporust to thoroughly clean the gallery and all the other oil holes to the mains and cam.
I am sure the engine would have self destructed in short order if I had tied to assemble as it was.
I have seen this movie before involving a Jaguar XKE. The shop that did the crank failed to remove the journal plugs (and I didn’t check assuming they knew to do that) and once the oil got up to temp, all the contaminates freed up and trashed the crank and rods. Of course this wasn’t found out until the car arrived in Antwerp Belgium.
So I guess the lesson is to be absolutely sure everything is clean, even if it just came from the machine shop. Assume nothing and double check everything. The shop that polished the crank had the decimal part of the measurements .040″ off.
Like Ronnie said, “Trust but verify”
Onan part number 0312-0256. Available at RV suppliers. Onan is part of Cummins
Ken,
On the left is a repro locking handle with the key maxed out in one direction. You can see the kidney(??) shaped cam plate that is turned by an offset pin attached to the tumbler. The handle to the right shows the opening in an original handle.
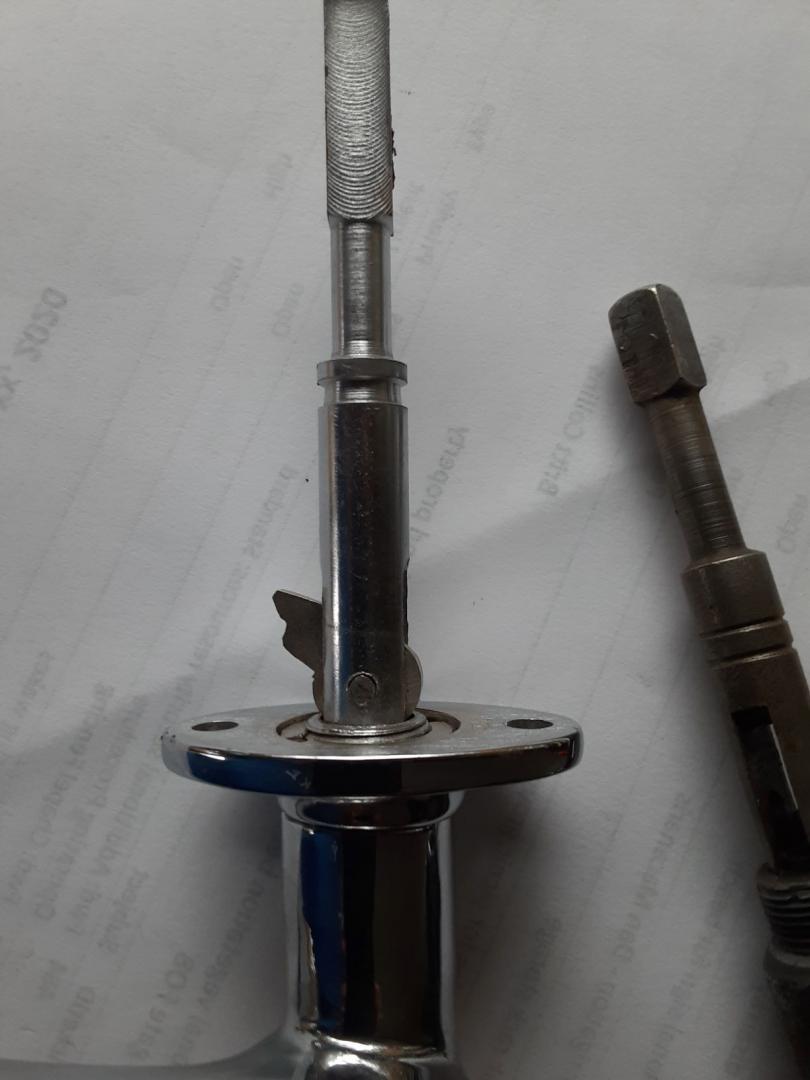
The second picture is the cam with the key maxed out in the opposite direction.
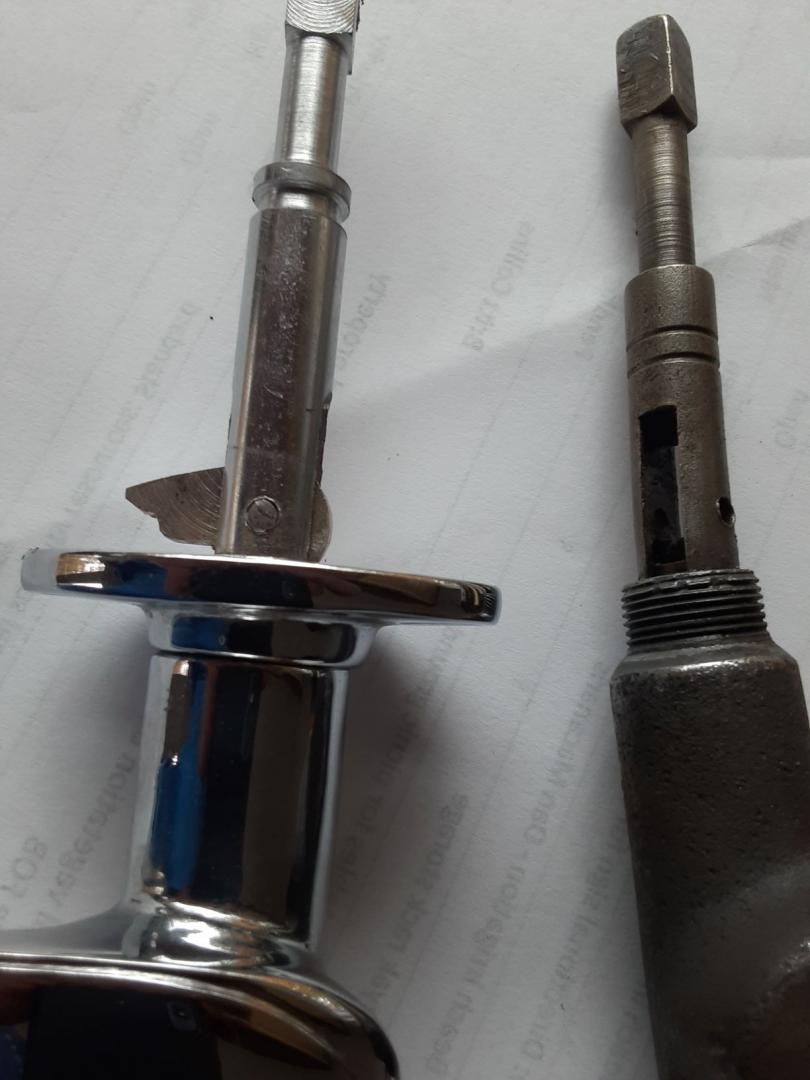
Hope that helps, let me know if you need a different view or description
WOW, very impressive. Is the wood real or simulated?
Who did the gauges?
Donald,
The brake/backup switch is located on the top of the brake part of the transmission. It is behind the shift tower.
In the picture below, if you look to the left and towards the top of the “4” tape tag, you will see a small square outlined with 2 diagonal holes in it (just in front of the red vacuum cleaner. That is where the switch is and the holes are for the screws that hold it on.
Bill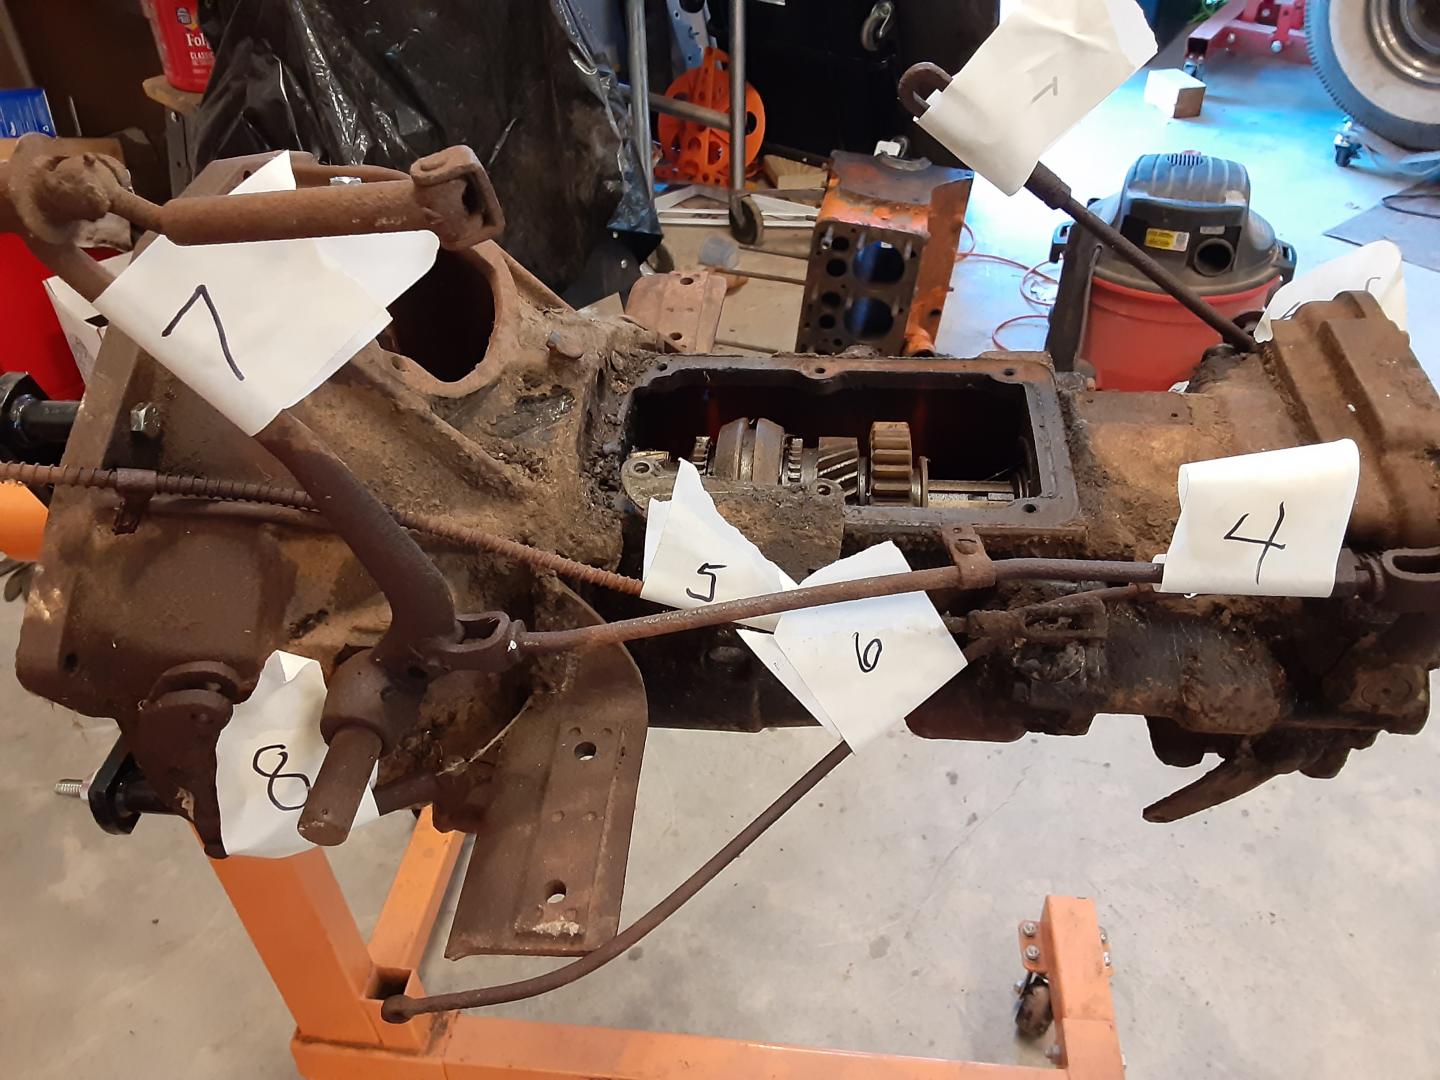
Kirby,
Good luck with your project. I see you have impeccable taste buy having a Morgan to keep your Pierce company.
Bill
Ronald, Are you talking about a steering or road wheel?
My problem is solved. Thanks for everyone’s help.
David,
I have the same issue at times.
Bill
Jim,
Very nice work. You missed your calling, you should have been a surgeon.
Jim and Bob
Well, Doesn’t look promising with the center axle numbers being different although it could be something as simple as changing a bolt size or length.
Changing a forging that size would have been expensive I would bet.
Other parts Steering knuckles (2) 704190, knuckle arms 703216/17
The reason I am doing this is I am doing the frame at my house where I have a ’35 front and am trying to keep from having to take the ’35, go to the storage place, remove the ’33 axle from my other frame (which is under the body), replace it with the ’35 and then have to bring the ’33 home to work on. Lazy I guess, but those suckers are heavy.
Thanks for your help
At the other end of the system is this. This one is listed as Packard, but it looks identical to my ’33. The vendor says they have other applications
https://www.ebay.com/itm/1929-1930-1931-1932-Packard-Hydrostatic-Fuel-Sender/184365370506
Herb,
With a telescoping ID gauge I am getting 1.445″ for an ID and it looks like 18 TPI.
So my guess looking at the charts is 1 1/2″ -18 UNEF.
Anyone have one I can beg, borrow, rent or purchase?
Jim,
They are almost 1 1/2″ in diameter and the thread count is in the 20 TPI range and I don’t think it has a taper.
The threads are pretty fine for that OD.
I am afraid they are going to be one of the Pierce only products, courtesy of the Pierce engineering staff.
Bill
The lack of damage to the plating is a pretty major revelation.
I guess I will have to go get a bucket.
Mark,
You can send them back now. Thanks for fixing them. Seriously, very nice work.
How did you anneal them?
Bill
Don,
Thanks for the report.
On the removal, there are 9 screw/bolts that hold each of them in. I think removing the whole dash board is easier than the instrument cluster.
If I remember, I had to just about stand on my head to get to the cluster screws/bolts. The complete dash panel was easier if I remember.
Be sure to remove the 2 bolts in the back inside of each of the glove boxes and disconnect the freewheeling lever assembly.
