- Home
- About Us
- Join/Renew
- Member Benefits
- Member Pages
- Log In
- Help
- Museum Store
What a great way to show a Pierce out stretching its legs!
Congrats on the purchase of a gorgeous, mostly original Pierce Arrow.
If it still has the original motor that has never been out of the car, enjoy driving it but be judicial with the miles since it is only a matter of time before it will need to be rebuilt.
If pulling the motor and giving it a once over doesn’t bother you then drive it to your heart’s content.
My ’29 is original except for the driver’s seat cover and although I love driving the car I want to keep it original as long as possible so I try to keep the miles to a minimum.
Welcome to the PAS and enjoy your beautiful car.
Thomas, good luck with your bidding on the car and welcome to the PAS.
Sounds to me like you could order one if you so desired but that most did not.
I have seen them listed for sale by John Cislak with Pierce Parts Store but there are also 4 vendors listed in the Parts and Services section as well.
My ’29 143 has the rectangle shaped lights.
I can take a picture of them and post it for you this evening.
But I agree if they weren’t available on the car don’t add them.
You car is one that I would restore to as close to factory as possible.
Your archer has a bent arm.
Hopefully he can be bent back into shape without causing more damage.
Very nice to see the progress.
Keep the pictures and updates coming.
Info from my car-
Y: 1929 M: 143/126 B: Enclosed Drive Limousine N: Both sides T: 1 L: 7″  13″” R: Irregular rectangle
“
Jak, if you want more photos of the visor clamps themselves, I can remove them and take some more photos and get some measurements if you like.
The clamps are not smooth on the side that faces the visor and one clamp has a rounded indent for the bar and one has a flat indent to mate with the flat portion of the bar.
And here is the passenger visor mounted in the car to show that the visor is mounted fairly far back away from the windshield.
The headliner in the driver’s compartment is original.
This is the whole assembly back together.
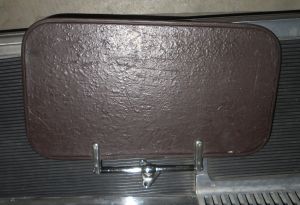
The visor is not square.
It measures:
15.5″ across the bottom where the mounting brackets are.
15.625″” across the top side away from the brackets.
9″” top to bottom on the left in this pic.
8.25″” top to bottom on the right in this pic.
“

This is the back side of the mounting bracket.
It was mentioned that there was a screw under here to adjust tension but I don’t see where it would be possible with this piece.
Here is the entire bar without the end pieces.
Note that the bar is sitting on the visor and I believe the visors to be original material.
The other side of the bar has the following stamped into it:
PAT.6-29-26
Also note that the two sides are no equal in length.
One side measures 2.62″ from the center to the cut section.
The other side measures 2.51″” from the center to the cut section.
The longer side was towards the wider end of the visor.
“
Here are some pictures of my visors.
When I was cleaning up the one that is not in the car I discovered something very interesting.
There is some lettering stamped into the long arm.
One side says:
Tiffany Mfg. Co.
Newark. N.J.
I second Jak’s enthusiasm for pics and a write-up.
Syd, if you need to look at a ’29 version and need to use it as a template I have the passenger side visor removed from my car right now.
I’m not too far north of you so we could always meet somewhere and I could let you borrow it for awhile.
If Karl hasn’t gotten to it by this evening I’ll post a pic of mine and where it’s mounted.
Amazing that Pierce lent their name to so many accessories.
Given the high standards that the PA auto was made I’m sure their accessories were also meticulous in detail and craftsmanship.
Good pics and great descriptions with them.
Stuff like this would be great for a FAQ or How To section of the website.
Greg, the extra ground cable is a great idea.
Chris’ suggestions of making sure you know you have proper electrical connections going to the battery before troubleshooting the starter is also a great idea.
Solving electrical problems can sometimes seem like voodoo science but good practices and a logical progression from source to load can greatly reduce troubleshooting headaches.
